
How to Fix QMK Toolbox Flashing Issues
[ Back to Mechanical Keyboards 101 ]When QMK Toolbox fails to flash your custom keyboard firmware, it’s often due to driver problems, incorrect setup, or bootloader issues. Here’s a quick guide to get you back on track:
- Install or Update Drivers: Missing or outdated drivers are a common culprit. Use QMK Toolbox's "Install Drivers" tool or the Zadig utility to ensure proper driver installation.
- Enter Bootloader Mode Correctly: Use your keyboard's reset button or short RST and GND pins. For Pro Micro boards, double-tap reset within 7–8 seconds.
-
Select the Right Firmware: Match your keyboard's microcontroller to the correct firmware file type (
.hex,.bin, or.uf2). - Update QMK Toolbox: The latest version (0.3.3 as of June 2024) ensures compatibility with newer firmware and bootloaders.
- Fix Common Errors: If you see "No Device Present" or your keyboard doesn’t function after flashing, check drivers, reflash with the correct firmware, or troubleshoot USB interference.
For advanced users, command-line tools like qmk flash or dfu-programmer offer more control. Proper setup and attention to detail are key to resolving flashing issues effectively.
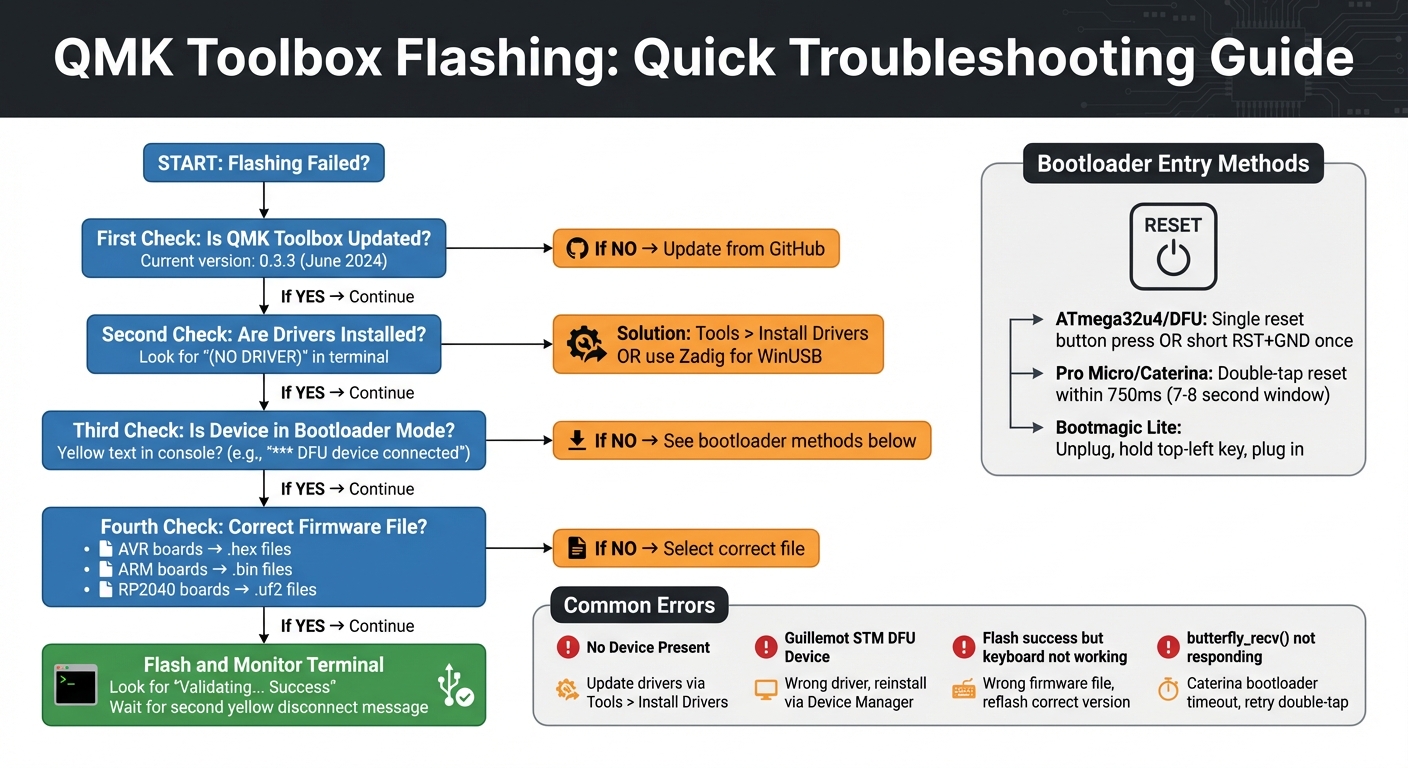
QMK Toolbox Firmware Flashing Troubleshooting Flowchart
QMK Tutorial: QMK Toolbox (Flashing Firmware On Your Keyboard)
Check QMK Toolbox Setup and Drivers
Ensuring QMK Toolbox is set up correctly is crucial, as many flashing problems arise from outdated software or missing drivers. This is especially common on Windows, where managing drivers can sometimes be tricky.
Install or Reinstall QMK Drivers
On Windows, QMK Toolbox depends on specific drivers to communicate with your keyboard's bootloader. When you launch QMK Toolbox for the first time, it prompts you to install these drivers. If you skipped this step or run into detection issues later, you can manually install them by navigating to Tools > Install Drivers... in the menu bar.
To check if the drivers are working, put your keyboard into bootloader mode and observe the terminal output in QMK Toolbox. If you see (NO DRIVER) next to the connected device, the drivers haven’t been installed correctly. For instance, if you press the reset button on an ATmega32u4-based board and notice (NO DRIVER) next to the Atmel DFU device, you’ll need to install the bootloader driver on Windows.
Modern setups use WinUSB, which has replaced the older libusb-win32 driver. If you’re upgrading from an older installation, you might need to remove the outdated libusb0 drivers and switch to WinUSB using the Zadig utility. Here’s how:
- Put your keyboard into bootloader mode.
- Open Zadig and go to Options > List All Devices.
- Select your bootloader from the dropdown menu.
- Choose WinUSB as the target driver.
- Click Install Driver or Replace Driver.
Once the drivers are confirmed to be working, make sure your QMK Toolbox is updated to avoid any compatibility issues.
Check QMK Toolbox Version
Using an outdated version of QMK Toolbox can lead to problems with newer firmware files and bootloaders. The latest stable version is 0.3.3, released on June 13, 2024. You can check your version by looking at the title bar or the "About" section in the application.
If you’re running an older version, download the latest release from the official GitHub repository. For macOS users with Homebrew, update the application by running brew install qmk-toolbox. Note that QMK Toolbox requires Windows 10 May 2020 Update (20H1) or higher or macOS 12 (Monterey) or higher to run. If you’re on an Apple Silicon Mac, ensure Rosetta is installed, as some flasher binaries are still Intel-based.
Enter Bootloader Mode Correctly
Bootloader mode is essential for flashing firmware onto your device. When activated, you should see a yellow notification in the console, such as *** DFU device connected: Atmel Corp. ATmega32U4 (03EB:2FF4:0000). If this notification doesn't appear, the bootloader hasn't been activated. Follow the steps below to reliably enter bootloader mode.
Methods for ATmega32u4 and Pro Micro
To activate bootloader mode, you can use the QK_BOOT keycode or the physical reset button on the PCB. Common methods include:
- Pressing the reset button on the PCB.
- Briefly shorting the RST and GND pins.
- Using Bootmagic Lite: unplug the device, hold the top-left key, and plug it back in.
Most PCBs have a reset button located on the underside. Press it once or hold it for about one second, depending on your board, to enter bootloader mode. If your PCB lacks a reset button, locate the RST (or RESET) and GND pins, and briefly short them using tweezers or a paperclip. Once bootloader mode is active, the QMK Toolbox console will display the yellow connection message, confirming you're ready to flash your keyboard with QMK.
Double-Tap Reset for Caterina Bootloader
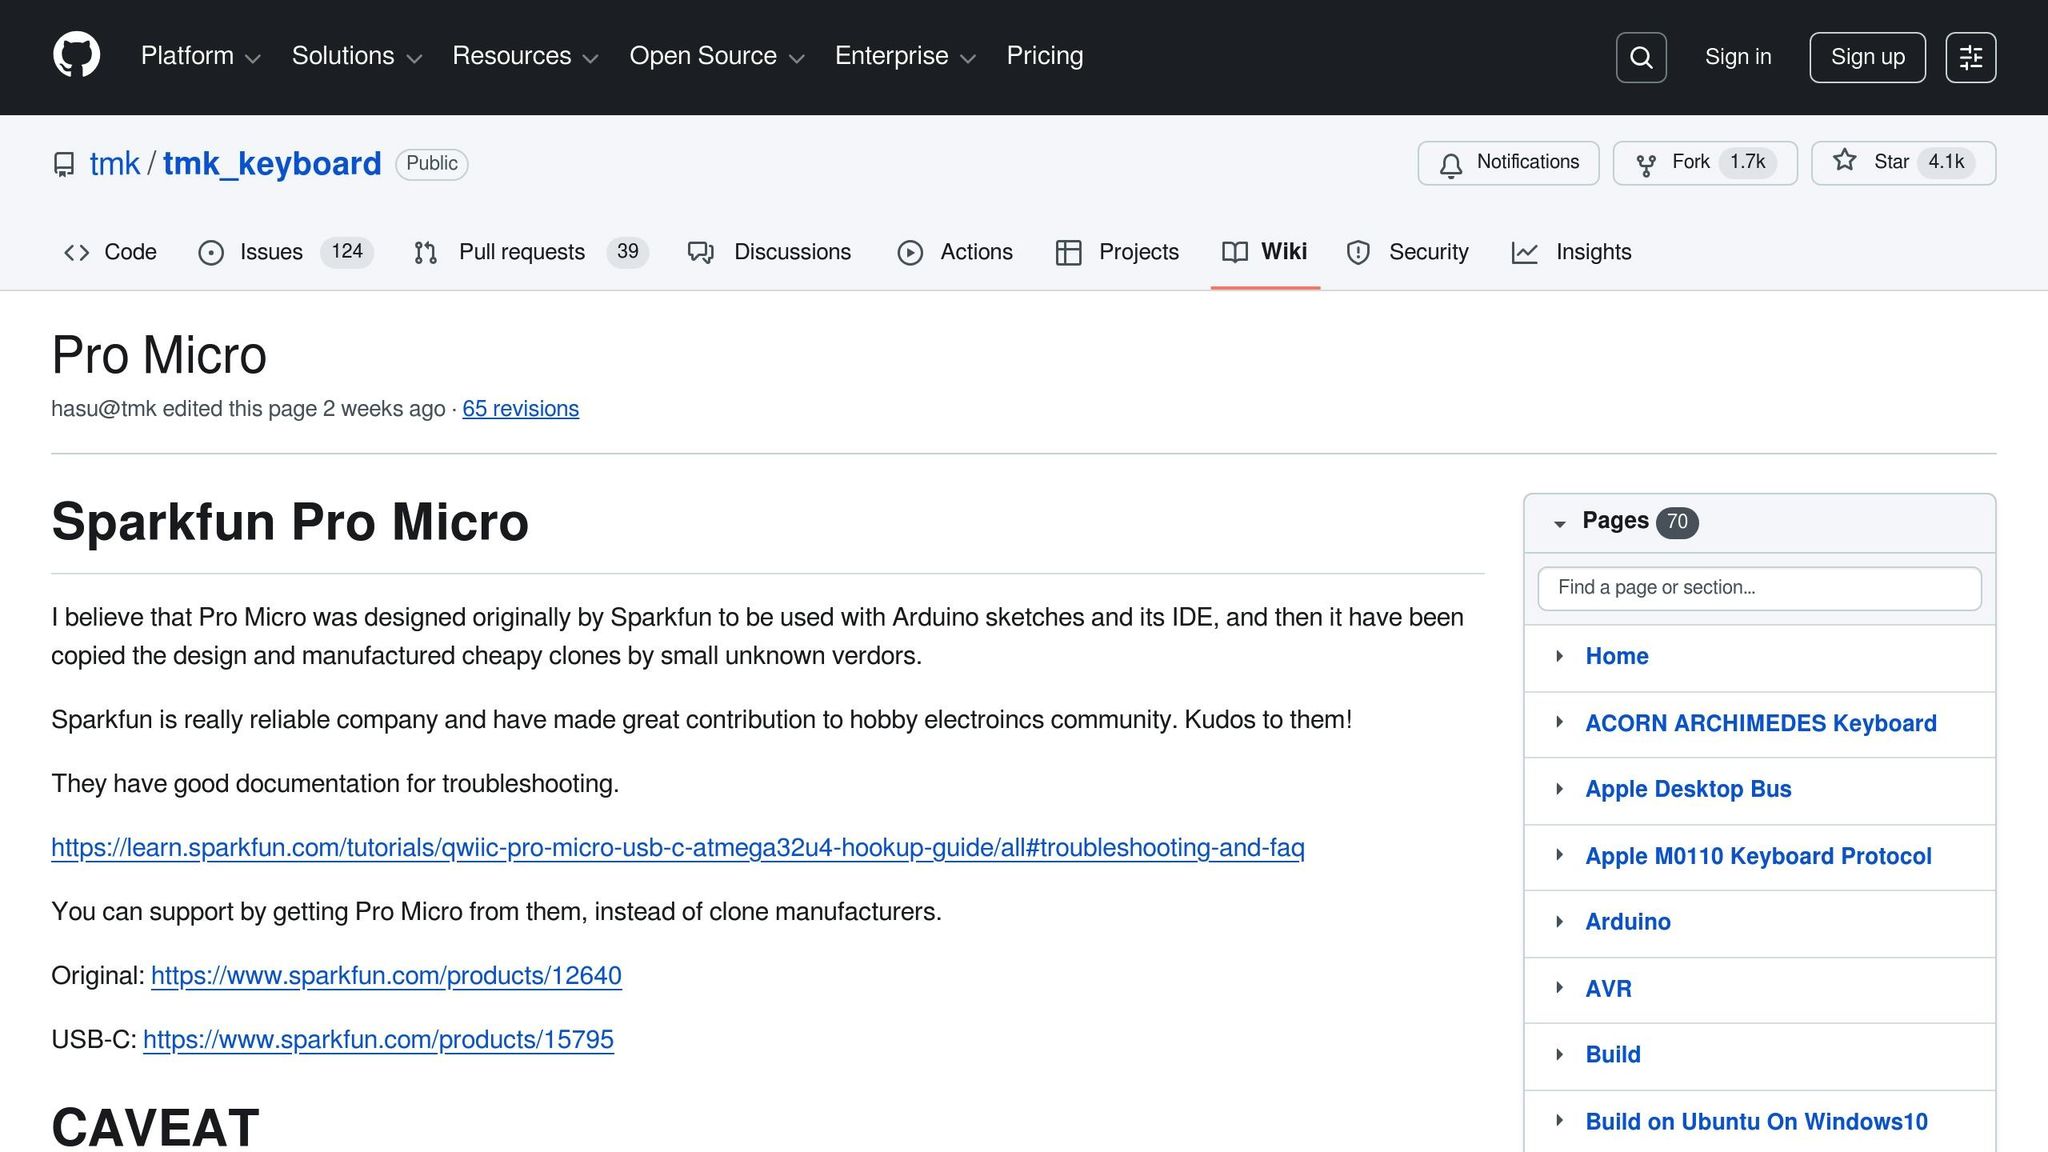
For Pro Micro controllers using the Caterina bootloader, entering bootloader mode requires a double-tap of the reset button or shorting the RST and GND pins twice within 750 milliseconds.
"Caterina bootloader only stays in bootloader mode for about 8 seconds when reset is triggered, while DFU stays in bootloader mode when reset, allowing for a better flashing experience." - Keebio Documentation
Since the Caterina bootloader only stays active for 7–8 seconds, it’s a good idea to enable the "Auto-Flash" feature in QMK Toolbox before performing the double-tap reset. This ensures that firmware starts flashing as soon as the device is detected. If you encounter the error butterfly_recv(): programmer is not responding, it means the device either failed to enter bootloader mode or the bootloader window expired. In that case, repeat the double-tap process to reactivate the bootloader.
Load and Flash Firmware File
Once the bootloader is activated, the next step is to load and flash your firmware file. With the bootloader mode engaged, you’ll need to select the correct firmware file and keep an eye on the terminal feedback to ensure everything goes smoothly.
Select the Correct Firmware File
Firmware files for QMK vary depending on your keyboard's microcontroller. Here’s a quick breakdown:
- AVR-based boards (e.g., those with the ATmega32u4 chip) require .hex files.
- ARM-based boards (e.g., STM32 processors) use .bin files.
- RP2040-based keyboards need .uf2 files instead.
These files follow a naming convention: <keyboard>_<keymap>.<extension>. For example, a firmware file for a Planck Rev 5 with the default keymap would be named planck_rev5_default.hex.
To load the file, you can either click the "Open" button in the QMK Toolbox and navigate to your firmware file or drag and drop the file into the Local file box.
If you’re working with an AVR-based board, double-check that the "MCU (AVR only)" drop-down menu matches your keyboard's processor. For instance, most Pro Micro and Elite-C boards use the ATmega32u4 processor. Once the correct file is loaded, you’re ready to move on to the flashing process.
Monitor Terminal Output
The terminal in QMK Toolbox provides essential feedback during the flashing process.
- Yellow text highlights device status updates.
- Gray text displays technical progress details.
After clicking "Flash", look for lines starting with >>>, which indicate command execution. For example, when flashing a Planck Rev 5, the terminal might show dfu-programmer.exe atmega32u4 flash, followed by a progress bar indicating the 0x3F80 bytes being written. A successful flash is confirmed with a "Validating... Success" message.
The final step is to wait for a second yellow line in the terminal, signaling that your device has exited bootloader mode and reset into application mode. Do not unplug your keyboard until you see this final yellow disconnect message.
If you encounter (NO DRIVER) next to your connected device in the terminal, it means there’s a driver issue. To fix this, go to Tools > Install Drivers in QMK Toolbox to resolve the problem.
sbb-itb-3cb9615
Fix Common Flashing Errors
Even when you meticulously follow the steps, errors can still pop up during the flashing process. Two of the most common problems are the "No Device Present" error and situations where the flash seems successful, but your keyboard remains unresponsive.
Resolve 'No Device Present' Error
The "No Device Present" error typically happens when QMK Toolbox can't find the correct driver. This often occurs because Windows assigns a generic or outdated driver that newer versions of QMK Toolbox don't support.
One specific issue is when your device shows up as "Guillemot STM DFU Device" instead of "STMicroelectronics STM32 BOOTLOADER". Keychron Support explains:
"If the screen shows Guillemot STM DFU Device, that means the computer has the wrong driver installed."
To fix this, ensure you're using the latest version of QMK Toolbox, which has better driver support. Then, use the built-in driver installer by navigating to Tools → Install Drivers in QMK Toolbox.
If that doesn't work, you can manually resolve the issue. Open Device Manager, locate the bootloader device, and uninstall it. Be sure to check the option "Delete the driver software for this device" before reconnecting your keyboard. Once your keyboard is in bootloader mode, go to Device Manager → View → Devices by container. Find the bootloader device (e.g., ATmega32U4 DFU or STM32 Bootloader), right-click, and select Uninstall device. Afterward, click Action → Scan for hardware changes and restart QMK Toolbox. This should allow the software to recognize the correct driver.
If fixing the driver still doesn't solve the issue, move on to addressing unresponsive keyboard problems.
Fix Flash Success but Keyboard Not Working
Sometimes, even after a successful flash, your keyboard might not work. This is often due to using firmware that's not designed for your specific keyboard model or PCB variant.
For example, flashing firmware meant for a different PCB type - like a soldered PCB instead of a hotswap PCB - can leave your keyboard unresponsive. Cansu Sener from KeebsForAll advises:
"Using the freebird60 firmware on a PCB that doesn't support it might lead to you bricking that PCB. Usually, the firmware will be named the same as the PCB."
Before flashing, double-check that the firmware file and MCU setting (e.g., ATmega32u4) match your keyboard's specifications.
If the keyboard still doesn’t work after flashing, try disconnecting other USB devices and reflash the firmware. Sometimes, interference from other peripherals can cause issues. You can also use "Test Matrix" mode in VIA or Remap to check key functionality. Keep in mind that certain keys, like Menu or Fn, might process locally and not show up in browser-based tests.
If your keyboard remains completely unresponsive, force it back into bootloader mode. You can do this by pressing the physical RESET button on the PCB's underside or by shorting the RST and GND pins.
Other Flashing Methods
If the QMK Toolbox method doesn't work, command-line tools offer a more detailed and controlled approach to flashing your keyboard firmware.
Use Command Line Tools
The QMK CLI is a powerful alternative to QMK Toolbox. It simplifies the flashing process by automatically detecting your keyboard's bootloader. To flash your firmware using QMK CLI, run the following command in your terminal:
qmk flash -kb <keyboard> -km <keymap>
Replace <keyboard> and <keymap> with the appropriate names for your device.
For specific bootloaders, different tools might be necessary:
-
Atmel DFU (common in ATmega32u4 boards): Use
dfu-programmer. -
Caterina bootloaders (used in Pro Micro controllers): Use
avrdude. -
STM32/ARM devices: Use
dfu-util.
If the bootloader isn't detected, running the following command can help diagnose issues:
qmk doctor
For Caterina bootloaders, keep in mind that you have a 7-second window to flash the firmware. An example command for flashing with avrdude might look like this:
avrdude -p <mcu> -c avr109 -P <serialport> -U flash:w:<filename>:i
On Windows, if you encounter a "Device not found" error, you may need to update the driver using Zadig. Switch the driver to either WinUSB or libusb-win32.
If flashing issues persist, manually erasing the flash memory can often resolve lingering problems.
Erase Flash Before Flashing
Most flashing tools automatically erase the flash memory before writing new firmware. However, manual erasure can be helpful when troubleshooting stubborn firmware issues or when using command-line tools directly.
For Atmel DFU devices (like those with the ATmega32u4 chip), you can manually erase the flash memory with dfu-programmer. First, put your keyboard into bootloader mode, then run:
dfu-programmer <mcu> erase --force
. After erasing, flash the new firmware with:
dfu-programmer <mcu> flash <filename>
Finally, reset the device:
dfu-programmer <mcu> reset
.
For ARM-based keyboards (like the Planck rev6), simply erasing the flash may not be enough. If your keyboard remains unresponsive after flashing, you might need to load a reset EEPROM firmware image to clear any invalid settings. On Linux, you may need to use sudo or configure proper udev rules to access the bootloader device.
Wrapping It Up
To get your keyboard running smoothly, it's essential to follow the process from driver setup to firmware flashing step by step. Fixing QMK Toolbox flashing problems often comes down to proper drivers, the right bootloader, and careful troubleshooting. For Windows users, tools like the built-in "Install Drivers" option or Zadig can address pesky "Device not found" errors. Make sure you're selecting the correct bootloader for your hardware - whether it's Atmel DFU for ATmega32u4 boards, Caterina for Pro Micro controllers, or UF2 for RP2040-based keyboards.
If QMK Toolbox doesn't get the job done, you can turn to command-line tools like qmk flash, dfu-programmer, or avrdude for more control over the process. Also, keep in mind that USB device interference can cause I/O errors, so disconnect any unnecessary peripherals during the flashing process.
Testing your PCB before assembling the keyboard is a smart move to catch hardware issues early. Once you've flashed the firmware, double-check your key functionality to ensure everything is working as expected.
For long-term reliability, using high-quality components is key. Stores like KeebsForAll offer a wide range of mechanical keyboard parts, including customizable keyboards like the Freebird series, switches, keycaps, and tools like the KFA Switch Opener. Starting with dependable parts not only reduces the risk of hardware failures but also complements your troubleshooting efforts.
FAQs
How do I fix the 'No Device Present' error in QMK Toolbox?
If you're seeing the 'No Device Present' error in QMK Toolbox, don't worry - here are some steps to help you fix it:
- Enter bootloader mode: Start by putting your keyboard into bootloader mode. This usually involves holding down a specific key (commonly the ESC key) or pressing a reset button while plugging the keyboard into your computer.
- Install or update drivers: Open QMK Toolbox, navigate to the Tools menu, and select Install Drivers. This ensures your computer has the correct drivers to recognize your device.
- Check your device in the system: On Windows, open Device Manager and verify that your keyboard is detected. If it shows up as an unrecognized device, uninstall it, then reinstall the drivers using QMK Toolbox.
Once you've followed these steps, reconnect your keyboard in bootloader mode and attempt to flash the firmware again. This process should help QMK Toolbox detect your device without any issues.
What should I do if my keyboard stops working after flashing firmware?
If your keyboard stops responding after flashing firmware, here’s what to do:
- Review the flashing process: Double-check that the firmware was installed correctly and that the keyboard was in the right bootloader mode during the update.
- Check your hardware connections: Ensure the USB cable is firmly connected and functional. A damaged cable or port could be causing the issue.
- Try bootloader mode again: Put your keyboard back into bootloader mode and repeat the flashing process, making sure to use the correct firmware file.
If none of these steps fix the problem, double-check that the firmware matches your keyboard model and confirm your hardware setup is in working order. These steps should address most issues related to firmware flashing.
How do I put my keyboard into bootloader mode for firmware flashing?
Entering bootloader mode varies depending on the microcontroller used in your keyboard. Here's a quick breakdown:
- AVR-based boards (e.g., ATmega32u4): Typically, you can hold certain keys (like Spacebar + B) while plugging in the keyboard or use a physical reset button on the PCB.
- STM32 boards: These often require shorting pins labeled RESET and GND during power-up or using their reset button.
- Arduino Pro Micro boards with the Caterina bootloader: A quick press of the reset button will usually put the board into bootloader mode.
- RP2040-based controllers (e.g., Elite-Pi): Depending on the design, you might need to press a reset button or short specific pins. Refer to your keyboard's manual or PCB documentation for precise instructions.
The goal is to enter bootloader mode before flashing the firmware. Whether it's a key combination, a reset button, or shorting pins, follow the steps specific to your microcontroller to ensure everything goes smoothly.