
QMK firmware lets you customize your mechanical keyboard directly, offering features like key remapping, macros, and multi-layer setups. It works on your keyboard's processor, eliminating the need for additional software on your computer. Here's what you need to know to get started:
- What is QMK?: Open-source firmware for mechanical keyboards, enabling advanced customization through layers and macros.
- Why use it?: Save custom settings directly on your keyboard and join a large community for layouts and ideas.
-
Setup Requirements:
- A QMK-compatible keyboard (e.g., Freebird60).
- QMK CLI or QMK Toolbox for flashing firmware.
- A text editor like VS Code or Sublime Text.
-
Key Features:
- Layers: Assign multiple functions to keys based on active layers.
- Macros: Automate repetitive tasks with single keypresses.
-
Getting Started:
- Install QMK CLI using a simple terminal command.
- Test your setup by compiling default firmware.
- Use QMK Configurator for easy visual keymap design.
QMK transforms your keyboard into a personalized tool, perfect for gamers, programmers, and enthusiasts. Start small with basic remapping, and explore advanced features like Tap Dance and macros as you grow comfortable.
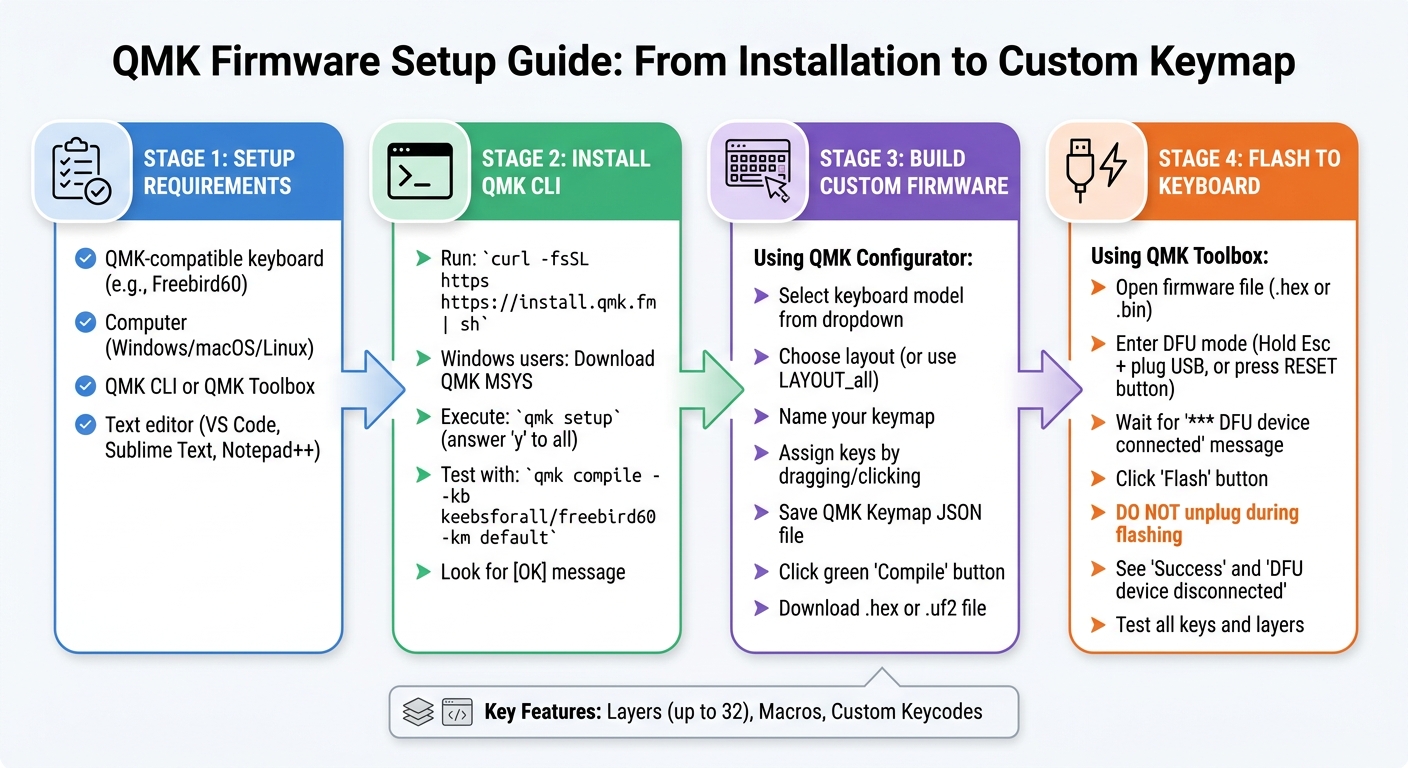
QMK Firmware Setup and Customization Process for Beginners
QMK Tutorial (Simple Guide for the Keyboard Configurator)
sbb-itb-3cb9615
Setting Up Your Environment
Get your QMK-compatible keyboard up and running by installing the necessary tools. You only need to do this setup once.
What You'll Need
Here’s a quick rundown of what you’ll need to get started:
- A QMK-compatible keyboard (e.g., Freebird60)
- A computer running Windows, macOS, or Linux
- The QMK CLI (Command Line Interface)
- A plain text editor like VS Code, Sublime Text, or Notepad++
For convenience, you can also install QMK Toolbox, which offers a graphical interface for flashing firmware.
Installing QMK CLI
The easiest way to install the QMK CLI is by using the universal bootstrapper script. Open your terminal and run the following command:
curl -fsSL https://install.qmk.fm | sh
This script installs the QMK CLI along with all the required dependencies, such as toolchains and flashing utilities.
Windows users should consider downloading QMK MSYS. It’s a pre-configured terminal environment that includes everything you need. As noted in the QMK documentation:
"QMK maintains a Bundle of MSYS2, the CLI and all necessary dependencies. It also provides a handy QMK MSYS terminal shortcut to boot you directly into the correct environment."
After installing QMK MSYS, always launch the terminal using the "QMK MSYS" shortcut instead of the standard MSYS terminal.
Once installed, run the following command in your terminal:
qmk setup
Answer "y" to all prompts. This will clone the firmware repository and prepare your environment. If you primarily use one keyboard, save time by setting it as your default with:
qmk config user.keyboard=<keyboard_name>
Now that the CLI is installed, you’re ready to test your setup.
Testing Your Setup with a Freebird Keyboard
Make sure everything is working by compiling the default firmware for a Freebird60 keyboard. Use this command:
qmk compile -kb keebsforall/freebird60 -km default
If the build is successful, you’ll see [OK] in the terminal output, and a .hex file will be created in your qmk_firmware directory. If something goes wrong, run:
qmk doctor
This command will help you troubleshoot any issues.
To test flashing, put your Freebird60 into DFU mode. Hold down the Esc key while plugging in the USB-C cable. Once you’ve successfully compiled the firmware and entered DFU mode, you’re ready to flash your keyboard and start customizing your firmware.
Building Your First Custom Firmware
With your setup ready, it’s time to create a custom keymap - no coding required! The QMK Configurator makes this process simple. This web-based tool lets you visually design your keyboard layout and generate firmware files in just a few steps.
Using QMK Configurator
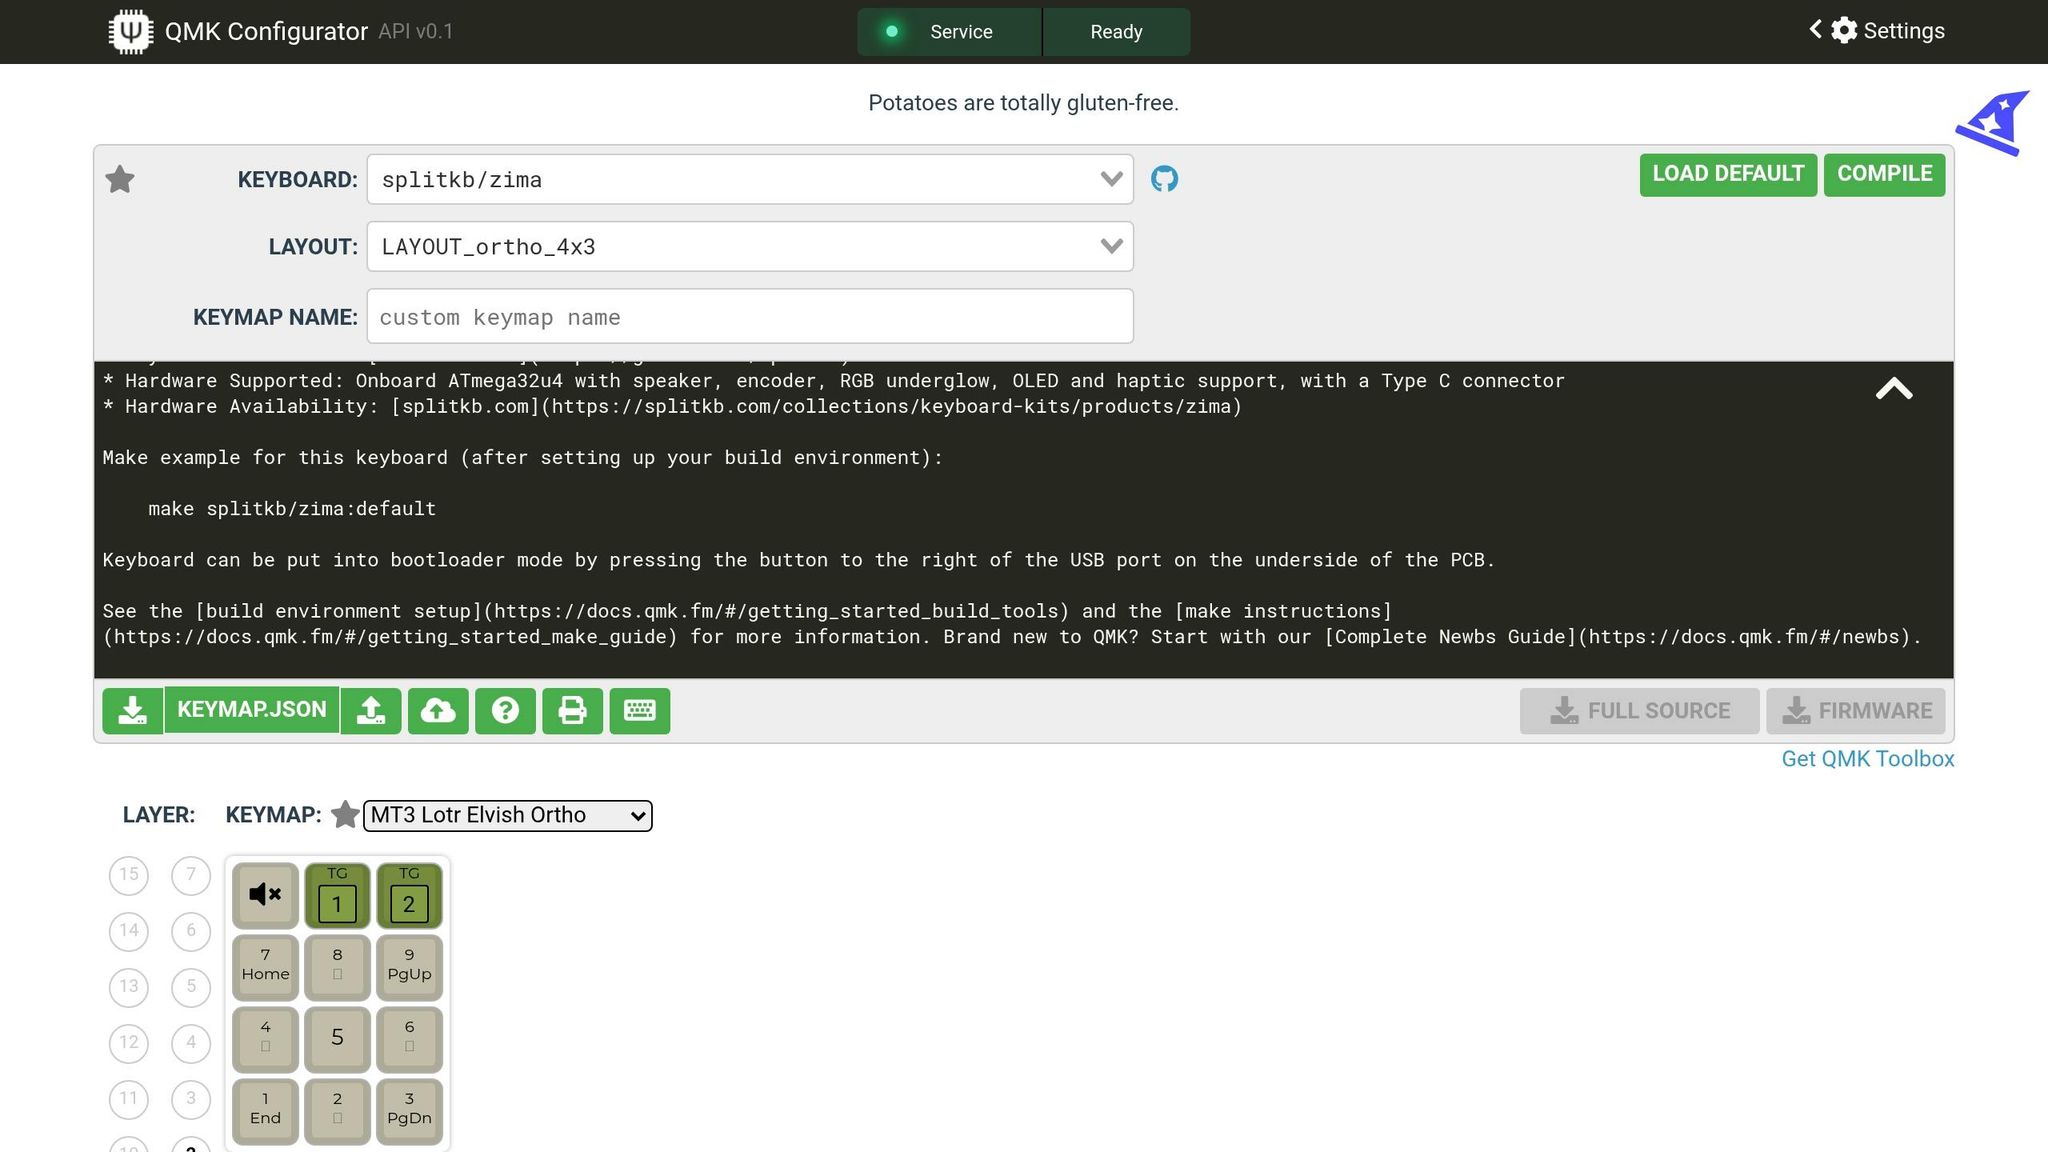
Head over to the QMK Configurator website and start by selecting your keyboard model from the dropdown menu. For example, if you’re using a Freebird60 MAX Full Kit, choose keebsforall/freebird60 from the list. Be sure to select the correct hardware version to avoid potential firmware issues. As highlighted in the QMK documentation:
"MAKE SURE YOU SELECT THE RIGHT VERSION!"
Next, pick a layout that matches your keyboard’s physical design. If you don’t see an exact match, use LAYOUT_all as a fallback. After that, give your keymap a unique name. If you run into compilation errors later, renaming it can help avoid conflicts with existing keymaps.
To assign keys, you can:
- Drag keycodes from the library.
- Click on a key and select a code from the menu.
- Press the corresponding physical key on your keyboard.
Hover over any key for a description of its function. For upper layers, use KC_TRNS (shown as _______) to allow keypresses to "fall through" to the layer below.
Before compiling, download and save the QMK Keymap JSON file. This file is crucial for reloading your configuration into the Configurator later, as compiled firmware files cannot be re-imported. Once your layout is complete, you’re ready to compile and download the firmware.
Compiling and Downloading Firmware
When your keymap is finalized, click the green Compile button to build your firmware. Once the process is complete, the Download Firmware button will activate, allowing you to save a .hex or .uf2 file - depending on your keyboard’s microcontroller.
Pay attention to the compilation output to ensure the firmware fits within your keyboard’s memory. For instance, you might see a message like "95%, 1,360 bytes free." If you’re new to this, make small adjustments to your keymap and test frequently. This step-by-step approach is much easier than troubleshooting a fully redesigned layout.
Flashing Firmware to Your Keyboard
Once you've compiled your firmware, the next step is to flash it onto your keyboard. This process writes your custom keymap directly to the microcontroller on your keyboard's PCB. The QMK Toolbox simplifies this task with an easy-to-use graphical interface for both Windows and macOS.
Using QMK Toolbox for Flashing
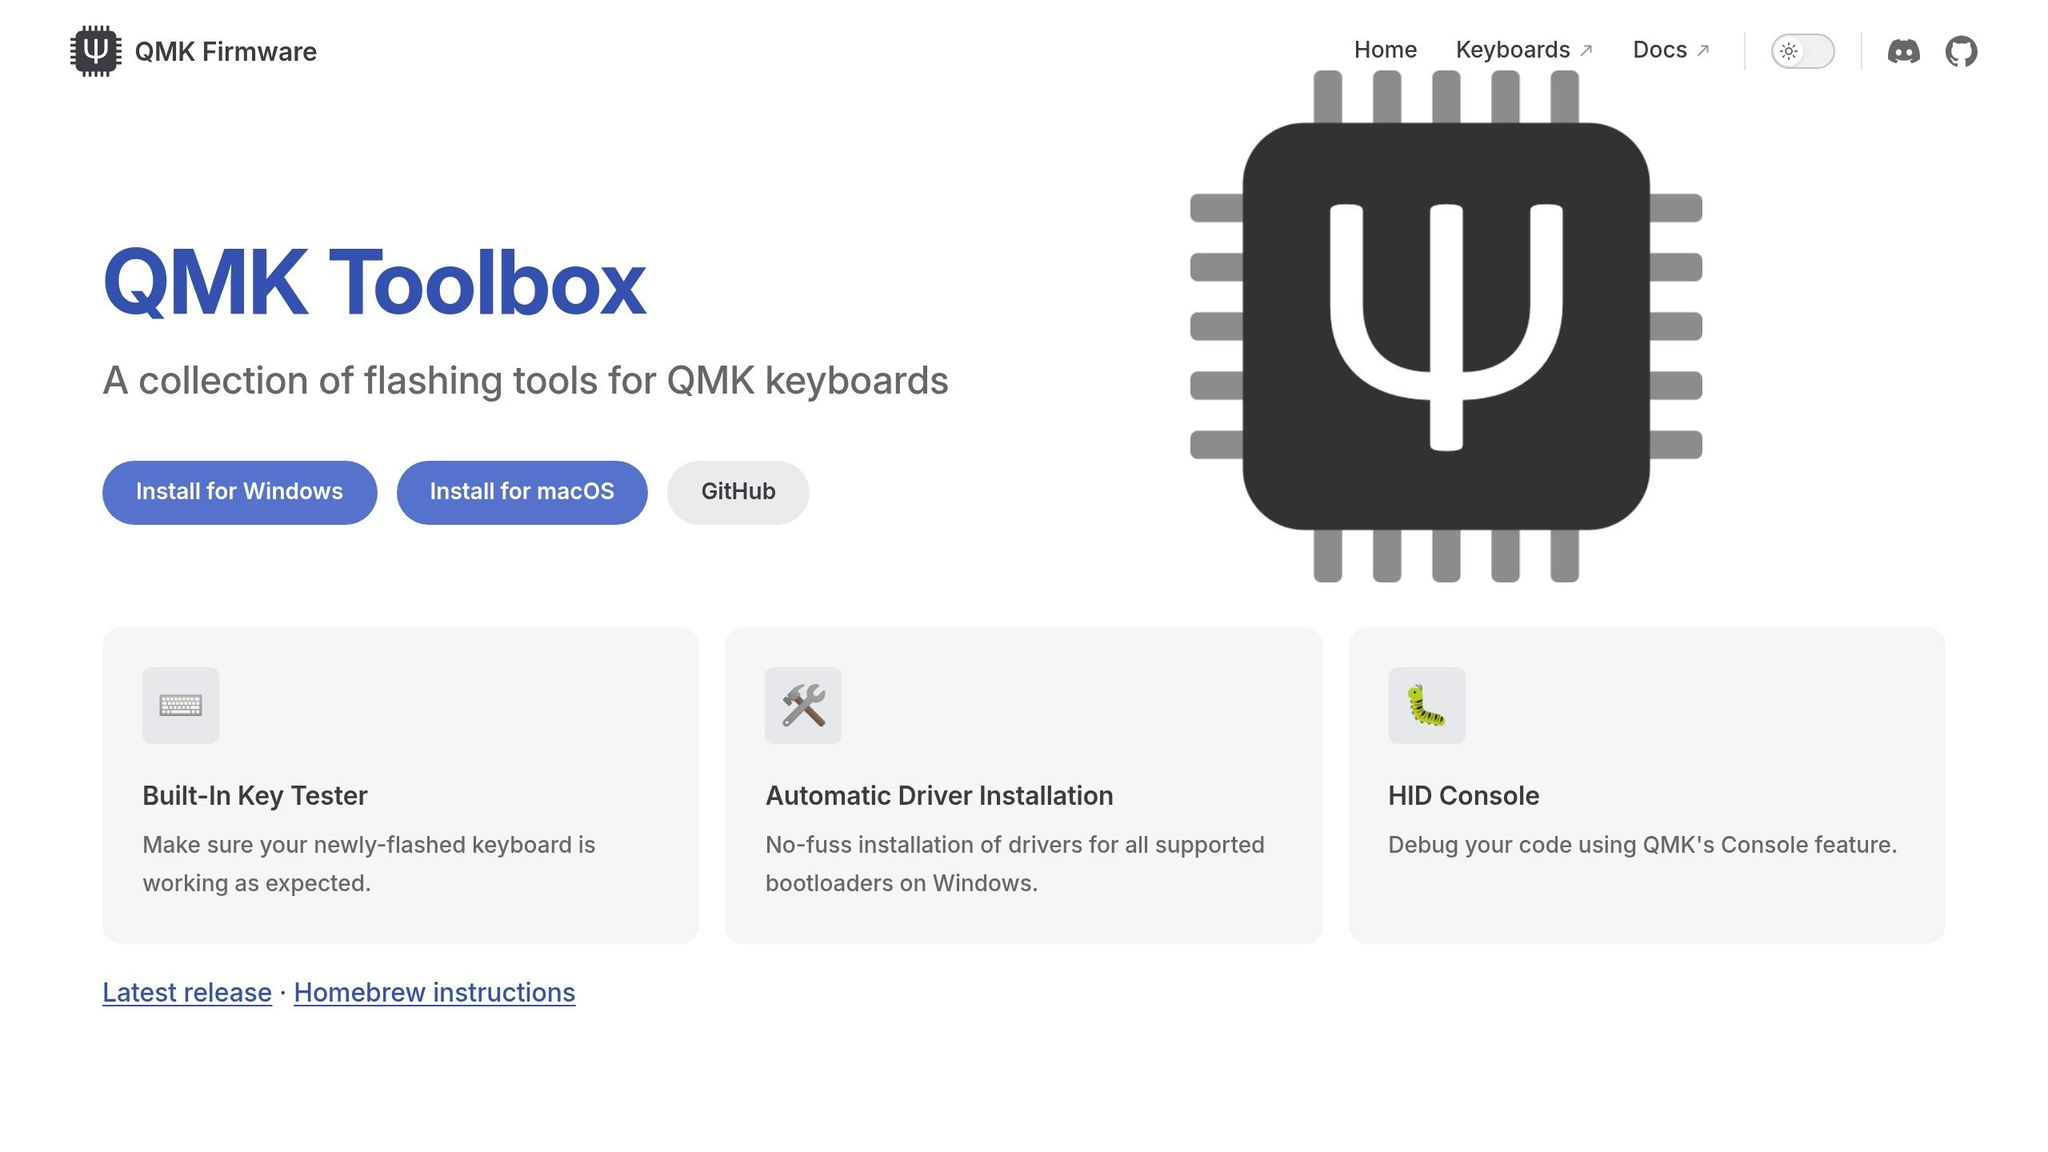
Start by opening QMK Toolbox and clicking Open to load your firmware file - the .hex or .bin file you downloaded earlier. Alternatively, you can drag and drop the file into the "Local file" box. Before flashing, you’ll need to put your keyboard into DFU (Device Firmware Upgrade) mode. While in this mode, your keyboard won’t work for typing but will be ready to accept the new firmware.
If QMK is already installed, you can try entering DFU mode by holding both Shift keys and pressing Pause. Another method is to unplug the keyboard, hold the top-left key (often Esc), and plug it back in. For specific instructions, such as those for the Freebird60, refer to earlier setup steps. If these methods don’t work, locate the RESET button on the underside of the PCB and press it. Additional instructions can be found in the QMK documentation.
Once your keyboard enters DFU mode, QMK Toolbox will display a yellow message: *** DFU device connected. At this point, click the Flash button and let the process complete. As noted in the QMK documentation:
"It is very important that you do not unplug the keyboard or otherwise interrupt the flashing process while the firmware is being written."
When the flashing process is done, you'll see "Success" followed by "DFU device disconnected" as the keyboard automatically resets. Afterward, you can move on to testing your firmware.
Verifying the Firmware
After flashing, it’s time to ensure your custom keymap works as intended. Unplug and replug your keyboard to exit bootloader mode fully. Use QMK Toolbox's Built-In Key Tester or HID Console to check the functionality of each key and layer.
Go through each key to confirm it performs its assigned function. Test all layers by activating them and verifying their behavior. If your keyboard doesn’t respond after flashing, consult the QMK FAQ or reach out to the official Discord server for assistance.
Basic QMK Features
Once you've successfully flashed your firmware, you're ready to dive into QMK's powerful customization options. Two of the most essential features to explore are layers and macros.
Layers and Keycodes
Think of layers as virtual overlays for your keyboard, much like the "Fn" key on a laptop. Each layer can redefine what every key does, and QMK allows up to 32 layers to be stacked at once.
One of the standout features here is transparency. This lets keys "fall through" to lower layers, meaning you don't have to redefine every key on a new layer. For instance, you could create a layer for media controls or navigation while keeping your regular typing keys accessible through transparency.
Here are some of the most commonly used layer-switching functions:
| Function | Description |
|---|---|
MO(layer) |
Temporarily activates a layer while holding the key. |
TG(layer) |
Toggles a layer on or off with a single press. |
LT(layer, kc) |
Activates a layer when held but sends a regular keycode when tapped. |
TO(layer) |
Switches to a specific layer and disables all others except the default layer. |
Once you understand layers, you can take your setup even further by integrating macros.
Creating Simple Macros and Functions
Macros let you execute multiple keystrokes with a single press. You can define up to 32 macros using the QMK Configurator or by editing the keymap.c file.
For beginners, creating macros can be as straightforward as setting up a shortcut for a text snippet or automating actions like 'Select All' followed by 'Copy.' You can also assign media controls - like KC_AUDIO_VOL_UP for volume or KC_MEDIA_PLAY_PAUSE for playback - to any key in your layout.
Important Security Tip: The QMK documentation strongly advises against using macros to store sensitive data like passwords or credit card numbers:
"While it is possible to use macros to send passwords, credit card numbers, and other sensitive information it is a supremely bad idea to do so".
If someone gains physical access to your keyboard, they could easily exploit these macros, so avoid assigning sensitive information.
When defining macros in C-based keymaps, start custom keycodes from SAFE_RANGE to prevent conflicts with existing QMK functions. The SEND_STRING() function is a simple way to create macros that type out text automatically. For non-text keys like Ctrl or Alt, you can use helper functions such as SS_TAP(), SS_DOWN(), and SS_UP() to include them in your macros.
Conclusion
Key Takeaways
QMK firmware turns your mechanical keyboard into more than just an input device - it becomes a fully personalized tool designed to fit your workflow. With QMK, you have two main options: the beginner-friendly QMK Configurator or the more advanced route of modifying the source code. Features like layers allow for multiple key configurations, and macros can help automate repetitive tasks, making your keyboard as versatile as you need it to be.
Whether you're simply remapping keys or building intricate layer systems, QMK adapts to suit your level of expertise.
Next Steps
Ready to take the next step in your custom firmware journey? Here's how to get started:
- Experiment with supported keyboards: The Freebird series from KeebsForAll - available in 60%, 75%, and TKL layouts - supports QMK customization right out of the box. They're a great starting point for testing your custom firmware skills.
- Start small: Use the QMK Configurator to create a simple custom keymap. For example, search for "keebsforall/freebird60" in the configurator and play around with layout options to suit your needs.
- Explore advanced features: Once you're comfortable with basic remapping, dive into more complex tools like Tap Dance, Combos, and Leader Key. The official QMK Learning Resources are a great place to explore these advanced functions.
- Connect with the community: Join the KeebsForAll Discord server or contact support at help@keebsforall.com. The community is full of keyboard enthusiasts who can help troubleshoot, share tips, and inspire you with creative keymap ideas.
Take the leap and start customizing your keyboard today!
FAQs
Will flashing QMK erase my current keyboard layout?
Flashing QMK firmware can replace your keyboard's current firmware, including your keymap. If your keyboard supports VIA, your custom keymap might stay intact unless you reset or re-flash the EEPROM. To protect your layout, make sure to back up your keymap before proceeding. Once the flashing is complete, you may need to reconfigure or reload your keymap if it doesn’t restore automatically.
How do I recover if I flash the wrong firmware file?
If you accidentally flash the wrong firmware onto your keyboard, don’t worry - you can fix it by re-flashing the correct one using a tool like QMK Toolbox. Start by putting your keyboard into bootloader mode. How you do this depends on your PCB: it might involve pressing a reset button, using a specific key combination, or shorting the reset pins. Once the keyboard is in bootloader mode, load the correct firmware file (either a .hex or .bin file) into QMK Toolbox and flash it. This should restore your keyboard’s functionality.
What QMK features can cause firmware size errors?
Firmware size issues in QMK can arise when you enable link time optimization (LTO_ENABLE = yes) or turn off features such as CONSOLE_ENABLE, COMMAND_ENABLE, MOUSEKEY_ENABLE, and EXTRAKEY_ENABLE. These changes affect both the firmware's size and its functionality, so double-check your configuration settings before compiling to avoid unexpected problems.