Introduction
If you've looked into how to build your very first custom mechanical keyboard, chances are, you've repeatedly heard of something called QMK and the words--firmware and flashing. These terms might sound confusing to you, but don't worry, it's all actually very simple. Once you've flashed your first PCB, it becomes muscle memory.
This tutorial is for someone who is looking to flash their very first PCB using QMK. If you've done this process before, chances are, this won't teach you anything new. But, for those looking to dip into the mechanical keyboard hobby for the first time, this is for you.
Background
Before we start with how to flash your first PCB, we should probably go over some basic concepts and terms.
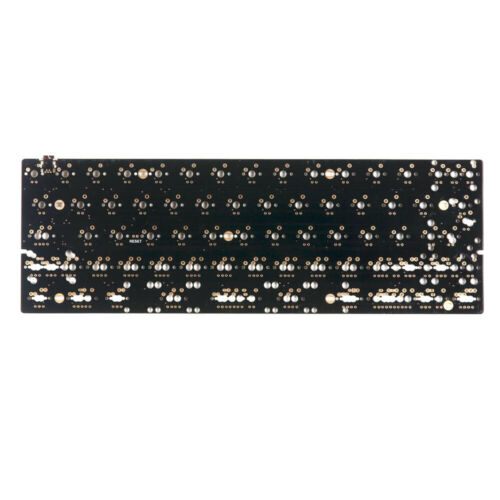
PCB - Printed Circuit Board. This is over simplifying it, but think of it like a mother board for your keyboard.
Micro Controller/MCU - Again, another simplification, but it's like the CPU for a computer, but it's the "control unit" for the keyboard instead and it's installed directly onto the PCB.
Firmware - This is basically the "software" required for your keyboard to function and know which keymapping it's using.
Flashing - Nope, you're not revealing yourself to strangers. It's just a word for downloading the firmware into the Micro Controller on your PCB.
QMK - It's an open source software that allows you to create key mappings and load firmware into your PCB.
So, how do all these terms tie together?
If you've bought a keyboard from Best Buy or Amazon, then you're used to just plugging the USB into your computer and having the keyboard work right away. However, for a custom mechanical keyboard that you have to install from individual components, this won't always be the case. In reality, both the mechanical keyboard you bought online from Amazon and the one you're about to build, work the exact same way.
A keyboard is an independent object from your computer. This means that it doesn't rely on your operating system to tell it which key does what. This is the reason why you can unplug a mechanical keyboard from one computer to another and have it still work right away. So, you can think of the keyboard as a tiny computer itself. The PCB is like the mother board and the Micro Controller is like the CPU. Flashing a firmware into the Micro Controller is like installing an operating system on your computer. The firmware contains a keymapping, which means which specific key on a keyboard is responsible for what function. If you want to annoy someone, you can re-map their "a" key and "d" with each other, then re-flash their keyboard. This will lead to some funny confusion the next time they try to type. Anyway, the keymap and everything else the micro controller needs gets flashed/installed into the micro controller. Once that happens, the micro controller will now know how to control and manage the keyboard including any RGB lighting etc.
The fully assembled mechanical keyboard you buy from Razer or another brand works the exact same way. It's just pre-flashed and pre-assembled for you!
A PCB you buy for your first build is likely pre-flashed for you as well (Our Freebird60 will be flashed before we ship it to you), but in the spirit of DIY, some stores/people might sell you an un-flashed PCB. If that's the case, you'll notice that your keyboard doesn't work after assembling everything with that un-flashed PCB.
Now that you have an idea of how the PCB works and why it's needed for a mechanical keyboard, we can move onto a step by step guide on flashing it with the firmware you need.
Step By Step Guide (Works for both PC and Mac)
1. First, configure your keymapping and export a firmware. Do do this, go to https://config.qmk.fm/
For this guide, we'll be using our own PCB and custom firmware as the example. So, this doubles as a guide for how to remap and flash your Freebird60 Hot Swap PCB with QMK.
Now that you're on config.qmk.fm, go to top bar that says KEYBOARD and click on it. Then type "keebsforall". You should see "keebsforall/freebird60" pop up as an option. Go ahead and select that. If you're using a different PCB, make sure you know which firmware you need for this process. Using the freebird60 firmware on a PCB that doesn't support it might lead to you bricking that PCB. Usually, the firmware will be named the same as the PCB, so if you're using DZ60 for example, then search for DZ60 in this step.
Now that you've selected "keebsforall/freebird60", the page should now look like this:

2. The next thing to toggle is the layout of the PCB. A lot of PCBs will only have 1 layout. However, our Freebird60 has support for a default 60% layout as well as support for an arrow key 60% layout. If you want to use the default 60% layout with out arrow keys, then you don't need to do anything. However, if you want to use the arrow key layout, then click on the second bar from the top where it says "LAYOUT" and change it from "LAYOUT" to "LAYOUT_all". If you changed the layout setting, then you should have noticed that the keyboard layout below changed from the above view to the following:

3. Now that you've chosen your layout, it's time to choose your keymap. Your keymap is basically a mapping of which key on the keyboard controls which actual function. If the traditional location for the letter "a" is mapped to the letter "a", then when you press the "a" key, the letter a will be written. However, with a custom board, you can pretty much map the keys however you want. If you've chosen the default layout, then there will be a set of default keys selected for you. In this case, I'd highly recommend for you to add some keys to the first layer of your keymap. This is because it can be annoying to type and use a keyboard without certain keys like volume control, tilde (~), or the arrow keys. As a result, most people will take advantage of layers. When you press and hold a quantum key like M(1) on the keyboard, then it will toggle on layer 1. You can then map specific keys like volume up and volume down to the usual "f" and "g" keys. The result will be every time you press and hold M(1) + "f", you'll lower the volume and every time you press and hold M(1) + "g", you'll increase the volume. This can be really powerful and it's how some people can be very adept at using even 40% sized keyboards. In addition to the volume up and volume down keys, I'd suggest you map the function keys F1, F2, F3, ... , F12 to layer 1 of the number key row. I'd also recommend you map the arrow keys to layer one as well. Some people who code and are used to VIM controls prefer to use (h, j, k, l) as the arrow keys in layer 1. Others prefer the gaming standard of (w, s, a, d). It's completely up to you. To map and remap these keys, simply click on the layer you want to map on the left hand side and drag the keys from the bottom black looking keyboard onto the keyboard layout at the top. Keep in mind the quantum key works like this--M(x), where x is the layer number. So M(1) is layer 1 and M(2) is layer 2 and so on. The key looks like this on QMK's configurator:

4. Now that you're happy with your keymap, you can create the hex file (.hex). Simply click the compile button at the top right of the page like so:

Once you've clicked that button, a potato will pop up and say it's baking the firmware like this:

Wait for a minute or two for the baking logo to go away. Then the download firmware button will go from grey to green like this. Go ahead and click on it to download the firmware, which will have a .hex file ending.

5. Now the firmware is downloaded to your computer. Download and install a software called QMK Toolbox from here https://github.com/qmk/qmk_toolbox. Make sure you download the right one for your operating system. Once QMK Toolbox is done installing, boot it up and you should see this window:

Go to the Local File section at the top and load in your recently downloaded .hex firmware file. It's important to select the correct micro-controller here. Go to the top right of the app and select the correct MCU. The micro-controller for Freebird60 is amega32u4, but this won't be always be the case for other PCBs. So, make sure you figure out which micro-controller is used by the PCB you purchased.
6. Now, you need to put your PCB/Keyboard into DFU mode. Putting it into this mode is what allows it to accept the incoming software that you plan on loading. You cannot flash a PCB without putting it into this mode first. On the Freebird60, you'll receive a PCB that's already flashed, so if you're just trying to flash the PCB with a new custom keymapping, then you can put it into DFU mode by holding down the ESC key while plugging in the USB-C into the PCB socket. If you've bricked your PCB by flashing it with the wrong firmware or wrong micro-controller, you can force it into DFU mode by shorting the reset pins a the back of the PCB right next to the micro-controller like in this image:

You can short the 2 small pins by using a metal object like a paper clip and have both ends touch the small openings at the same time. Whether you're forcing the reset using this method or loading the DFU using the ESC key method, you'll see the following if successful:

It will say DFU device connected if it's successfully in DFU mode. It will also say which micro-controller it's using, so make sure to double check that here. For those of you not using a Freebird60 PCB, you might have a different process for getting it into DFU mode. Some PCBs will have a physical reset button at the back of the PCB, some others will have their own default mapped custom reset keys like our ESC key process. However, I don't know what those exact key mappings might be so, make sure you ask the seller of the PCB for those instructions.
7. Now that your PCB is in DFU mode; you've made sure QMK toolbox has loaded in the correct firmware you want; and you've selected the correct micro-controller, then you're ready to flash the PCB. Simply click the Flash button near the top right corner and your screen should look like the following:

If you seed the words success in the output as well as DFU device disconnected, then it means the process likely worked as intended. Simply unplug your USB-C cable from the PCB/Keyboard, then plug it back in.
Voila! Your PCB/Keyboard has been successfully flashed with the keymapping you've custom built for yourself. Give yourself a pat on the back. Once you've done this a few times, it'll become second nature to you.
There is another software VIA that makes this process super simple, but not all PCBs support it currently. The vast majority will support QMK, so even though it's more involved, it's worth it to learn. If the PCB you bought doesn't have a firmware already up on QMK, you can flash it with QMK toolbox as long as the seller or designer of the PCB gives you a custom .hex file. Just load it in and it'll be the same process.
Conclusion
Hopefully, you've learned how to flash your PCB with QMK after reading this. If you have any other questions, feel free to reach out to us at keebsforall@gmail.com!


![[Pre-Order] Autumn Leaves PBT Keycaps - KeebsForAll](http://keebsforall.com/cdn/shop/products/DSC09732.jpg?v=1676148273)


Leave a comment
This site is protected by hCaptcha and the hCaptcha Privacy Policy and Terms of Service apply.