
How to Debug Keyboard Firmware Issues
[ Back to Mechanical Keyboards 101 ]Debugging keyboard firmware issues can seem overwhelming, but a systematic approach makes it manageable. Here's how to identify and fix common problems:
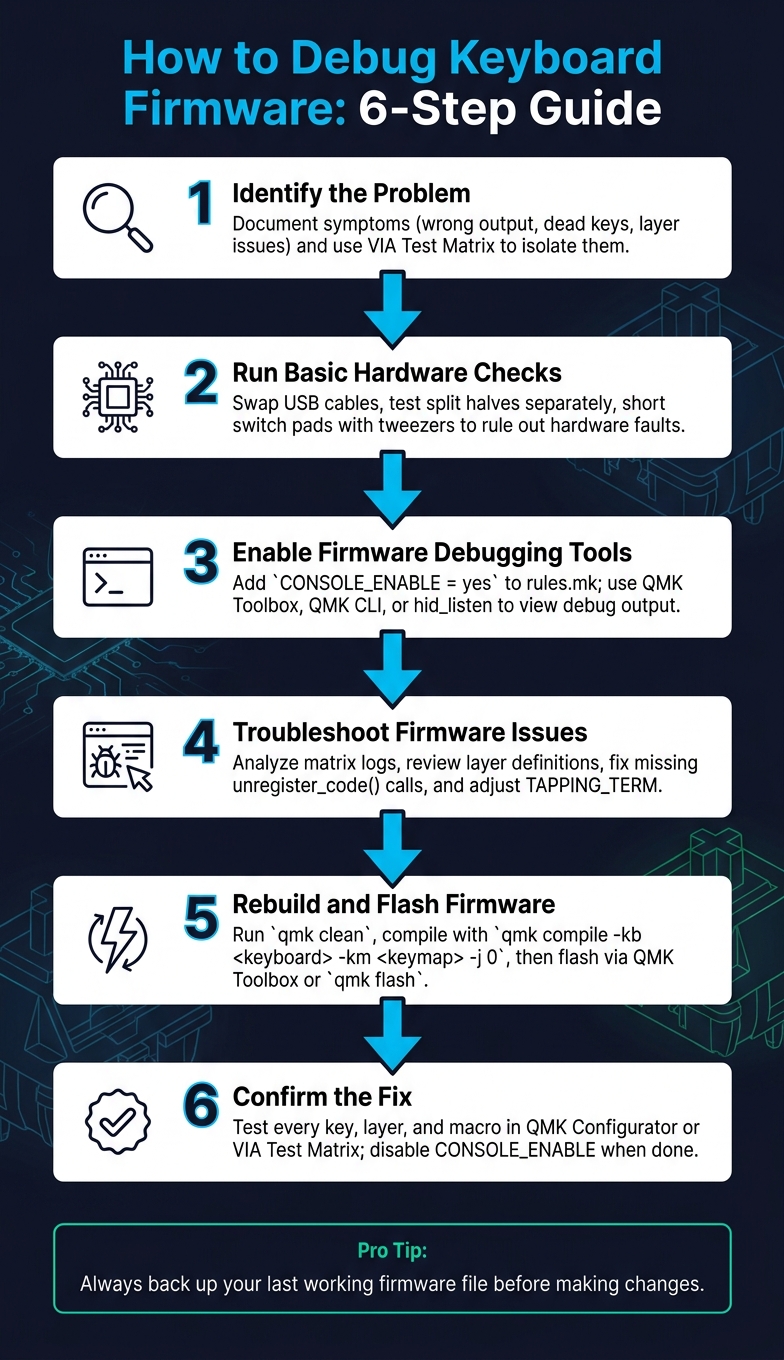
- Recognize Symptoms: Issues like incorrect key outputs, unresponsive layers, or inconsistent tap-hold functionality often point to firmware problems.
- Differentiate Firmware vs. Hardware: Use tools like VIA's "Test Matrix" or short PCB switch pins with tweezers to isolate the issue.
- Check Hardware First: Inspect cables, connections, and the PCB for physical defects before diving into firmware.
- Enable Debugging Tools: Activate debug mode in QMK to log key presses, matrix scans, and firmware behavior.
- Fix Firmware Errors: Review matrix configurations, layer definitions, and macro logic to resolve misconfigurations.
- Rebuild and Flash: Compile the corrected firmware and flash it onto your keyboard using tools like QMK Toolbox.
- Test Thoroughly: Verify every key, layer, and macro function after flashing to confirm the fix.
How to Debug Keyboard Firmware: 6-Step Troubleshooting Guide
QMK Firmware Tutorial: Compiling & Flashing (Part 4)
sbb-itb-3cb9615
Step 1: Identify the Problem
Before jumping into reflashing, take the time to figure out exactly what's going wrong. Skipping this step can make diagnosing and fixing the issue much harder later on.
Document the Symptoms
Start by noting down the details: which keys are acting up, what (if anything) they output, and when the problem first started. Use a key testing tool like VIA's "Test Matrix" to check for firmware-level responses. This is especially important because keys like Fn or layer toggles are managed by the firmware and might not show up on a standard browser-based tester, even if they're working. If you're using one of our split keyboards, plug the USB cable directly into each half to see if the problem is limited to one side or related to the interconnect cable. These notes will help you figure out whether you're dealing with a firmware or hardware issue.
Tell Apart Firmware vs. Hardware Issues
Once you've documented the symptoms, the next step is figuring out whether the problem lies in the firmware or the hardware. To test this, try shorting the switch pin pads on the PCB with a pair of tweezers. If the key works after shorting, the switch itself is likely the issue. If it still doesn't respond, the problem might be a PCB trace failure or a firmware mapping error.
Patterns in the failure can also give you clues:
"If a key fails based on timing, think firmware. If it fails based on pressure, angle, or physical movement, think hardware." - MouseTest.online
Here's a quick reference table to help identify the likely cause based on symptoms:
| Symptom | Likely Cause |
|---|---|
| Key is completely dead, with no response | Hardware (e.g., switch, solder joint, or trace) |
| Key registers but outputs the wrong character | Firmware mapping error |
| Failure depends on the duration of key press | Firmware-related settings (tap-hold, debounce) |
| Entire row or column of keys fails | Problem with a shared matrix line or configuration |
| Issue appears only on a specific layer | Error in the firmware layer definition |
| Intermittent success after multiple presses | Worn switch, cold solder joint, or bent pin |
If you're still unsure, try flashing a basic "vanilla" keymap - one without macros, layers, or tap-hold functions - and test the keyboard again. If the issue goes away, it's likely a firmware problem. If it remains, the hardware may be at fault. Figuring out whether the problem is in the firmware or hardware will help you decide how to move forward with troubleshooting.
Step 2: Run Basic Hardware Checks
Before diving into code, it's smart to do a quick physical check to rule out hardware issues. A lot of firmware problems can actually trace back to something as simple as a loose connection, a faulty cable, or using a USB cable that only handles power and not data.
Check Connections and Power
Start by swapping out your USB cable. Many cables are designed for charging only and don’t transmit data. If your keyboard lights up but doesn’t respond on your computer, this could be the problem. A quick cable swap can save you a lot of troubleshooting time.
Once you’ve ruled out the cable, use a debugging tool to confirm your device is being detected. If you’re using hid_listen, it will show "Waiting for device" if the board isn’t detected. When it switches to "Listening," it means the connection is working. On Linux, if the device still isn’t showing up, you might need to add a udev rule, such as /etc/udev/rules.d/70-hid-listen.rules, to grant the necessary permissions for accessing the keyboard’s HID interface.
For split keyboards, test each half separately before connecting them together. If one half works on its own but fails when connected, the issue is likely with the interconnect cable. Make sure you’re using a 4-ring TRRS cable instead of a 3-ring TRS cable. That extra ring is crucial for the data channel.
Once you’ve confirmed all connections are solid, you can move on to testing the PCB and individual components.
Test Switches and PCB Function
After ensuring proper connectivity, check whether individual keys are registering. You can do this by shorting the switch pin pads of the unresponsive key using tweezers or a bent paperclip. If the keypress appears in VIA's Key Tester or QMK Configurator, the PCB and firmware are functioning correctly, and the issue likely lies with the physical switch itself.
Take a close look at the board for potential assembly issues like inverted diodes, misaligned controllers, or unsoldered pins. These small mistakes can easily mimic firmware problems. If the controller still doesn’t respond, use a multimeter to check for continuity and ensure there’s proper voltage at the VCC pins before assuming the firmware is to blame.
Step 3: Enable Firmware Debugging Tools
Once hardware issues are ruled out, it's time to focus on software. Enabling firmware debugging tools allows you to zero in on software problems. QMK's built-in USB console is a great option for this, but you'll need to enable it first.
Turn On Debug Mode
To activate debug mode, open your rules.mk file and add the line CONSOLE_ENABLE = yes. Next, you’ll need to enable the console output. You can do this by assigning DB_TOGG in your keymap or by setting debug_enable = true in the keyboard_post_init_user function.
"Your keyboard will output debug information if you have
CONSOLE_ENABLE = yesin yourrules.mk." - QMK Firmware Documentation
Once debug mode is enabled, you can start viewing output. For even more detailed logging, set debug_matrix = true to monitor which rows and columns are activated on your PCB. To make keycodes more user-friendly (e.g., displaying KC_A instead of a raw hex value like 0x0004), add KEYCODE_STRING_ENABLE = yes to your rules.mk file.
Keep in mind that enabling the console increases firmware size. Boards with limited flash memory, like the Planck (which maxes out at 28,672 bytes), may exceed their capacity. If this happens, you can slim down your firmware by disabling unused debug features using #define NO_DEBUG or #define NO_PRINT in your config.h file.
Use Debugging Interfaces
Once debug mode is active, you’ll need a tool to view the output. Here are some options to consider:
| Tool | Interface | Best For |
|---|---|---|
| QMK Toolbox | GUI (Windows/macOS) | Beginners seeking a visual interface for flashing and log viewing |
| QMK CLI | Terminal (cross-platform) | Developers working within the QMK environment; use qmk console |
| hid_listen | Standalone CLI (all platforms) | Lightweight option for log access without the full QMK setup |
For newcomers, QMK Toolbox is a solid choice. It listens for HID messages on usage page 0xFF31 and usage 0x0074, which aligns with QMK's console output. If you’re using Linux and hid_listen doesn’t detect your device, try running it with sudo. Alternatively, set up a udev rule in /etc/udev/rules.d/ using your keyboard’s vendor and product IDs to avoid needing root access.
When writing debug strings with uprintf() or dprintf(), make sure they end with a newline (\n). Tools like QMK Toolbox display messages line by line, so forgetting the newline may cause your messages to appear incorrectly.
With debug mode enabled and an interface selected, you can now track down firmware issues more effectively before making any changes or reflashing your custom mechanical keyboard.
Step 4: Troubleshoot Firmware Issues
Take a close look at your debug output to pinpoint problems - whether it’s a misconfigured matrix or a glitchy macro. This step shifts the focus from hardware checks to the firmware logic itself.
Check Matrix Scanning and Keycodes
If pressing a key results in no response - or triggers the wrong key - start by examining the matrix log. With debug_matrix = true enabled, each keypress generates a log entry like this:
KL: kc: 169, col: 0, row: 0, pressed: 1
The col and row values show the exact intersection on the PCB that the firmware detected. If these coordinates don’t match the key you physically pressed, there’s likely an issue in your matrix map. Double-check the MATRIX_ROW_PINS or MATRIX_COL_PINS settings in config.h or info.json. If there’s no output at all, that points to a hardware fault.
The pressed field is also crucial: 1 indicates the key is pressed, while 0 means it’s released. If you see a pressed: 1 without a corresponding 0 after releasing the key, the firmware mistakenly believes the key is still held down.
To dig even deeper, enable KEYCODE_STRING_ENABLE = yes in your rules.mk file and use get_keycode_string(keycode) in debug prints. This will output something like kc: LT(2,KC_D), making it clear what the firmware is interpreting.
For performance insights, add DEBUG_MATRIX_SCAN_RATE to config.h. This will display the matrix scan frequency in Hz. A properly functioning board typically scans hundreds of times per second; if you see unusually low or inconsistent numbers, it could indicate a performance bottleneck in your firmware.
Once the matrix logs are verified, move on to analyzing layers and macros.
Review Layers and Macros
Troubleshooting layers and macros can be trickier since these issues often stem from higher-level logic, not the matrix itself. Insert uprintf calls into your process_record_user function to confirm whether specific code paths are being executed. For example, logging "Entering Layer 2" when a layer switch is triggered will immediately tell you if the layer toggle is functional.
Check that every register_code() call has a corresponding unregister_code(). If the release call is missing, the firmware will treat the key as perpetually pressed, even after you physically release it. Carefully audit your keymap for any such errors.
If layer behavior seems odd after reflashing, the EEPROM might be interfering. On VIA-enabled keyboards, the EEPROM often stores a keymap that overrides the one you’ve just flashed. To clear it, hold the Bootmagic key (usually Escape) while plugging in the keyboard, or use the QK_CLEAR_EEPROM keycode. This forces the firmware to default to your freshly compiled keymap.c.
For LT (Layer-Tap) or MT (Mod-Tap) keys that feel sticky or misfire, try adjusting the TAPPING_TERM value in config.h. Increasing this value gives you more time to distinguish between a tap and a hold. If you’re using PERMISSIVE_HOLD, consider turning it off to see if that resolves any unexpected activations.
If the debug output becomes overwhelming, flash a simplified keymap with only basic keycodes and no custom logic. If the problem disappears, gradually reintroduce your layers and macros one at a time until the issue reappears. That will help you pinpoint the specific feature causing the problem.
Step 5: Rebuild and Flash Firmware
Once you've addressed any firmware issues, it's time to rebuild and flash your updated firmware.
Rebuild with the Correct Settings
Start by double-checking your two key configuration files: rules.mk and config.h. These files control how your firmware is built. Specifically, the rules.mk file determines which features are compiled, while config.h deals with hardware-specific settings. Pay special attention to the BOOTLOADER value in rules.mk, as it must match your board's hardware. Common bootloader types include atmel-dfu, caterina, and stm32-dfu. Using the wrong bootloader type will cause the flashing process to fail.
Here are some feature settings to confirm before you compile:
| Feature Setting | File | Purpose |
|---|---|---|
CONSOLE_ENABLE = yes |
rules.mk |
Enables debug output to the console |
NKRO_ENABLE = yes |
rules.mk |
Activates N-Key Rollover support |
EXTRAKEY_ENABLE = yes |
rules.mk |
Enables audio and system control keys |
BOOTLOADER = <type> |
rules.mk |
Specifies the flashing protocol for the MCU |
To prepare for the rebuild, run qmk clean to clear out previous build artifacts. Then, compile your firmware using the command:
qmk compile -kb <keyboard> -km <keymap> -j 0
The -j 0 option ensures all CPU cores are used for faster compilation.
If you're working with boards like the Planck, keep an eye on the firmware size. The file must stay under 28,672 bytes (7,000h). Enabling too many features can push the file size over this limit, which will prevent flashing and may leave the board stuck in DFU mode.
Once you've successfully compiled the firmware, you're ready to flash it onto the keyboard.
Flash the Firmware to the Keyboard
To begin flashing, you'll need to put your keyboard into bootloader mode. If you're new to the hobby, check out our Mechanical Keyboards 101 guide for more basics. You can do this by:
- Pressing the physical RESET button on the PCB.
-
Using the
QK_BOOTkeycode if it's already mapped to a key. - Shorting the RST and GND pins with a paperclip.
For most users, QMK Toolbox is the simplest tool for flashing. Load the .hex or .bin file, select the appropriate MCU (e.g., atmega32u4), and click Flash when the device is detected. If you prefer using the terminal, the command qmk flash -kb <keyboard> -km <keymap> will both compile and flash the firmware in one step, waiting for the bootloader device to appear automatically.
"It is very important that you do not unplug the keyboard or otherwise interrupt the flashing process while the firmware is being written." - QMK Firmware Documentation
If you're working with a board that uses the Caterina bootloader (common with Pro Micro builds), keep in mind that the bootloader mode only lasts 7 seconds. Make sure QMK Toolbox is open and ready before you trigger the reset. On Windows, if the board isn't detected, you may need to run the QMK driver installer or use Zadig to install the correct bootloader drivers.
Step 6: Confirm the Fix
Once the firmware has been flashed, it’s time to make sure everything is working as expected. Take a moment to confirm that the original problem is resolved and that no new issues have cropped up during the process.
Test Key Functions
Start by pressing each key to ensure it outputs the correct response.
"Testing your keyboard is usually pretty straightforward. Press every single key and make sure it sends the keys you expect." - QMK Firmware Documentation
The easiest way to do this is by using QMK Configurator's Test Mode, which you can access at config.qmk.fm. This browser-based tool doesn’t require installation and provides a visual layout that highlights each key as it registers. It’s a quick way to spot any keys that are unresponsive or misfiring. If your keyboard is compatible with VIA, use the Test Matrix tab instead. This is particularly helpful for keys like Fn that don’t send standard keycodes to the operating system and might not show up in a basic tester.
For layers and macros, test them thoroughly. For example, hold your layer key (like Fn) and press a secondary key (such as Fn + 1) to confirm that the expected output - such as F1 - appears in the tester. If you’re working with a split keyboard, test each half individually via USB before connecting them together. Once all keys, layers, and macros work as they should, you’re ready to finalize your build.
Return to Normal Configuration
After confirming that everything is functioning properly, it’s time to clean up your firmware settings. This step is crucial for optimizing your firmware size and ensuring smooth operation, especially in BIOS/UEFI environments. Debug features, while useful during testing, can cause compatibility issues and take up unnecessary memory.
To finalize your configuration:
-
Set
CONSOLE_ENABLE = noin yourrules.mkfile. -
Disable debug mode by either using the
DB_TOGGkeycode or settingdebug_enable=falsein yourkeymap.c.
Once these adjustments are made, compile and flash a clean build onto the keyboard. Flashing tools will automatically restore application mode. If you encounter detection problems during this process, running qmk doctor can help identify and resolve lingering issues.
Conclusion and Final Tips
Key Takeaways
When debugging firmware, it's essential to take a structured approach: document the symptoms, rule out hardware problems, and then address firmware issues. Each step builds on the last, so skipping around can lead to unnecessary confusion.
Here are a few practical tips to keep in mind:
- Always back up your last working firmware file to avoid losing a stable version.
-
Add the
QK_BOOTkeycode to your keymap, so you can easily enter flashing mode without needing to disassemble your keyboard. -
Once you're done debugging, make sure to disable
CONSOLE_ENABLEto avoid unnecessary complications.
Also, keep in mind that EEPROMs are designed to handle roughly 100,000 write cycles. This serves as a helpful benchmark to avoid excessive flashing.
Resources for Further Learning
For an in-depth dive into firmware details, check out the QMK Documentation. If you run into issues, the QMK Discord is a great place to ask questions and troubleshoot. Additionally, running qmk doctor can be a quick way to diagnose build environment problems.
If hardware issues persist, consider upgrading your setup with reliable components to ensure smoother operation.
Shop Keyboard Components at KeebsForAll

Sometimes debugging uncovers hardware problems, like a bad PCB or worn-out switches. If that happens, KeebsForAll offers a wide selection of mechanical keyboard components. Looking for pre-built custom keyboards? The KFA Marketplace has you covered with plenty of options to explore.
FAQs
How do I know it’s firmware and not hardware?
To figure out if the problem is related to firmware, look for clues such as the keyboard entering DFU mode, error messages in tools like QMK Toolbox, or keys remaining unresponsive even after confirming the hardware connections are intact. If re-flashing the firmware fixes the issue or the PCB is recognized as an unknown device, it’s likely a firmware problem. On the other hand, if you suspect hardware issues, check for visible damage or use a multimeter to test the components.
Why do my layers or macros stop working after flashing?
When layers or macros stop working after flashing, it’s often due to issues like corrupted firmware, problems with the EEPROM, or incorrect layer configurations. Common culprits include interrupted flashing, using mismatched firmware, or omitting KC_TRNS for transparent keys in your keymap.
To fix this:
- Re-flash the correct firmware: Ensure you’re using the appropriate firmware version for your device.
- Reset the EEPROM: If problems persist, clearing the EEPROM can help resolve configuration conflicts.
-
Double-check your layers and keymap: Verify that your keymap includes
KC_TRNSwhere necessary and that all layers are set up correctly.
Addressing these steps usually resolves the problem, restoring proper functionality to your layers and macros.
What should I do if my keyboard won’t enter bootloader mode?
If your keyboard isn’t entering bootloader mode, here are some steps to try:
- Press the reset button: Look for a physical reset button on the PCB. You might need to double-tap it.
- Short the RST and GND pins: Use tweezers or a jumper wire to connect the RST and GND pins while plugging in the USB cable.
- Try key combinations: Some keyboards use specific shortcuts like Space + B or Shift + Pause to trigger bootloader mode.
- Inspect your USB connection: Ensure your USB cable and port are functioning properly.
If these steps don’t help, refer to your keyboard’s documentation for model-specific guidance.