
How to Flash Firmware on a Keyboard PCB
[ Back to Mechanical Keyboards 101 ]Flashing firmware on a keyboard PCB is the process of installing the software that makes your custom keyboard functional and customizable. Here’s a quick overview:
- What You Need: A data-compatible USB cable, QMK Toolbox (for flashing), QMK Configurator (for keymap design), and Zadig (for driver issues on Windows).
-
Steps:
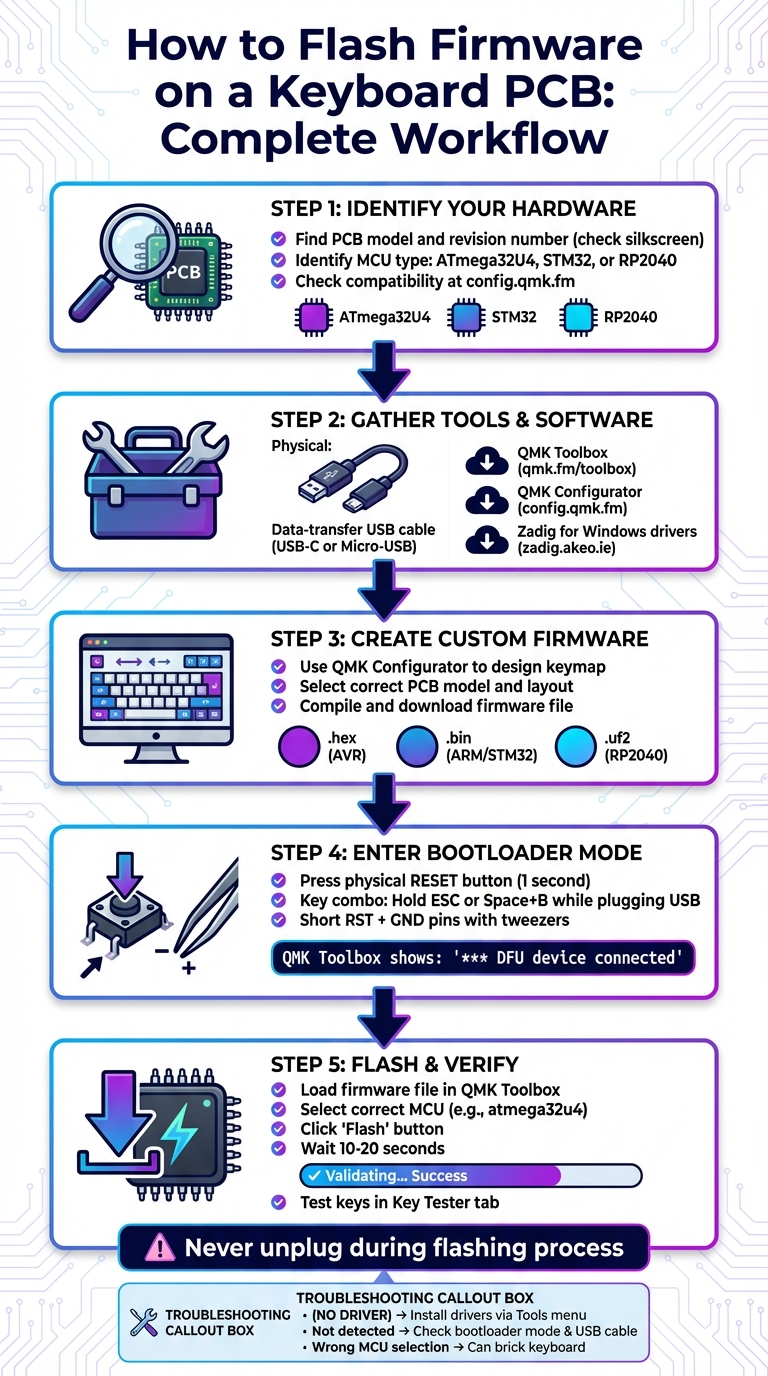
- Identify your PCB model and MCU (e.g., ATmega32U4, STM32, RP2040).
- Ensure firmware compatibility with your PCB to avoid damage.
- Enter bootloader mode via a reset button, key combination, or by shorting reset pins.
- Use QMK Toolbox to load and flash the firmware file (.hex, .bin, or .uf2 based on MCU type).
- Troubleshooting: Check drivers, use the correct USB cable, and verify bootloader mode if issues arise.
Flashing firmware allows you to customize keymaps, macros, and layers, ensuring your keyboard works seamlessly across all devices without extra software. Follow these steps carefully to avoid errors and enjoy a fully functional custom keyboard.
Step-by-Step Guide to Flashing Keyboard Firmware with QMK
Firmware and PCB Compatibility
What Firmware Does
Firmware acts as the brain of your keyboard, essentially serving as its operating system. Stored in the Micro Controller Unit (MCU), it handles everything from detecting key presses to managing keymapping and controlling hardware features like RGB lighting. As the QMK Documentation puts it, the MCU "runs software that is responsible for detecting button presses and informing the computer when keys are pressed. QMK Firmware fills the role of that software".
Think of the MCU as the keyboard’s CPU. It executes firmware instructions independently of your computer’s operating system. This independence is why custom key layouts and macros work seamlessly across different computers, without needing extra drivers. Before diving into mechanical keyboard basics and customization, you’ll want to ensure your PCB is compatible with the firmware you plan to use.
Checking Your PCB Compatibility
Matching the right firmware to your PCB is absolutely crucial. Using incompatible firmware can "brick" your keyboard, potentially rendering it permanently unusable. For instance, firmware designed for a standard 60% keyboard layout won’t function properly on a 60% layout that includes arrow keys if the matrix mapping differs.
To check compatibility, start by identifying your PCB model and revision number. Look at the silkscreen on the PCB (often found underneath) for labels like "Rev. 1" or "Rev. 6." These labels indicate the revision, which may dictate differences in microcontrollers or bootloaders. Additionally, inspect the largest chip on the PCB for markings such as "ATmega32U4", "STM32", or "RP2-B1" to identify the MCU type.
Once you’ve identified your PCB, use the QMK Configurator at config.qmk.fm to confirm compatibility. When connecting your keyboard in bootloader mode, tools like QMK Toolbox will display details about the MCU and bootloader in yellow text, helping you verify the correct settings. Keep in mind that different bootloaders require specific file types for flashing. For example, AVR-based boards use .hex files, while ARM-based boards like those with STM32 chips require .bin or .uf2 files.
Tools and Software You'll Need
Physical Tools
To connect your PCB to your computer, you'll need a data-transfer USB cable. Make sure the cable matches your board's port type, such as USB-C or Micro-USB. Be cautious - charging-only cables won't work since they lack the data lines needed for QMK Toolbox to detect your device.
If your PCB doesn’t have a physical reset button, you can use a paperclip or tweezers to short the reset (RST) and ground (GND) pins, which will force the board into bootloader mode. If you see a small tactile button on the back of your PCB, use that instead - it’s a safer and easier option.
For split keyboards, you’ll typically use TRRS or USB-C interconnect cables to link the two halves during regular use. However, these cables aren’t used for flashing. Each half must be connected directly to your computer when programming.
Software Downloads
You’ll need a few software tools to program your keyboard:
-
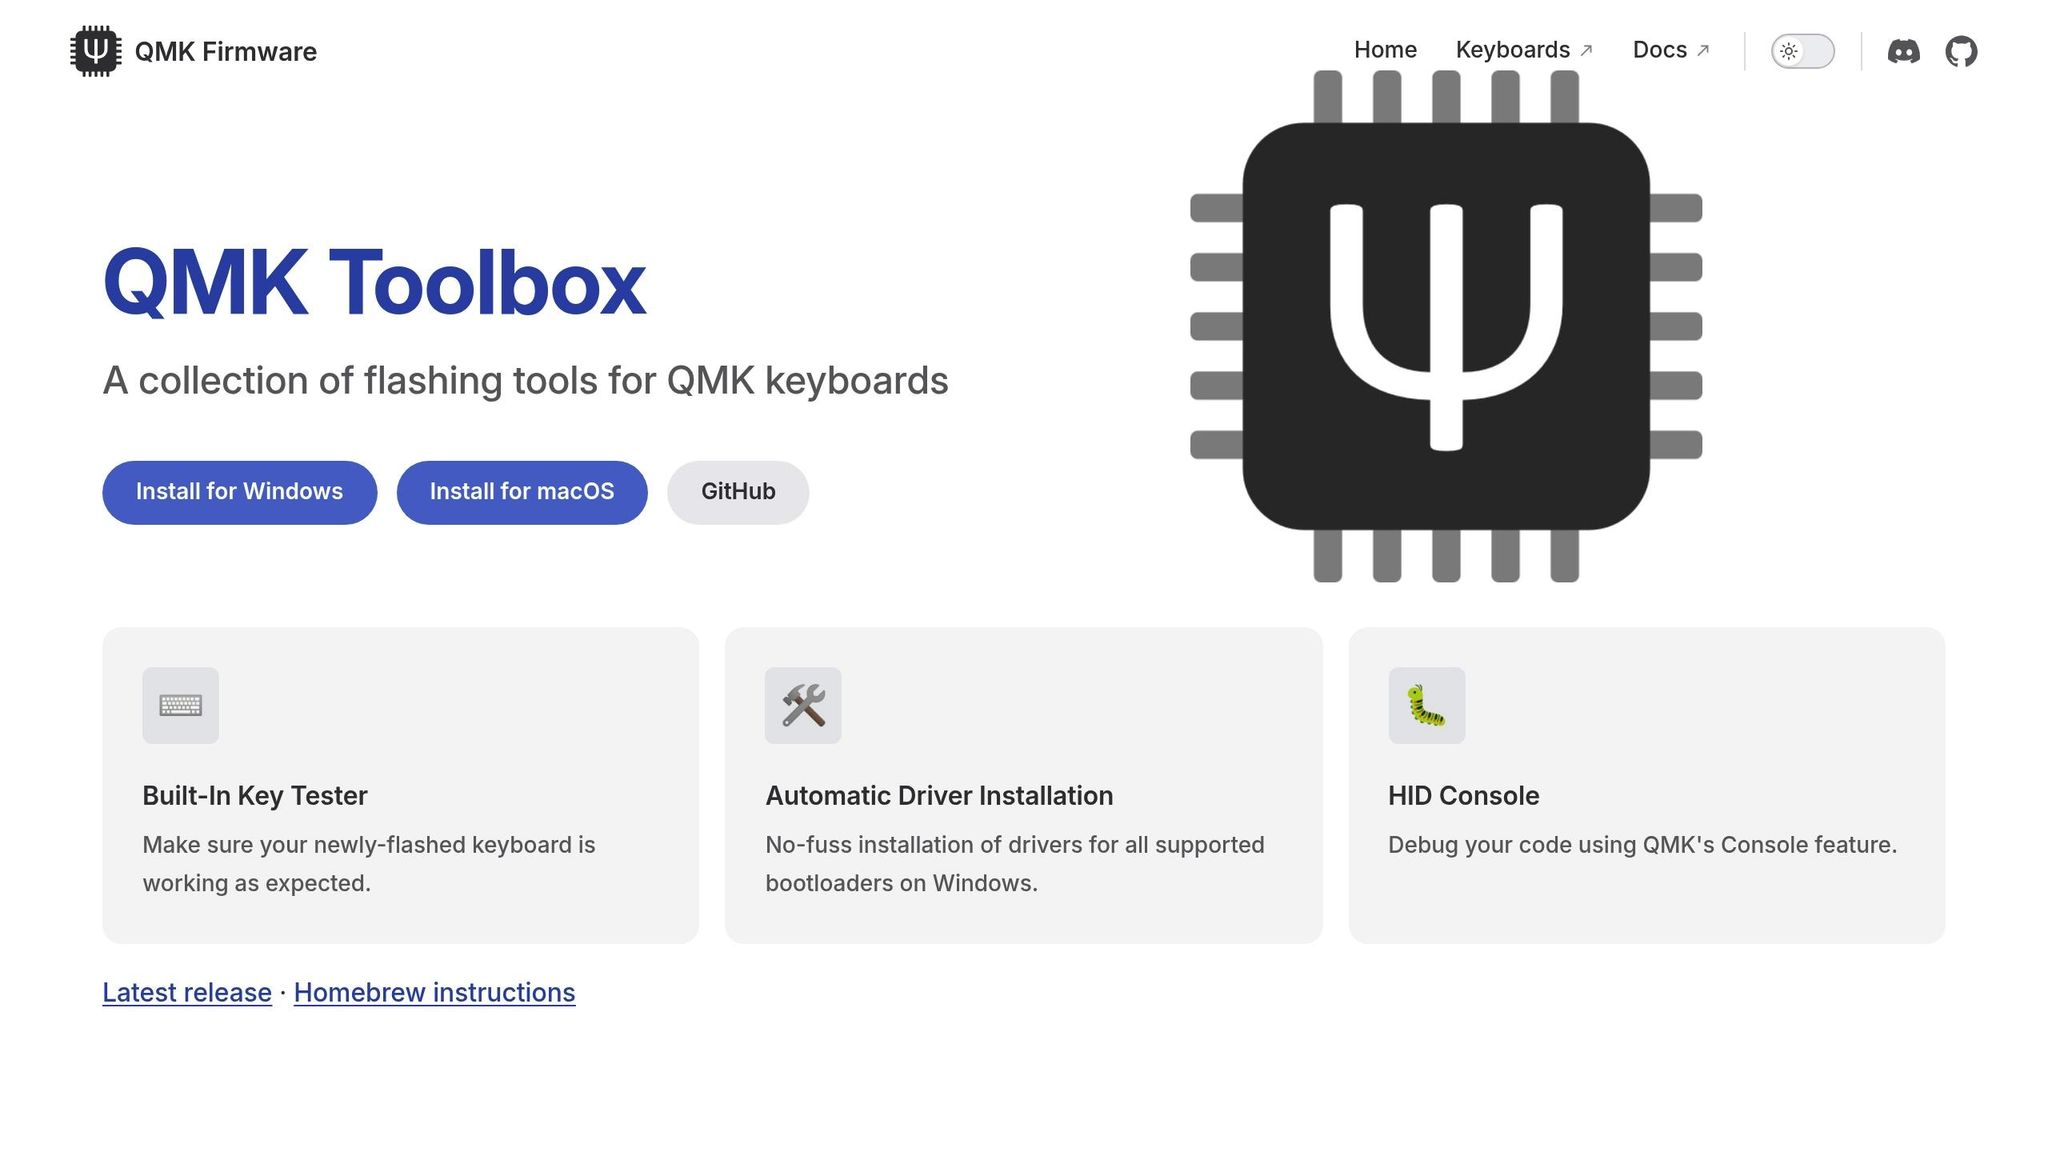
QMK Toolbox: This software is available for Windows, macOS, and Linux (CLI). You can download it from qmk.fm/toolbox or the official GitHub releases page for qmk/qmk_toolbox. The current stable release as of mid-2024 is version 0.3.3, though any version 0.0.21 or later should work reliably. macOS users can also install QMK Toolbox via Homebrew by running:
Linux users will need to use the command-line interface (brew install qmk-toolboxqmk flash) for programming, as a graphical interface isn’t available. - QMK Configurator: This web-based tool, accessible at config.qmk.fm, lets you design your keymap and compile the firmware file. It works across all operating systems but does require an internet connection.
- Zadig: If QMK Toolbox shows "(NO DRIVER)" when your keyboard is connected on Windows, you may need Zadig to install the correct USB drivers for your bootloader. You can download it from zadig.akeo.ie. Alternatively, QMK Toolbox has an "Install Drivers" option under its Tools menu to simplify this process.
Here’s a quick overview of the software:
| Software | Purpose | Platform | Official Source |
|---|---|---|---|
| QMK Toolbox | Flashing firmware to PCB | Windows, macOS | qmk.fm/toolbox |
| QMK Configurator | Creating custom keymaps | Web Browser | config.qmk.fm |
| Zadig | Driver repair/installation | Windows | zadig.akeo.ie |
Once you’ve gathered your physical tools and downloaded the necessary software, you’ll be ready to start creating and customizing your firmware.
Creating and Customizing Your Firmware
Using QMK Configurator
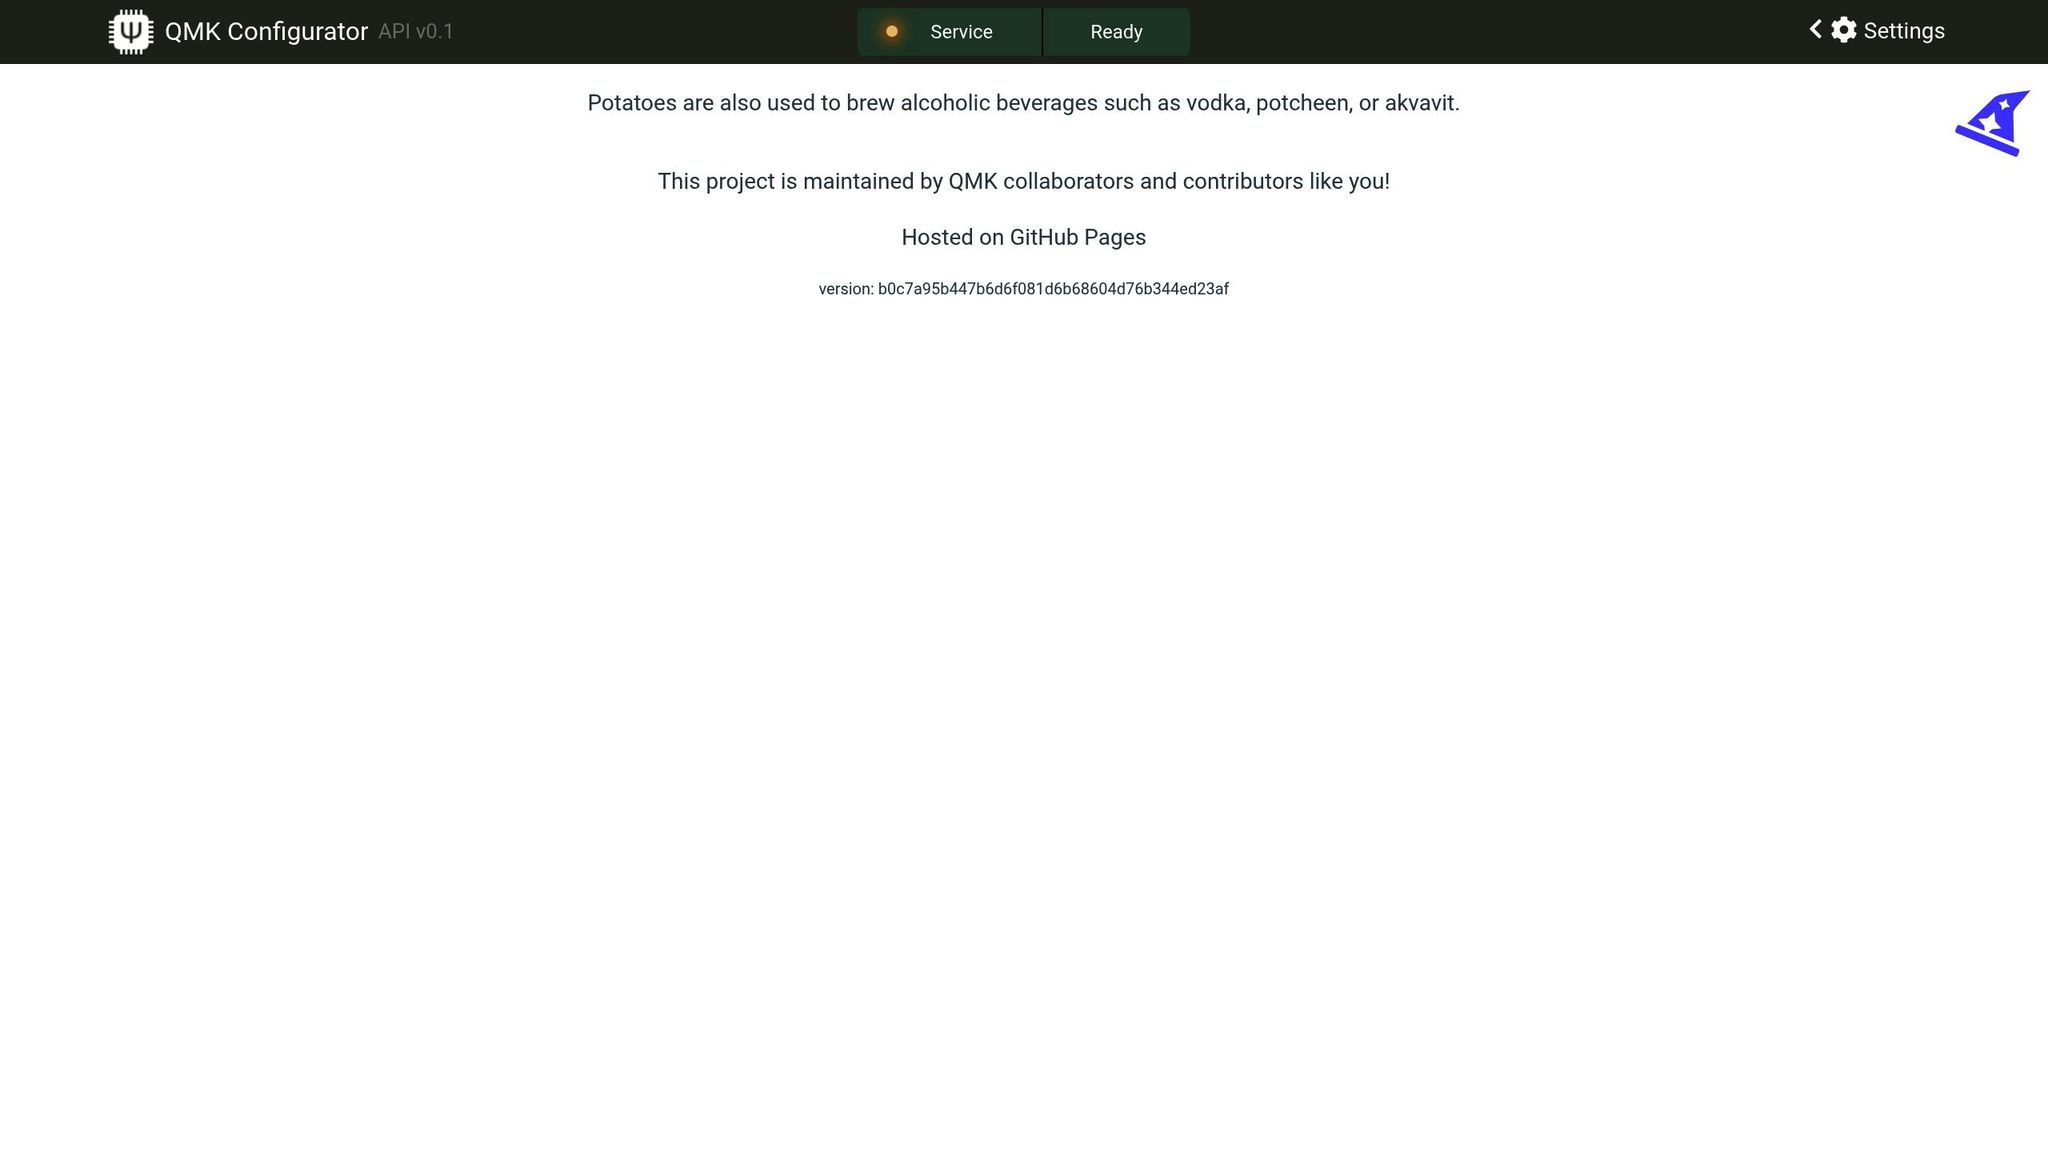
To get started, head over to config.qmk.fm using either Chrome or Firefox. From there, select your keyboard model from the dropdown menu. This step is crucial because even keyboards with the same name might have different versions of PCBs, each with unique microcontrollers or pin assignments. Be sure to confirm your PCB version by checking its markings, and select the correct one as documented.
Once you've chosen the right model, pick a layout that matches your keyboard's physical structure. If you can't find an exact match, use the LAYOUT_all option as a fallback. From here, you can start customizing your keymap. Simply click on a key position to assign a keycode, or drag and drop codes onto the layout. You can even define up to 32 layers to add extra functionality. To switch between layers, use special "Quantum" keys like MO(layer). If your layout shows more keys than your keyboard physically has, just leave those extra keys blank.
Before compiling your firmware, make sure to download the JSON layout file. This file saves your custom settings, as the compiled firmware itself can’t be re-imported. When you're ready, hit the "Compile" button - often symbolized by a "baking potato" icon - to generate the machine-readable firmware. Once the process finishes, click "Download Firmware" to get your .hex, .bin, or .uf2 file.
Before moving forward, double-check the firmware file type to ensure it’s compatible with your keyboard's microcontroller.
Firmware File Types
It’s important to note that the downloaded JSON file is just a configuration file - it’s not the firmware you’ll flash onto your PCB. The actual firmware file format depends on the type of microcontroller your keyboard uses. For example:
-
AVR-based chips (e.g., ATmega32U4) require a
.hexfile. -
ARM-based chips (e.g., STM32) use a
.binfile. -
RP2040 controllers rely on a
.uf2file.
Make sure you’re using the correct file format for your specific microcontroller.
"Files from other tools such as Keyboard Layout Editor (KLE), or kbfirmware will not be compatible with QMK Configurator. Do not load them, do not import them."
- QMK Documentation
Firmware files are named using the format <keyboard>_<keymap>.<extension> (e.g., planck_rev5_mycustomlayout.hex). While QMK Configurator automatically generates the correct file type based on your keyboard selection, it’s always a good idea to verify that the format matches your PCB’s microcontroller before proceeding with the flashing process.
QMK Tutorial: QMK Toolbox (Flashing Firmware On Your Keyboard)
sbb-itb-3cb9615
Entering Bootloader Mode
Before you can flash new firmware onto your keyboard, you'll need to put it into bootloader mode. This is a special state where the keyboard's microcontroller is ready to accept firmware uploads. While in bootloader mode, your keyboard won't respond to typing - this is completely normal and temporary.
"Different keyboards have different ways to enter this special mode. If your PCB currently runs QMK, TMK, or PS2AVRGB... and you have not been given specific instructions, try [standard combinations] in order." - QMK Documentation
The method to enter bootloader mode depends on your keyboard’s PCB design and microcontroller type. Most mechanical keyboards allow you to do this using one of three methods: pressing a physical reset button, using a specific key combination, or shorting header pins on the PCB. Once in bootloader mode, QMK Toolbox will confirm the connection.
Using the Reset Button
The easiest way to enter bootloader mode is by pressing the physical reset button on your PCB. Look for a small tactile switch labeled "RESET" on the underside of the board. Press and hold this button for about one second, then release it. Your keyboard should immediately switch to bootloader mode, and QMK Toolbox will verify the connection.
For keyboards with RP2040-based boards (like those using Elite-Pi controllers), you may need to double-tap the reset button quickly instead of holding it down. Similarly, if your board features a Pro Micro with a Caterina bootloader, double-tapping the button is required. Keep in mind, these controllers stay in bootloader mode for only about 750 milliseconds.
Key Combination Method
If your keyboard is fully assembled and accessing the PCB is inconvenient, you can try entering bootloader mode using key combinations. This method works on keyboards with Bootmagic firmware enabled. Common key sequences include:
- Hold Esc while plugging in the USB cable
- Hold Space + B while plugging in the USB cable
- Press Left Shift + Right Shift + Pause at the same time
Test these combinations one by one until QMK Toolbox detects your keyboard. If these attempts are unsuccessful, you may need to move on to shorting header pins.
Shorting Header Pins
For keyboards without a reset button - or if you're trying to recover a bricked keyboard - you can manually trigger bootloader mode by shorting the RESET and GND header pins on your PCB. Look for labels like "RESET" and "GND" on the board.
Using a metal tool such as tweezers or a paper clip, touch both pins at the same time while plugging the keyboard into your computer. If your board uses a Caterina bootloader, you may need to short the pins twice in quick succession.
Once your keyboard is in bootloader mode, you're ready to proceed with firmware flashing. Be cautious during this process - avoid unplugging the keyboard or interrupting the flashing sequence. With bootloader mode enabled, you're all set for the next step: flashing the firmware using QMK Toolbox.
Flashing Firmware with QMK Toolbox
Once your keyboard is in bootloader mode and QMK Toolbox is ready, you can begin flashing the firmware. This process involves erasing the old firmware, writing the new one, and verifying it. It’s crucial not to interrupt the process once it starts.
"It is very important that you do not unplug the keyboard or otherwise interrupt the flashing process while the firmware is being written." - QMK Documentation
Loading Your Firmware File
Start by opening QMK Toolbox. Drag your firmware file (such as a .hex or .bin file) into the "Local file" box, or click "Open" to browse and select it manually.
Next, choose the correct microcontroller from the dropdown menu in the top right corner. For many AVR boards, this will be atmega32u4. Double-check your keyboard's documentation to ensure accuracy - selecting the wrong microcontroller could damage your PCB. Once the keyboard enters DFU mode, QMK Toolbox will display a yellow message: *** DFU device connected. With the firmware file loaded and the correct microcontroller selected, you’re ready to proceed.
Flashing and Verification
Click "Flash" to start the process. QMK Toolbox will take care of erasing the old firmware, writing the new one, and verifying it. This usually takes 10–20 seconds. During this time, make sure the keyboard remains connected.
When the process completes successfully, you’ll see "Validating... Success" in the console, followed by *** DFU device disconnected.
A great example of this process in action comes from January 2021, when Cansu Sener of KeebsForAll demonstrated flashing the Freebird60 Hot Swap PCB. Using the atmega32u4 microcontroller and a custom .hex file, Sener entered DFU mode by holding the Escape key while plugging in the keyboard. The flashing process concluded with the "Success" message in the console.
"If you see the words success in the output as well as DFU device disconnected, then it means the process likely worked as intended." - Cansu Sener, KeebsForAll
After flashing, unplug and reconnect the USB cable to activate the new firmware. To ensure everything is functioning properly, open the "Key Tester" tab in QMK Toolbox and press each key to confirm they register correctly. If any keys fail to respond, you may need to reflash or troubleshoot your firmware configuration.
Troubleshooting Common Problems
Even with careful preparation, firmware flashing can sometimes hit a few snags. Whether it’s a driver hiccup, a misconfigured setting, or a quirky hardware issue, most problems can be resolved without causing any damage to your PCB.
Keyboard Not Detected
Your keyboard will only show up in QMK Toolbox when it’s in bootloader mode - and while in this mode, it won’t function for typing. If you’re using Windows and QMK Toolbox displays (NO DRIVER) next to your connected device, it means the bootloader drivers are missing. To fix this, go to Tools > Install Drivers in QMK Toolbox, or manually install them using the Zadig utility.
If your keyboard isn’t entering bootloader mode, refer to the "Entering Bootloader Mode" section for PCB-specific instructions. Typically, you can either press the physical RESET button or short the RESET and GND header pins using tweezers.
Some controllers only stay in bootloader mode for a short time. If you see an error like butterfly_recv(): programmer is not responding, it means the device exited bootloader mode too quickly. In this case, double-tap the reset button or short the RST and GND pins twice within 750 milliseconds to extend the window for flashing. Also, check your USB cable - some are "charge-only" and can’t transfer data. If that’s the issue, switch to a data-compatible cable and plug it directly into your motherboard instead of using a hub.
Flashing Errors
Flashing errors often occur when the MCU selected in QMK Toolbox doesn’t match your PCB’s chip. For example, an ATmega32U4 board won’t accept firmware designed for STM32 chips. Always double-check your PCB documentation to confirm the correct MCU and firmware before clicking "Flash."
If you accidentally flash incorrect firmware, many PCBs can recover through a quick reset pin short. RP2040-based boards are especially forgiving - they have a UF2 bootloader permanently stored in ROM. If a flash fails on these boards, simply re-enter bootloader mode and try again.
Finding PCB-Specific Help
When standard troubleshooting steps fail, your next stop should be your PCB manufacturer’s documentation or community forums. For boards with STM32 or RP2-B1 chips that don’t respond to typical reset methods, the QMK Discord is a great resource for advice. If you’re using the command line, running qmk doctor can help diagnose setup issues or missing dependencies.
For split keyboards, ensure both halves are flashed individually with the same firmware file. If they stop communicating after an update, this step often resolves the problem. By following these troubleshooting tips, you’ll be well-prepared to handle any hiccups during the flashing process.
Conclusion
Flashing firmware becomes straightforward when you follow the right steps: identifying your MCU, preparing compatible firmware, entering bootloader mode, and using tools like QMK Toolbox. As Cansu Sener from KeebsForAll aptly says, "Once you've flashed your first PCB, it becomes muscle memory".
One crucial step is ensuring compatibility. Using incorrect firmware - like loading RP2040 firmware onto a Pro Micro - can permanently damage your PCB. Always double-check that your MCU selection matches your hardware. Also, use the correct file format: .hex for AVR chips or .bin/.uf2 for ARM-based controllers.
If you run into trouble, it’s often related to drivers or bootloader mode. For Windows users, seeing "(NO DRIVER)" in QMK Toolbox means you’ll need to install drivers via the Tools menu or use Zadig. If entering bootloader mode is the issue, try pressing the reset button or shorting the RST and GND pins. For split keyboards, remember to flash each half individually. These steps can help you resolve most common issues.
For those seeking high-quality components or pre-flashed PCBs, KeebsForAll’s Freebird series is a reliable option. They offer detailed flashing guides and competitive pricing, making it easier to build your custom keyboard.
With the right preparation and tools, flashing firmware becomes just another manageable step in personalizing your mechanical keyboard.
FAQs
How can I check if my keyboard PCB is compatible with specific firmware?
To determine if your keyboard PCB works with a specific firmware, start by identifying the microcontroller (MCU) and bootloader used in your PCB. This information is typically found in the PCB’s spec sheet or product page - sites like KeebsForAll often provide these details. Common MCUs include models like ATmega32U4, STM32, and RP2040, while bootloaders might include DFU, Caterina, or UF2.
Once you have this information, check it against the firmware’s list of supported boards. For instance, QMK firmware supports many hobbyist keyboards built with these MCUs, but you’ll need to confirm that your specific board or its MCU and bootloader combination is included. If it’s supported, you should be able to find a compatible firmware file, such as a .hex or .uf2 file.
Afterward, test if your PCB can enter bootloader mode. This can usually be done by pressing a reset button on the PCB or using a designated key combination. If the board successfully enters bootloader mode, it’s a strong sign that the firmware will work. If not, you might need to consider alternative firmware options or even upgrading the PCB’s components.
What can I do if my keyboard isn’t recognized in bootloader mode?
If your keyboard isn’t being detected in bootloader mode, here are a few troubleshooting steps you can try:
- Try different bootloader entry methods: Hold both Shift keys and press Pause or B. Another option is to unplug the keyboard, hold Space + B, plug it back in, and then release the keys. You can also test holding Esc or Left Ctrl while plugging the keyboard in. If your keyboard has a physical RESET button on the PCB, press it. Alternatively, you can short the RESET and GND pins during connection.
- Confirm the bootloader type: Different bootloaders require specific entry methods. For example, ATmega32U4, STM32, Caterina, or UF2 bootloaders each have unique processes. If your keyboard uses a UF2 bootloader, you may need to press the BOOTSEL button.
- Check your USB connection: A faulty USB cable or port might be the culprit. Try using a different cable or plugging into another USB port. Avoid using USB hubs, as they can sometimes interfere with detection.
If these steps don’t solve the problem, consider restarting your flashing software or updating your USB drivers - for example, installing WinUSB for DFU devices on Windows. For more help, share details about your keyboard’s PCB and bootloader with the KeebsForAll community. They’re a great resource for troubleshooting!
Can using the wrong firmware permanently damage my keyboard PCB?
Flashing the wrong firmware onto your keyboard’s PCB usually doesn’t cause lasting damage. If this happens, you can often fix it by re-flashing the correct firmware. However, it’s crucial to avoid interrupting the flashing process, as this can lead to temporary problems that might take additional troubleshooting to resolve.
To avoid unnecessary headaches, double-check that the firmware matches your specific PCB model before proceeding. A little extra caution upfront can save you a lot of time and frustration later on!