If your keycaps don’t fit properly, the problem usually comes down to stem compatibility, keyboard layout differences, or physical defects. Here’s a quick overview of what to watch for and how to fix it:
- Stem Compatibility: Keycaps are designed for specific switch types (e.g., Cherry MX, Topre, Alps). Mismatched stems can cause loose or tight fits.
- Layout Differences: Keyboards follow layouts like ANSI or ISO, which require different keycap sizes for keys like Enter, Shift, and Spacebar.
- Physical Defects: Warped keycaps, uneven stems, or stabilizer issues can lead to poor fit. These often result from manufacturing flaws or wear over time.
Quick Fixes:
- Check Compatibility: Verify your keyboard’s switch type and layout.
- Fix Loose/Tight Fits: Use PTFE tape for loose keycaps or sandpaper for tight ones.
- Address Warping: Use hot water or heat treatment to reshape warped keycaps.
- Adjust Stabilizers: Ensure stabilizers are properly aligned and wires are straight.
Pro Tip: Always measure your keycap sizes (in units like 1u, 2.25u) and check your keyboard’s specs before buying a new set. This avoids mismatches and ensures a perfect fit.
How to fix a loose keycap - Dwarf Factory

Switch Stem Compatibility
The switch stem - the small piece where a keycap attaches - comes in distinct designs that are not interchangeable. Here's a breakdown of common stem types and some practical advice for dealing with mismatches.
Common Stem Types
| Stem Type | Design | Compatibility | Common Usage |
|---|---|---|---|
| Cherry MX | Cross (+) | Most modern keycaps | Standard in today's mechanical keyboards |
| Alps | Rectangular | Alps-specific keycaps | Found in vintage keyboards and Matias switches |
| Topre | Circular | Topre-specific or with MX adapter | Used in HHKB and Realforce keyboards |
Cherry MX stems are the go-to standard in the mechanical keyboard world. They feature a cross-shaped design and are widely used, not just in Cherry switches but also in clones made by Gateron, Kailh, and Outemu. However, there are some key differences to note:
- Original Cherry MX stems are known for their precise manufacturing.
- Clones may have slight variations in thickness, which can affect fit.
- Box-style switches add extra housing around the stem for durability.
- Silent switches modify the stem to include dampening materials.
How to Fix Stem Mismatches
If your keycaps and switches aren’t compatible, here’s what you can do:
-
Identify Your Switch Type
Check your keyboard’s documentation or remove a keycap to examine the stem underneath. -
Confirm Keycap Compatibility
Look at the product descriptions for phrases like "Cherry MX compatible" or "for Topre switches". If unsure, reach out to the vendor for clarification. -
Tackle Fit Issues
If the keycap fits poorly but is technically compatible, try these fixes:- Loose fits: Wrap a thin strip of plastic around the stem to create more friction.
- Tight fits: Check for defects in the stem or keycap before making any adjustments.
- Avoid adhesives: Glue or similar materials can cause permanent damage to both the keycap and switch.
For some stem types, adapter solutions like MX-to-Topre adapters are available. However, these are best used as temporary fixes. Whenever possible, it’s better to choose keycaps that are specifically designed for your keyboard’s switch type.
Layout and Size Problems
Keyboards come in various physical layouts, and these differences can lead to keycap fitting issues. Knowing these variations is crucial to ensure the right fit for your keycaps.
Keyboard Layout Differences
The two most common keyboard layouts are ANSI (American National Standards Institute) and ISO (International Organization for Standardization). Each has unique characteristics that directly impact keycap compatibility:
| Feature | ANSI Layout | ISO Layout | Impact on Keycap Fit |
|---|---|---|---|
| Enter Key | Rectangular (2.25u) | L-shaped | Requires a different keycap shape |
| Left Shift | 2.25u wide | 1.25u wide | Sizes are incompatible |
| Extra Key | None | Near left Shift | ISO needs an additional keycap |
| Backslash Location | Above Enter | Near right Shift | Legend placement differs |
When switching between layouts, these are some common challenges to watch for:
- Gaming Keyboards: Many gaming keyboards have non-standard bottom rows, often using 1u Windows keys instead of the usual 1.25u size.
- Regional Variations: Keyboards designed for specific languages may include extra characters, requiring unique legends and arrangements.
- Compact Layouts: Smaller keyboards, like 65% or 75% models, frequently replace the standard 2.75u right Shift with a 1.75u version.
Being aware of these layout quirks is just the first step. Key sizes also play a significant role in ensuring everything fits perfectly.
Key Size Guide
Keycap sizes are measured in units (u), where 1u equals the width of a standard letter key (roughly 18–19 mm). Before buying new keycaps, here’s what you need to know:
-
Standard Key Measurements:
- Tab: 1.5u
- Caps Lock: 1.75u
- Backspace: 2u
- Spacebar: 6.25u (standard size)
- Bottom row modifiers: 1.25u each
-
Special Considerations:
- The spacebar’s stabilizer positions must align with your keyboard’s design.
- Bottom row configurations can vary widely, especially on gaming keyboards.
- Compact keyboards might use smaller function row keys - 1u instead of the typical 1.25u.
To avoid any surprises, use a ruler or caliper to measure your current keycaps and compare them to the specifications of the set you’re considering. Keep in mind that thicker keycaps (over 1.5 mm) may cause interference on certain keyboard designs.
For most users in the US, the ANSI layout is standard. Always double-check your keyboard’s layout and keycap sizes before making a purchase to ensure a perfect fit!
sbb-itb-3cb9615
Physical Defects
Physical defects in keycaps can present unique challenges, separate from compatibility and layout concerns. Issues like warping and stem size variations often require specific approaches to resolve. Let’s break down some effective methods to tackle these problems.
Fixing Warped Keycaps
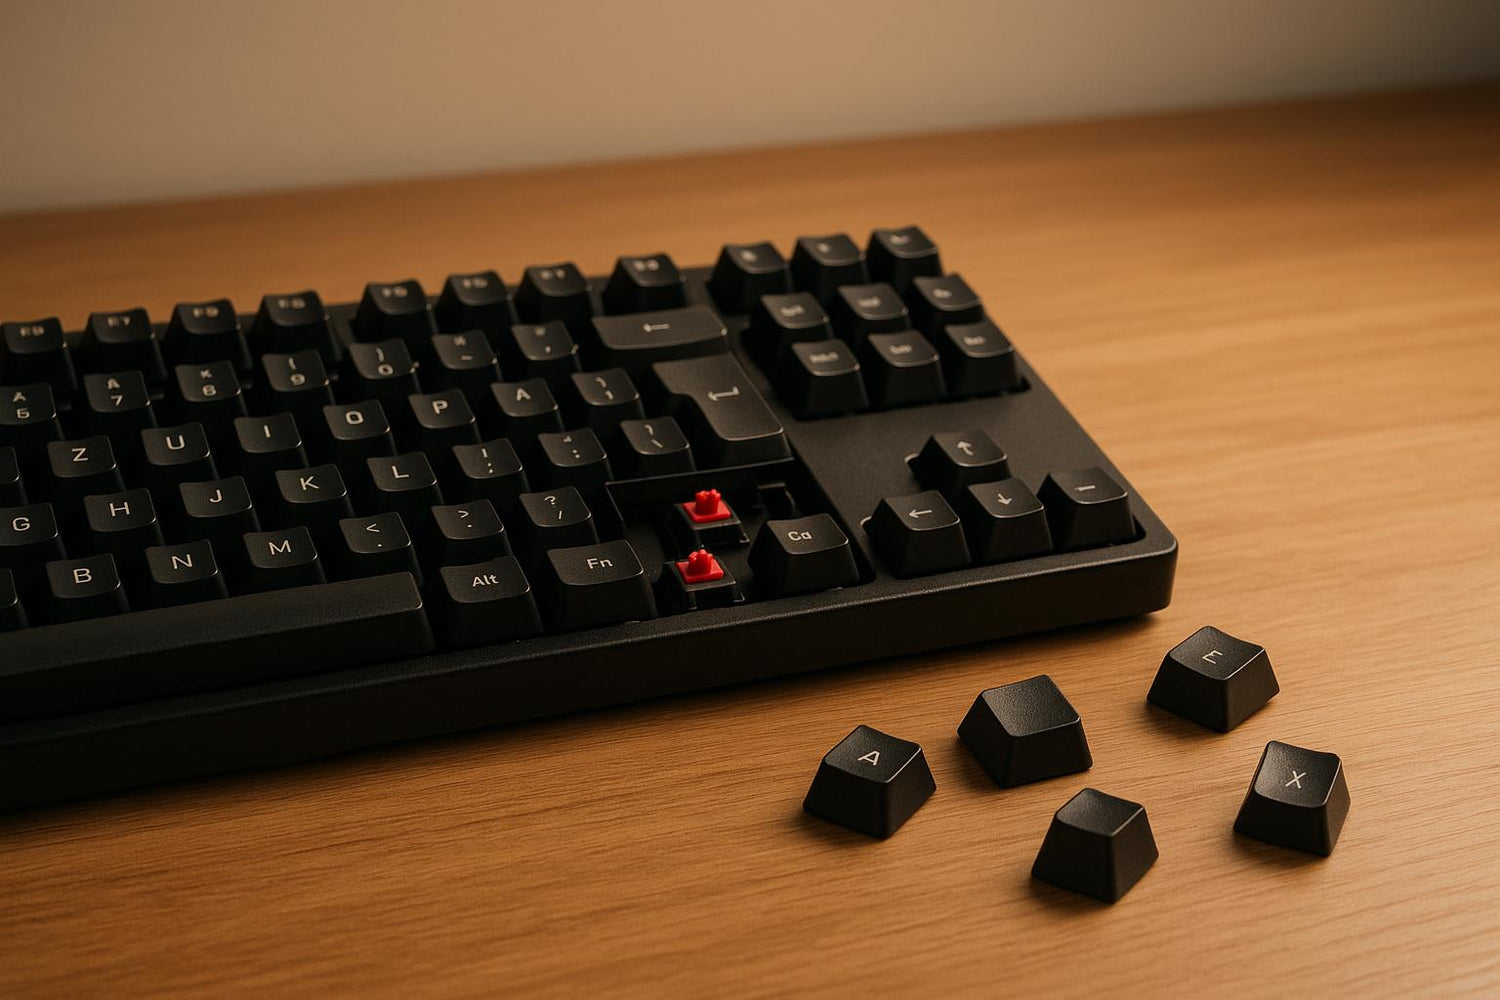
Warping, particularly in PBT keycaps, is a frequent issue - especially with longer keys like spacebars. To identify a warped keycap, place it face-down on a flat surface. If it rocks or doesn’t sit evenly, it’s likely warped.
Here are two methods to fix warped keycaps:
-
Hot Water Method
Submerge the keycap in hot water heated to 140–160°F (60–70°C) for 30–60 seconds. Once softened, press it flat against a surface in the opposite direction of the warp and hold it in place until it cools. -
Heat Treatment
Use a hair dryer on a low heat setting, keeping it about 6–8 inches away from the keycap. Apply heat evenly, being careful not to overheat, and then reshape the keycap as needed.
Stem Size Issues
Stem size variations can also impact how well keycaps fit onto switches. These problems often depend on the material and manufacturing process of the keycap. Here's a quick overview:
| Keycap Material | Common Issues | Typical Causes | Solutions |
|---|---|---|---|
| PBT | Tight stems (1–2% shrinkage) | Manufacturing shrinkage | Filing the keycap or allowing break-in |
| ABS | Loose stems over time | Normal wear and usage | PTFE tape or clear nail polish |
For an accurate diagnosis, use digital calipers to measure the keycap stem. Standard MX-compatible stems typically have the following dimensions:
- Outer dimensions: 5.2 mm × 5.2 mm
- Inner cross opening: 4 mm × 4 mm
- Wall thickness: 0.6 mm per side
Tips for Tight-Fitting Keycaps:
- Apply PTFE lubricant to the switch stem.
- Allow for a natural break-in period.
- Use fine-grit sandpaper to file the inside of the keycap gently.
Tips for Loose-Fitting Keycaps:
- Apply a thin layer of clear nail polish to the switch stem (avoid the keycap itself).
- Wrap PTFE tape around the switch stem for a snugger fit.
- If the issue persists, consider replacing the switches entirely.
These targeted fixes can help address common physical defects, ensuring your keycaps fit and function as intended.
Stabilizer and Switch Problems
Stabilizer Fit Issues
Stabilizers are crucial for keeping larger keys stable, but they can sometimes cause misalignment or other problems. The two main types - Cherry-style and Costar - each come with their own set of challenges.
Cherry-Style Stabilizer Issues:
- Wires that are too loose, leading to key wobble
- Stabilizer housings that are improperly aligned
- Bent stabilizer wires causing uneven key height
What You Can Do: A popular fix, known as the "holee mod", involves placing small pieces of band-aid material to reduce movement. If the stabilizer wires are bent, gently straighten them on a flat surface to restore proper alignment.
| Issue | Cause | Solution |
|---|---|---|
| Keycap binding | Misaligned stabilizer housing | Reinstall the stabilizer, ensuring correct orientation |
| Uneven height | Bent stabilizer wire | Straighten the wire on a flat surface |
| Loose fit | Worn stabilizer wires | Apply the holee mod or replace the stabilizers |
Once stabilizer issues are addressed, the next step is to consider how switch orientation might be affecting keycap fit.
Switch Direction Impact
Switch orientation plays a significant role in how well keycaps fit. North-facing switches (with LEDs positioned at the top) often cause compatibility problems with Cherry profile keycaps. This happens because the bottom edge of the keycap can hit the switch, leading to a scratchy feel, reduced key travel, or even damage over time.
Profile Compatibility:
| Keycap Profile | North-Facing Compatibility | South-Facing Compatibility |
|---|---|---|
| Cherry | Poor – Likely interference | Excellent |
| OEM | Good | Excellent |
| SA | Excellent | Excellent |
| DSA | Excellent | Excellent |
Keycap profiles like OEM, SA, and DSA offer better clearance with north-facing switches, while Cherry profile keycaps are better suited for south-facing switches to avoid interference.
Pro Tip: If you're noticing issues with switch interference, start by checking your keycap profile. Often, switching to a different profile can solve the problem without requiring any hardware modifications.
Conclusion: Keycap Fit Checklist
Wrap up your troubleshooting process by going through this handy keycap fit checklist. It covers the main points discussed earlier - stem compatibility, layout differences, physical flaws, and stabilizer adjustments.
| Check Point | What to Verify | Common Issues |
|---|---|---|
| Stem Type | Cross-shaped (MX), circular (Topre), rectangular (Alps) | Loose or incompatible stems causing poor fit |
| Layout Format | ANSI vs. ISO, bottom row configuration | Incorrect modifier key sizes, spacebar mismatch |
| Stabilizer Type | Cherry-style or Costar mount points | Misaligned stabilizer holes, binding keys |
| Switch Orientation | North or south-facing switches | Profile interference, especially with Cherry caps |
Essential Tools and Measurements: Keep digital calipers and a keycap puller on hand. Clean keycap stems using 90%+ isopropyl alcohol. Standard keycap sizes are based on 1u, which measures approximately 0.75 inches (19.05 mm).
For larger keys like spacebars, pay extra attention to:
- Warping and stabilizer alignment
- Material type and its tendency to warp
- Proper alignment of stabilizer mount points
Pro Tip: If you encounter warped keycaps, try the hot water method to straighten them out.
To keep your keycaps in top shape:
- Store them flat in their original packaging.
- Keep them away from extreme temperatures.
- Clean stems and switch housings regularly.
- Inspect larger keys periodically for early signs of warping.
Having the right tools can make all the difference. A simple toolkit with a keycap puller, precision screwdrivers, and cleaning supplies will help you avoid damage during maintenance and ensure a proper fit during installation.
For more tips, product recommendations, and expert guidance, visit KeebsForAll.
FAQs
How do I check if my keycaps will fit my keyboard's switches and layout?
To make sure your keycaps will fit your keyboard, the first step is identifying your keyboard’s switch type. Most mechanical keyboards use switches with a Cherry MX-style stem, but some have proprietary designs. The keycap stem needs to match the type of switch your keyboard uses.
Next, check your keyboard’s layout. Standard layouts, like ANSI or ISO, are generally easy to find keycaps for. However, if your keyboard has a non-standard or compact layout, you might need keycaps in specific sizes or profiles. Always review the dimensions and compatibility details provided by the keycap manufacturer to avoid any mismatches.
Still feeling unsure? Reach out to the seller or dive into community forums for advice. Getting the right keycaps for your keyboard ensures a snug fit and a satisfying typing experience!
How can I fix warped keycaps without damaging them?
If your keycaps are warped, you might be able to fix them by carefully applying heat to reshape them. A popular approach is to submerge the keycaps in warm water - about 120–140°F - for a few minutes. This softens the plastic just enough to make it pliable. Once they're softened, gently press the keycaps back into their proper shape and allow them to cool and harden naturally. Be cautious not to use boiling water or apply too much force, as this could cause more harm than good.
Not feeling confident about doing this on your own? You can always consult a professional or seek advice from a reliable mechanical keyboard community. Handle your keycaps with care to ensure they stay in great condition for as long as possible.
How do ANSI and ISO keyboard layouts impact keycap compatibility, and how can I pick the right set for my layout?
When it comes to ANSI and ISO keyboard layouts, the differences boil down to key sizes and arrangements, which play a big role in keycap compatibility. The ANSI layout, popular in the US, has a wider right Shift key and a single-row Enter key. On the other hand, the ISO layout, commonly used in Europe, includes a narrower left Shift key, a two-row Enter key, and an extra key near the left Shift.
To pick the right keycap set, start by identifying your keyboard's layout. Then, carefully review the keycap set's details to confirm it includes the correct key sizes and configurations for your specific layout. These small checks will save you from mismatched keycaps and ensure everything fits perfectly.


![[Pre-Order] Autumn Leaves PBT Keycaps - KeebsForAll](http://keebsforall.com/cdn/shop/products/DSC09732.jpg?v=1676148273)


Leave a comment
This site is protected by hCaptcha and the hCaptcha Privacy Policy and Terms of Service apply.