RGB layers in QMK firmware let you use your keyboard's RGB lights for more than just decoration. They provide visual cues for active layers, key states, or functions like Caps Lock. Here’s what you need to know:
- What Are RGB Layers? Assign unique lighting setups to different layers or key states, highlighting active keys or modes.
- Why Use QMK Firmware? QMK allows deep customization, supporting up to 32 RGB layers and popular LED types like WS2812 and SK6812.
- Setup Essentials: You’ll need compatible hardware (addressable RGB LEDs, supported PCB, microcontroller) and software tools like QMK MSYS and QMK Toolbox.
-
Key Features: Enable RGB layers in
config.h, define lighting segments inkeymap.c, and sync effects to layer changes using QMK functions. - Advanced Options: Add blinking effects, retain brightness across layers, and ensure split keyboard synchronization.
This guide covers everything from enabling RGB layers to advanced customization, ensuring your keyboard is both functional and visually intuitive.
QMK Firmware Tutorial: coding custom per layer animation effects from source code for the ErgoDox-Ez
Requirements for Setting Up RGB Layers
Before diving into RGB layer setup, make sure your hardware and software are ready for the task.
Hardware Requirements
To use RGB layers, you'll need LED hardware that's compatible with QMK firmware. Supported addressable LED types include WS2811, WS2812, WS2812B, WS2812C, SK6812, SK6812MINI, SK6805, and APA102. Your keyboard's PCB must also support RGB LEDs - this could mean it already has underglow lighting installed or allows you to add an RGB LED strip. If you're adding a strip, ensure that the PCB provides the necessary pins.
Your microcontroller must have available GPIO pins, including a dedicated data pin (and a clock pin, if you're using APA102 LEDs), as well as VCC and GND connections. Some PCBs simplify this process by offering unused microcontroller pins for modifications like adding RGB strips.
Keep in mind that RGB LEDs can draw a lot of current. To avoid overloading your circuit, it's a good idea to limit the brightness. For example, you can add the following line to your configuration: #define RGBLIGHT_LIMIT_VAL 120.
When sourcing parts for your setup, consider suppliers like KeebsForAll, which offers a variety of mechanical keyboard components and accessories. They focus on providing high-quality, in-stock products, making them a reliable option for builders who want to avoid long wait times.
Once your hardware is sorted, it's time to prepare the software.
Software and Tools
You'll need QMK MSYS for the QMK CLI and its dependencies. This tool is essential for compiling and configuring your firmware.
For flashing and debugging, download QMK Toolbox from qmk.fm/toolbox. This tool comes with features like a built-in key tester, automatic driver installation, and an HID console that provides real-time feedback - perfect for troubleshooting RGB layer setups.
If you're installing an RGB LED strip, basic soldering tools are necessary. This includes a soldering iron, solder, and other related supplies.
Finally, you'll need a text editor or IDE to modify configuration files like config.h and rules.mk. Once everything is set up, you can edit your configurations, compile the firmware using QMK CLI, and flash it with QMK Toolbox. This process gives you complete control to create the RGB lighting effects you’ve envisioned.
Setting Up RGB Layers in QMK Firmware
To customize how your RGB LEDs behave across different keyboard layers, you’ll need to tweak your QMK firmware. This involves modifying configuration files and adding specific code to your keymap.
Enabling RGB Layer Support
Start by enabling RGB layer functionality in your config.h file. Add this line to activate the feature:
#define RGBLIGHT_LAYERS
QMK supports up to 8 RGB layers by default, but you can increase this to 32 layers if your setup requires it. To extend the layer count, include the following in config.h:
#define RGBLIGHT_MAX_LAYERS 32
Once enabled, define the lighting configurations for each layer in your keymap.c file. Use the RGBLIGHT_LAYER_SEGMENTS macro to specify which LEDs light up and their respective colors. Then, combine these configurations into a master array using the RGBLIGHT_LAYERS_LIST macro and assign it to the rgblight_layers variable during setup.
For split keyboards, remember to flash both halves to ensure synchronized lighting effects.
Finally, configure the LED pins and count to ensure proper communication between your firmware and hardware.
Configuring LED Pins and Counts
In config.h, specify the microcontroller pin connected to your LED strip and the total number of LEDs. For WS2812 LEDs (commonly used), define the data pin like this:
#define WS2812_DI_PIN B6
Replace B6 with the correct GPIO pin according to your PCB documentation.
Next, confirm the total LED count in your setup. For instance, if you have a 12-LED underglow strip, ensure your layer segments don’t reference positions beyond LED 11, as numbering starts at 0.
With these basic configurations in place, you can explore advanced options to take your RGB layers to the next level.
Advanced Options for RGB Layers
QMK includes several advanced features that can make your RGB lighting more dynamic and responsive.
To enable blinking effects, add this line to your config.h:
#define RGBLIGHT_LAYER_BLINK
This feature lets you activate a lighting layer temporarily using the function rgblight_blink_layer(layer_number, duration_ms).
If you want your RGB layers to remain active even when the main RGB lighting is turned off, include:
#define RGBLIGHT_LAYERS_OVERRIDE_RGB_OFF
This ensures that layer indicators stay visible, regardless of the global RGB lighting state.
For consistent brightness when switching layers, add:
#define RGBLIGHT_LAYERS_RETAIN_VAL
This prevents abrupt changes in brightness by preserving the current setting when a new layer is activated.
"Lighting Layers is an RGB Light feature, it will not work for RGB Matrix."
With these settings, you can control layer states programmatically using the function rgblight_set_layer_state(layer_number, is_on). This allows you to synchronize your keyboard’s logical layers with the visual feedback provided by your RGB LEDs, creating a seamless and interactive experience.
Customizing RGB Layer Effects
Once you've set up RGB layers, you can create lighting effects that react to your keyboard's state. This involves defining specific lighting zones for groups of LEDs and linking them to layer changes for dynamic feedback.
Defining RGB Lighting Segments
To create custom RGB effects, use the rgblight_segment_t structure to define which LEDs to control and their HSV (Hue, Saturation, Value) colors. Each segment specifies the starting LED position, the number of LEDs in the group, and their color.
In your keymap.c file, use the RGBLIGHT_LAYER_SEGMENTS macro to configure these effects. For example, here's how you can create a Caps Lock indicator that lights up LEDs 6–9 and 12–15 in red:
const rgblight_segment_t PROGMEM my_capslock_layer[] = RGBLIGHT_LAYER_SEGMENTS(
    {6, 4, HSV_RED},       // Lights 4 LEDs starting at position 6
    {12, 4, HSV_RED}       // Lights 4 LEDs starting at position 12
);
For layer indicators, assign different colors to specific LEDs for each layer. Here's an example:
const rgblight_segment_t PROGMEM my_layer1_layer[] = RGBLIGHT_LAYER_SEGMENTS(
    {9, 2, HSV_CYAN}       // Lights LEDs 9 and 10 in cyan for layer 1
);

const rgblight_segment_t PROGMEM my_layer2_layer[] = RGBLIGHT_LAYER_SEGMENTS(
    {11, 2, HSV_PURPLE}    // Lights LEDs 11 and 12 in purple for layer 2
);

const rgblight_segment_t PROGMEM my_layer3_layer[] = RGBLIGHT_LAYER_SEGMENTS(
    {13, 2, HSV_GREEN}     // Lights LEDs 13 and 14 in green for layer 3
);
After defining these segments, combine them using the RGBLIGHT_LAYERS_LIST macro. The order is important because layers defined later in the list will take precedence over earlier ones:
const rgblight_segment_t* const PROGMEM my_rgb_layers[] = RGBLIGHT_LAYERS_LIST(
    my_capslock_layer,
    my_layer1_layer,    // Overrides Caps Lock layer
    my_layer2_layer,    // Overrides previous layers
    my_layer3_layer     // Highest priority
);
Then, assign this array to the rgblight_layers variable in the keyboard_post_init_user() function:
void keyboard_post_init_user(void) {
    rgblight_layers = my_rgb_layers;  // Enable the RGB layers
}
These segment setups create the foundation for dynamic effects, which can then be linked to specific keyboard states.
Linking RGB Effects to Layer States
To make your RGB effects respond to changes in keyboard layers, use the rgblight_set_layer_state() function. This is done within callback functions that QMK executes automatically when layer states change.
The layer_state_set_user() function is triggered every time the active layer changes. Use it to update your RGB effects. For example, to activate specific layers, use layer_state_cmp(state, layer_name):
layer_state_t layer_state_set_user(layer_state_t state) {
    rgblight_set_layer_state(2, layer_state_cmp(state, _FN));       // Activate layer 2
    rgblight_set_layer_state(3, layer_state_cmp(state, _ADJUST));  // Activate layer 3
    return state;
}
For Caps Lock, the led_update_user() function can enable or disable the corresponding RGB layer:
bool led_update_user(led_t led_state) {
    rgblight_set_layer_state(0, led_state.caps_lock);  // Activate Caps Lock layer
    return true;
}
If you're changing the default layer (e.g., switching layouts), use default_layer_state_set_user():
layer_state_t default_layer_state_set_user(layer_state_t state) {
    rgblight_set_layer_state(1, layer_state_cmp(state, _DVORAK));  // Activate Dvorak layer
    return state;
}
Practical Code Examples
Here's a complete setup that combines Caps Lock and three layer indicators:
const rgblight_segment_t PROGMEM my_capslock_layer[] = RGBLIGHT_LAYER_SEGMENTS(
    {6, 4, HSV_RED},       // Lights 4 LEDs starting at position 6
    {12, 4, HSV_RED}       // Lights 4 LEDs starting at position 12
);

const rgblight_segment_t PROGMEM my_layer1_layer[] = RGBLIGHT_LAYER_SEGMENTS(
    {9, 2, HSV_CYAN}
);

const rgblight_segment_t PROGMEM my_layer2_layer[] = RGBLIGHT_LAYER_SEGMENTS(
    {11, 2, HSV_PURPLE}
);

const rgblight_segment_t PROGMEM my_layer3_layer[] = RGBLIGHT_LAYER_SEGMENTS(
    {13, 2, HSV_GREEN}
);

const rgblight_segment_t* const PROGMEM my_rgb_layers[] = RGBLIGHT_LAYERS_LIST(
    my_capslock_layer,
    my_layer1_layer,
    my_layer2_layer,
    my_layer3_layer
);

void keyboard_post_init_user(void) {
    rgblight_layers = my_rgb_layers;
}

bool led_update_user(led_t led_state) {
    rgblight_set_layer_state(0, led_state.caps_lock);
    return true;
}

layer_state_t default_layer_state_set_user(layer_state_t state) {
    rgblight_set_layer_state(1, layer_state_cmp(state, _DVORAK));
    return state;
}

layer_state_t layer_state_set_user(layer_state_t state) {
    rgblight_set_layer_state(2, layer_state_cmp(state, _FN));
    rgblight_set_layer_state(3, layer_state_cmp(state, _ADJUST));
    return state;
}
For split keyboards, ensure layer state synchronization by adding this line to config.h:
#define SPLIT_LAYER_STATE_ENABLE
This configuration ensures that multiple lighting conditions can coexist, with higher-priority layers overriding lower-priority ones. For example, if both Caps Lock and a function layer are active, the function layer's lighting will take precedence in overlapping LED zones.
sbb-itb-3cb9615
Testing and Troubleshooting
Once you've set up your RGB layer configuration, the next step is to flash the firmware and confirm that your lighting effects react correctly to layer changes. Careful testing ensures that your RGB layers perform as intended.
Flashing Firmware and Checking RGB Layers
Begin by putting your keyboard into DFU (Device Firmware Upgrade) or bootloader mode. The method varies depending on your keyboard. For instance, some keyboards require holding both shift keys and pressing B, while others may have a dedicated reset button. If you're using a Glorious GMMK Pro, hold Spacebar+B while connecting the USB-C cable to enter bootloader mode.
If you're on Windows or macOS, QMK Toolbox is a straightforward way to flash your firmware. Open the tool, locate your firmware file (in .hex or .bin format), and either drag it into the "Local file" box or use the "Open" button to find it. Once your keyboard is in DFU mode, click "Flash." The process usually takes 30–60 seconds.
For those who prefer the command line, you can flash your keyboard using:
qmk flash -kb <my_keyboard> -km <my_keymap>.
After flashing, your keyboard will restart automatically. Test each layer by activating them one at a time and checking that the LEDs display the correct colors and positions. For split keyboards, remember to flash both halves to ensure consistent RGB effects. If your keyboard's bootloader isn't detected, try running qmk doctor for diagnostic help.
Once everything is flashed, test thoroughly. If any issues crop up, use the troubleshooting tips below to resolve them.
Troubleshooting Common Issues
If your RGB lighting isn't behaving as expected, here are some common problems and solutions:
-
Power Consumption Problems: RGB LEDs can draw a lot of power, which might cause unresponsiveness or erratic behavior. If setting the LEDs to white causes issues, limit brightness by setting
RGBLIGHT_LIMIT_VALto 120. Alternatively, reduce themax_brightnesssetting in your firmware to around 128 for a better balance between visibility and power usage. Updating your firmware to the latest version may also help. -
Split Keyboard Sync Issues: Sometimes, RGB effects may not sync properly between the two halves of a split keyboard. For example, only the master side might light up initially, even though later color changes sync correctly. To fix this, ensure
RGBLED_SPLITis defined and add#define SPLIT_LAYER_STATE_ENABLEto yourconfig.hfile to synchronize layer states. -
Memory and Compilation Errors: If your firmware exceeds size limits, try disabling unused RGB animations to free up space. For errors like redefinition issues on split keyboards, double-check that
RGBLIGHT_ENABLE = yesis set in yourrules.mkfile, and confirm thatWS2812_DI_PINandRGBLIGHT_LED_COUNTare correctly defined inconfig.h. -
Color and Brightness Issues: Incorrect HSV values or configuration conflicts can cause LEDs to display the wrong colors or stop working entirely. Resetting the EEPROM on your keyboard can clear corrupted settings. You can also test individual LEDs using functions like
rgblight_setrgb_at(r, g, b, index)orrgblight_sethsv_at(h, s, v, index)to identify problematic LEDs.
Advanced Tips for Optimization
For those looking to fine-tune their setup, here are some advanced strategies:
-
RGB Matrix vs. RGB Lighting Layers: Remember, lighting layers only work with RGB lighting, not RGB Matrix. If you're using RGB Matrix, rely on functions like
rgb_matrix_indicators_kborrgb_matrix_indicators_userinstead. Avoid usingRGB_MATRIX_NONEdirectly, as it can interfere with manual RGB control - set appropriate flags or create a custom effect instead. - Adjust Brightness Dynamically: Lowering brightness based on ambient light can save power without sacrificing visibility.
- Organize Layers Logically: Arrange your layers in a tree structure, starting with layer 0 as your base typing layer. Reference only higher-numbered layers in your keymap to reduce conflicts.
-
Enhance Lighting Layer Functionality: Use
#define RGBLIGHT_LAYERS_OVERRIDE_RGB_OFFto keep lighting layers active even when RGB lighting is turned off. Similarly,#define RGBLIGHT_LAYERS_RETAIN_VALensures that brightness settings remain consistent when lighting layers are activated.
Finally, test your configuration systematically. Activate multiple layers at once to confirm that higher-priority layers override lower-priority ones. Document any unexpected behavior to guide future adjustments and refinements.
Conclusion
By following the setup and customization steps outlined earlier, you can use RGB layers with QMK firmware to make your keyboard more responsive and visually intuitive. With QMK, RGB layers can be enabled and tailored to provide instant visual cues for different functions, making your keyboard seamlessly align with your workflow needs.
One of QMK's standout features is its firmware-level control, which eliminates the need for additional background software while offering precise customization options. With this flexibility, you can define custom RGB Matrix effects directly in your keymap without altering core QMK files. You can also create dynamic animations with Velocikey that adapt to your typing speed or remap LED arrangements to suit your unique layout. This makes your keyboard's lighting not just decorative but a functional part of your setup, giving you real-time feedback on your current layer state.
If you're upgrading or building your keyboard, investing in quality hardware can elevate your experience. Check out the selection at KeebsForAll, where you'll find everything from hot-swappable keyboard kits, like the Freebird series, to essential tools that pair perfectly with your custom firmware setup.
The combination of high-quality components and finely tuned firmware creates a personalized keyboard experience that enhances both your productivity and the enjoyment of everyday tasks.
FAQs
What are RGB layers, and how do they improve my keyboard's functionality with QMK firmware?
RGB Layers in QMK Firmware
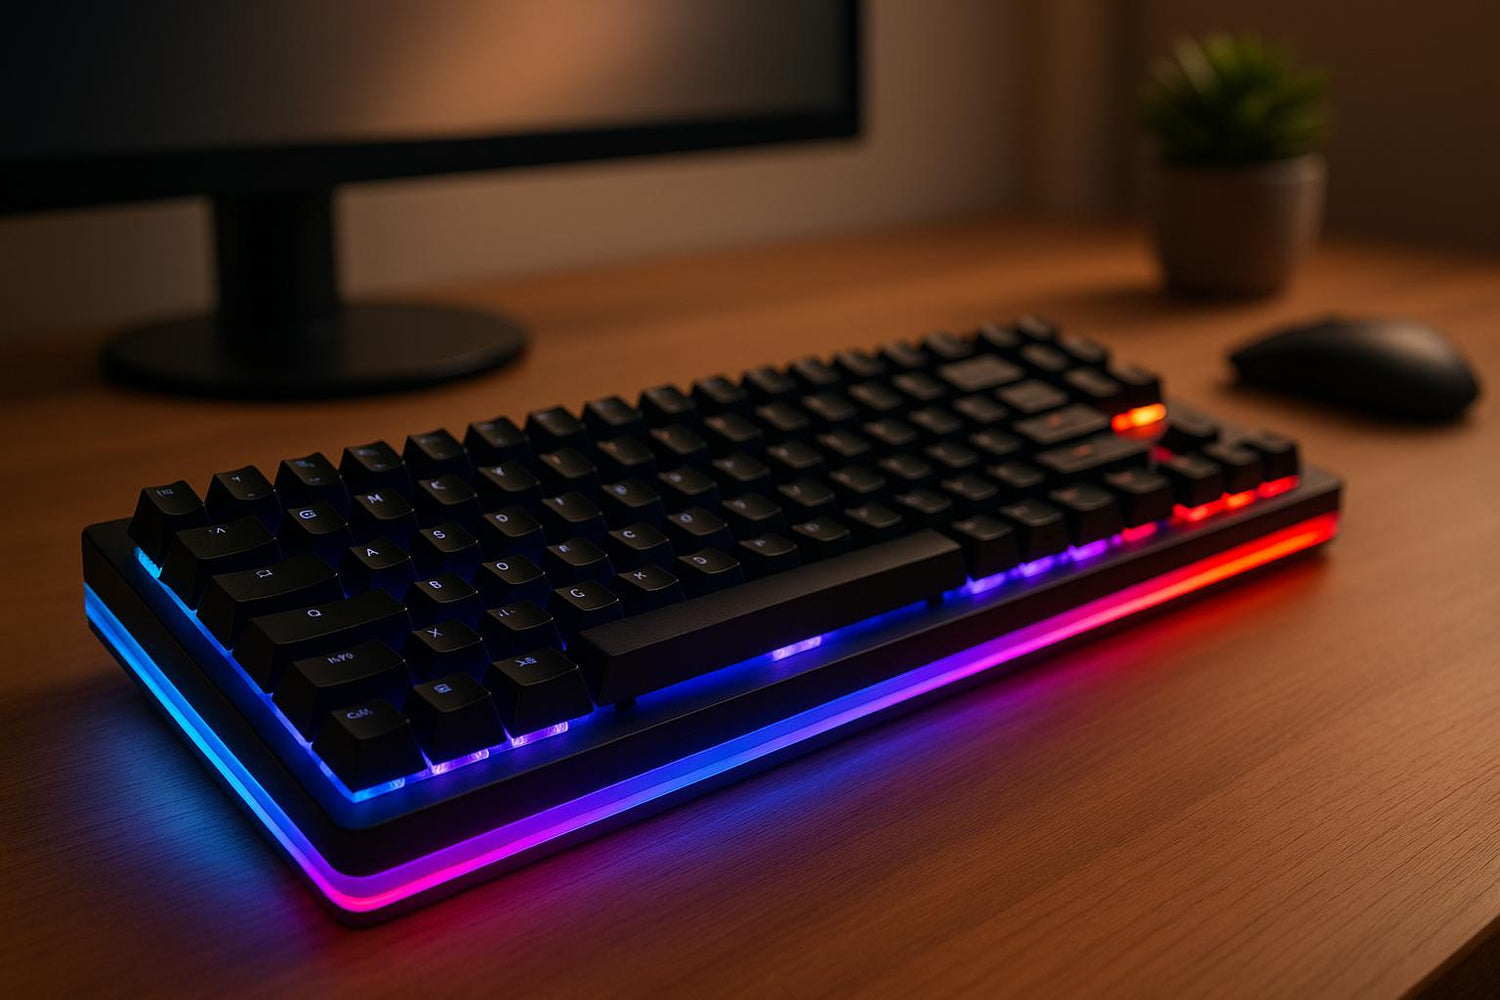
RGB layers in QMK firmware let you assign distinct lighting effects to different keyboard layers, making it simple to see which layer you're currently using. For instance, you could have your keyboard glow green on the default layer, then switch to red when a secondary layer is active. This kind of visual feedback takes the guesswork out of navigation and makes your keyboard much easier to use.
But it’s not just about functionality - RGB layers let you give your keyboard a personal flair. You can tweak colors and effects to fit your style, whether you want something subtle or bold. Whether you’re working, gaming, or just typing away, RGB layers make your mechanical keyboard both more practical and visually striking.
What do I need to set up RGB layers with QMK firmware?
To set up RGB layers using QMK firmware, you'll need a combination of specific hardware and software components.
Hardware Requirements
- Addressable RGB LEDs: Choose from options like WS2811, WS2812, SK6812, or APA102. These LEDs might already be part of your keyboard or can be added manually.
- QMK-Compatible Microcontroller: Ensure your microcontroller supports RGB lighting features.
Software Setup
- QMK Firmware: Install and configure the firmware on your microcontroller.
- Python 3.7 or Higher: Required for building the firmware.
In the firmware setup:
- Enable RGB lighting by adding
RGBLIGHT_ENABLE = yesto therules.mkfile. - Update the
config.hfile to specify:- The correct data pin.
- The number of LEDs.
- The clock pin (if your setup uses one).
With everything configured, you can start designing custom RGB layers to give your keyboard dazzling lighting effects!
Why isn’t my keyboard’s RGB lighting working correctly, and how can I fix it?
If your keyboard’s RGB lighting isn’t working as it should, the first thing to check is your QMK firmware settings. Open your rules.mk file and make sure it includes RGBLIGHT_ENABLE = yes. Then, take a look at your config.h file to confirm that the data pin and the number of LEDs are correctly defined. If you’re using APA102 LEDs, don’t forget to also verify that the clock pin is properly set.
After confirming the firmware settings, turn your attention to the physical connections. Loose or damaged wires are a common culprit when RGB lighting malfunctions. Reseat all connections carefully and inspect the LEDs and wiring for any visible damage. If nothing seems out of place, consider updating your firmware or checking if the power supply is delivering enough juice to support the LEDs. These steps usually address most issues with RGB lighting.


![[Pre-Order] Autumn Leaves PBT Keycaps - KeebsForAll](http://keebsforall.com/cdn/shop/products/DSC09732.jpg?v=1676148273)



Leave a comment
This site is protected by hCaptcha and the hCaptcha Privacy Policy and Terms of Service apply.