


Key mapping errors in QMK firmware can disrupt your keyboard's functionality, causing unexpected behavior like swapped keys or non-working layers. These issues often stem from EEPROM corruption, misconfigured layers, or incorrect keycodes. Here's how to address them:
- Diagnose the Issue: Identify symptoms like swapped keys, stuck layers, or unresponsive keys using tools like QMK Configurator or online keyboard testers.
- Reset EEPROM: Clear stored settings that override your firmware. Use methods specific to your keyboard's microcontroller (e.g., ATmega32u4, RP2040, STM32F072).
-
Verify Keymaps: Use QMK Configurator to ensure all key positions are correctly assigned and layers include transparent keycodes (
KC_TRNS) where needed. -
Edit Firmware: For advanced fixes, update your
keymap.cfile to define custom layouts or correct layer configurations. - Reflash Firmware: Flash the updated firmware using QMK Toolbox or the QMK CLI to apply your changes.
To prevent future issues, back up your configurations, document custom setups, and regularly check your environment with mechanical keyboards 101 guides with tools like qmk doctor. For deeper debugging, enable console logs and monitor outputs with tools like QMK Toolbox.
How To Program Your Keyboard With Code Instead Of QMK Configurator
sbb-itb-3cb9615
Tools and Setup for Troubleshooting
Before diving into diagnosing key mapping errors, it’s important to gather the right tools and set up a workspace that supports efficient troubleshooting. The good news? Most of what you need is either free or easily accessible online.
Required Tools
Here’s a quick rundown of the essential tools:
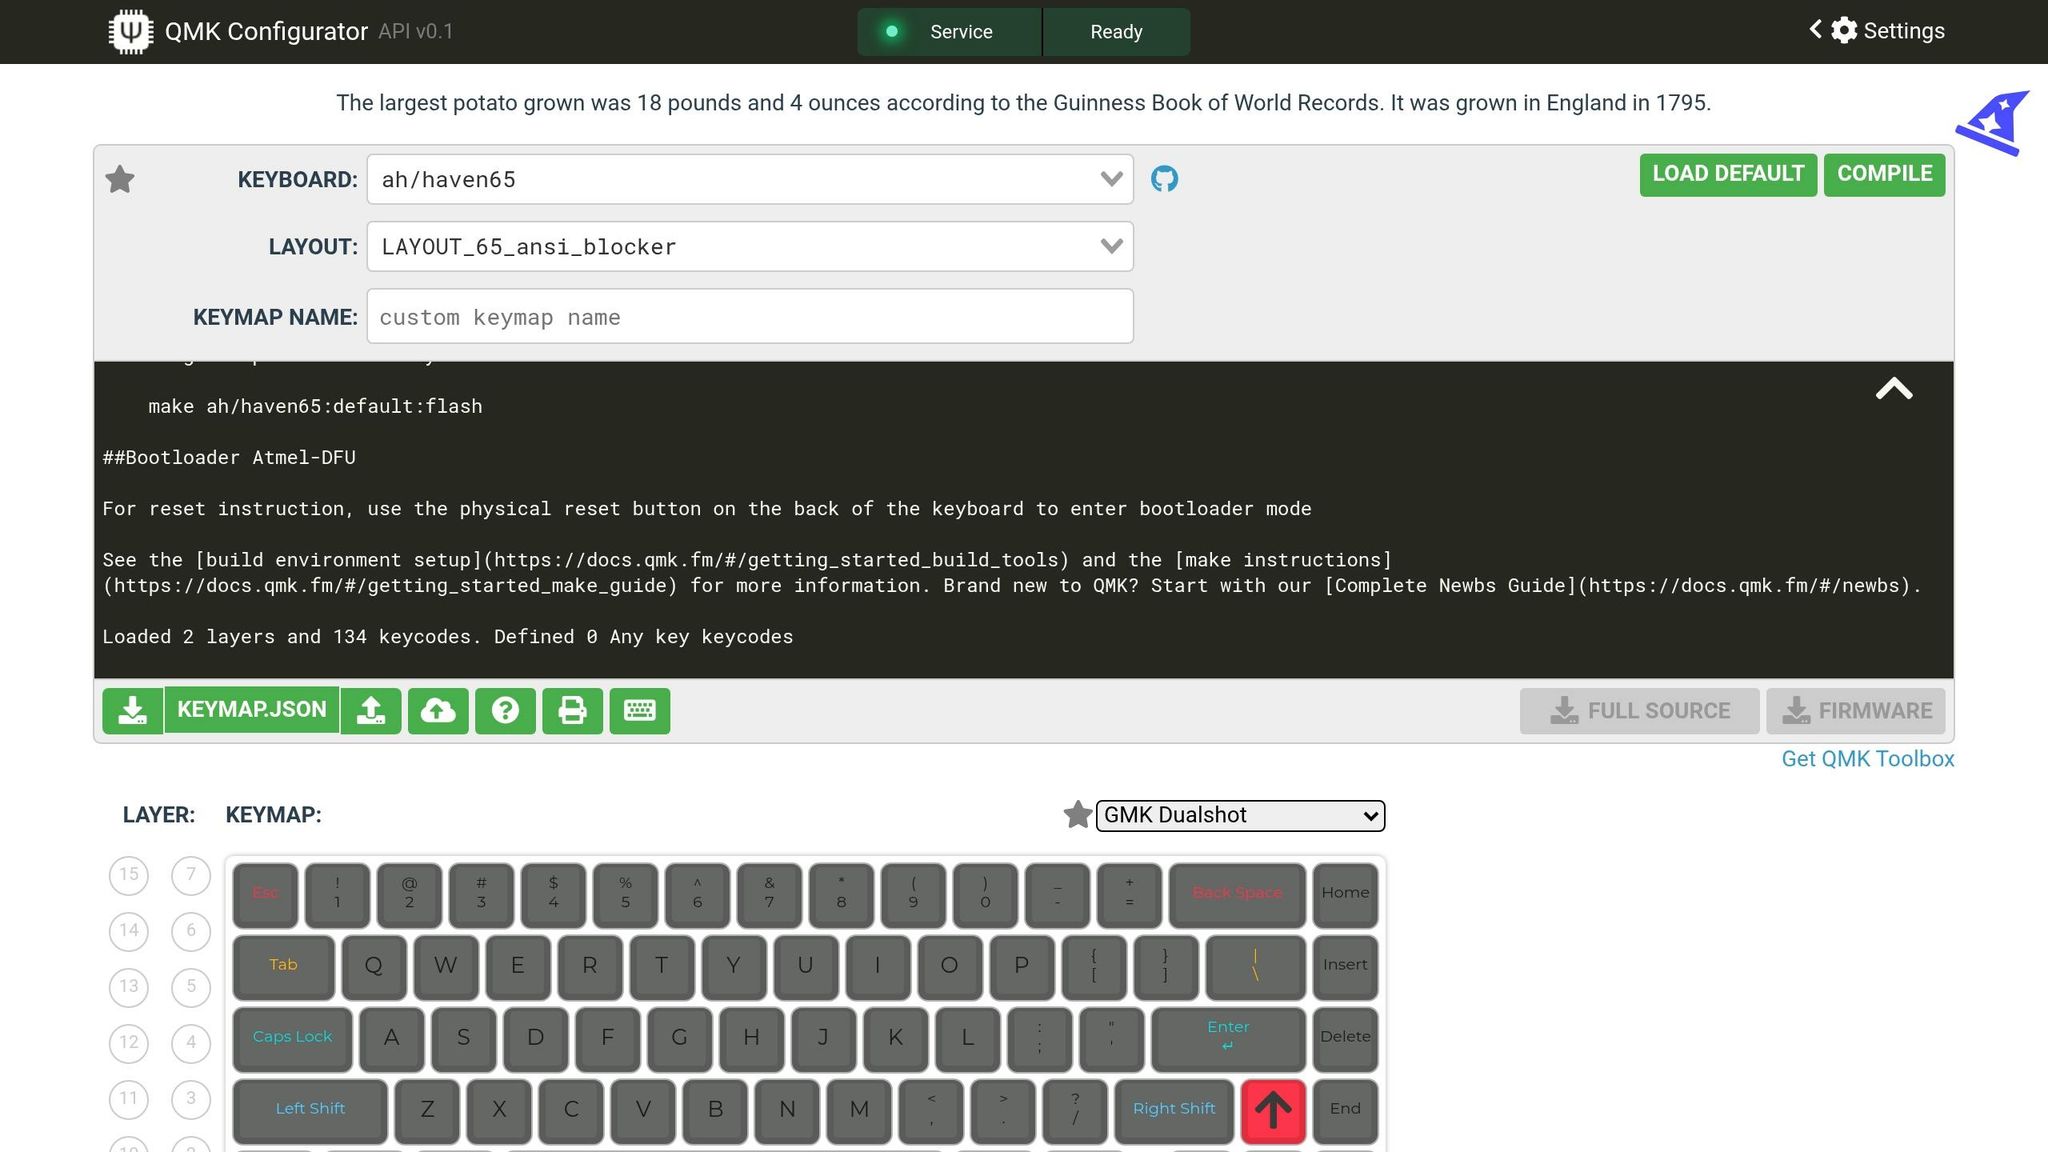
- QMK Configurator: This web-based tool helps you visually create keymaps and generate firmware without needing to code. It also features a built-in test mode to check if keys are sending the correct signals - a real time-saver for quick checks.
- QMK Toolbox: A graphical app for Windows and macOS that simplifies flashing your keyboard with QMK and lets you monitor debug messages through the HID console.
-
QMK MSYS: A terminal environment tailored for Windows. It helps manage the QMK CLI and run commands like
qmk doctorto detect setup issues. -
Plain Text Editor: You’ll need this for manual troubleshooting to edit files like
keymap.c,config.h, orinfo.json. Make sure it saves files without any extra formatting. - Bootloader Access: To flash firmware, you’ll need to activate your keyboard’s bootloader. This can be done with a physical reset button, shorting specific pins, or using key combinations like holding both Shift keys and pressing B.
Here’s a quick comparison of the tools:
| Tool | Primary Function | Platform |
|---|---|---|
| QMK Configurator | Visual keymap editing and key testing | Web Browser |
| QMK Toolbox | Firmware flashing and HID debug console | Windows, macOS |
| QMK MSYS | CLI environment for compiling and setup | Windows |
| QMK CLI | Command-line flashing and diagnostics | Windows, macOS, Linux |
| hid_listen | Standalone debug message monitor | Windows, macOS, Linux |
With these tools ready, you’ll be equipped to handle key mapping issues effectively.
Setting Up Your Workspace
Creating an organized and functional workspace is just as important as having the right tools. Here’s what you’ll need:
- A computer running Windows 10 (20H1 or later) or macOS 12+.
- A reliable USB cable to avoid interruptions during firmware flashing.
- A stable internet connection for accessing QMK Configurator and documentation.
When flashing firmware, avoid unplugging your keyboard or interrupting the process, as this can lead to serious complications.
To enable debugging, modify your keyboard’s rules.mk file by adding CONSOLE_ENABLE = yes. This allows your keyboard to send diagnostic messages to tools like QMK Toolbox or hid_listen, which can be critical for pinpointing issues. Before implementing any fixes, run the command qmk compile -kb <keyboard> -km default to ensure your build environment is set up correctly.
How to Diagnose Key Mapping Errors
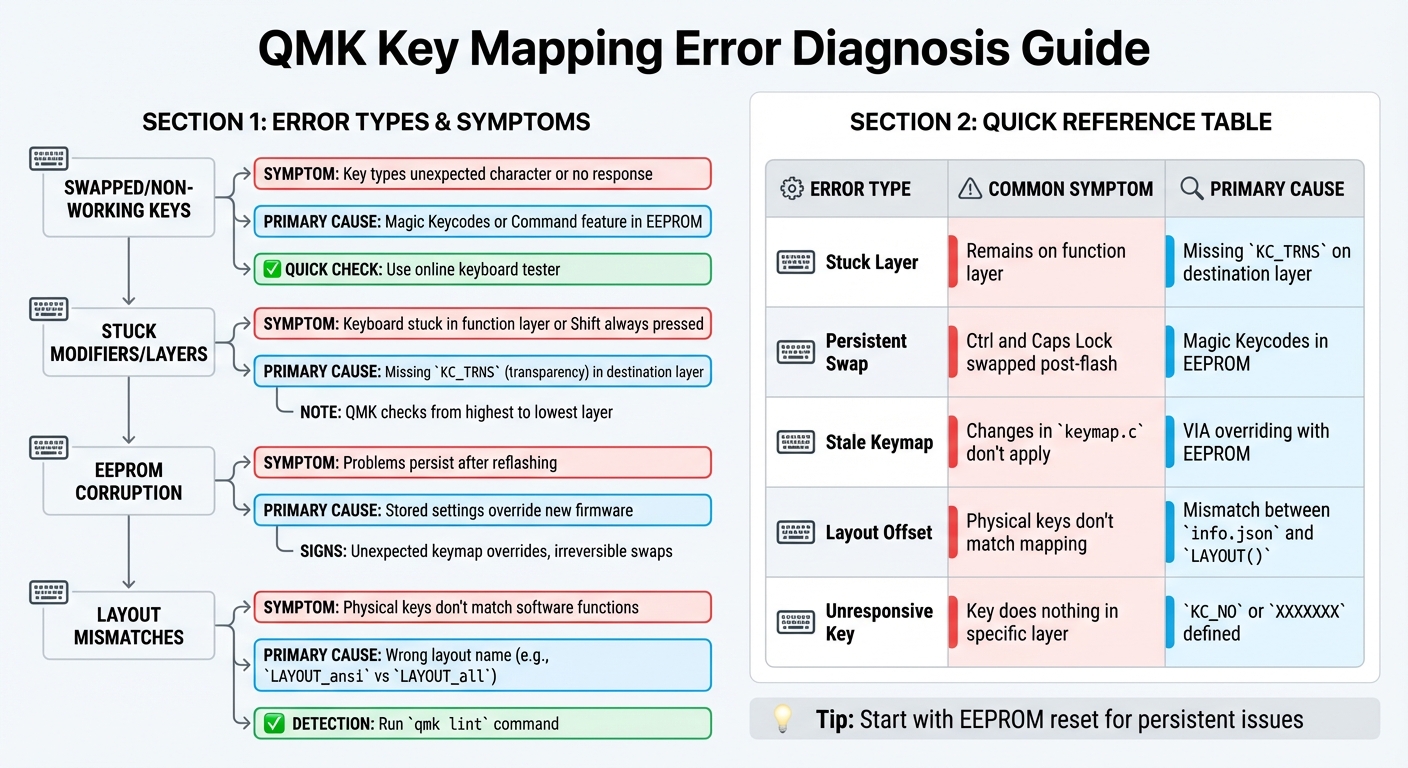
QMK Key Mapping Error Types and Troubleshooting Guide
With your workspace ready, the next step is pinpointing the specific key mapping issue by analyzing how your mechanical keyboard behaves. Key mapping errors generally fit into a few main categories, each with its own distinct symptoms.
Swapped or Non-Working Keys
If a key fails to respond or types an unexpected character, the issue often lies with Magic Keycodes or the Command feature. These features can dynamically reassign keys - like swapping Ctrl and Caps Lock or Alt and GUI - and these changes persist in the keyboard's EEPROM even after reflashing. To confirm, use an online keyboard tester to check which keys are registering. If a key doesn't produce any output, it might be defined as KC_NO in your keymap, or there may be a mismatch between your physical keyboard layout and the software configuration.
Stuck Modifiers or Layers
When your keyboard seems stuck in a specific function layer or behaves as if Shift is always pressed, it’s likely a transparency issue. This occurs when a key like MO(layer) is used to switch layers, but the corresponding position in the destination layer lacks KC_TRNS (or _______). Without a transparent keycode, you can get "trapped" in that layer. Since QMK checks from the highest active layer down to layer 0, a non-transparent keycode on a higher layer can block the layers below. This issue requires careful troubleshooting to resolve.
EEPROM Corruption
If problems persist even after reflashing, EEPROM corruption might be the cause. The EEPROM stores settings like VIA configurations and Magic Keycode states, which can override newly flashed firmware. Signs of corruption include unexpected keymap overrides, irreversible key swaps, or behavior that deviates from your keymap.c. If you’re using VIA-enabled firmware, remember that the keymap stored in the EEPROM will take precedence over your compiled firmware until it’s cleared.
Layout Mismatches
When the physical keys on your keyboard don't align with their intended software functions, you’re likely dealing with a layout mismatch. This often happens when the wrong layout name is used in your keymap.c - for instance, using LAYOUT_ansi when your board expects LAYOUT_all - or if there’s a discrepancy between your info.json file and the LAYOUT() macro. Symptoms include unresponsive keys or keys mapped to incorrect positions. Running qmk lint in your terminal can help detect these structural errors early.
| Error Type | Common Symptom | Primary Cause |
|---|---|---|
| Stuck Layer | Keyboard remains on a function layer | Missing KC_TRNS on the destination layer |
| Persistent Swap | Ctrl and Caps Lock remain swapped post-flash | Magic Keycodes stored in EEPROM |
| Stale Keymap | Changes in keymap.c don’t reflect on board |
VIA overriding flash memory with EEPROM |
| Layout Offset | Physical keys don’t match software mapping | Mismatch between info.json and LAYOUT() |
| Unresponsive Key | Key does nothing in a specific layer |
KC_NO or XXXXXXX defined in that position |
Once you've identified the specific issue, you're ready to move on to the next steps to fix it.
How to Fix Key Mapping Errors
You can fix key mapping errors by clearing stored settings, checking your keymap configuration, or reflashing your firmware. Below are practical solutions to address common issues and get your keyboard functioning as it should.
Resetting EEPROM
If you're dealing with persistent key mapping problems, like swapped keys or stuck modifiers, clearing the EEPROM is a good starting point. The EEPROM stores settings like VIA keymaps and RGB configurations, which can sometimes override your firmware.
The simplest way to clear the EEPROM is with QMK Toolbox. Start by putting your keyboard into bootloader (DFU) mode. You can do this by holding both Shift keys and pressing Pause, or by pressing the physical RESET button on the keyboard's PCB. Once in bootloader mode, click the Clear EEPROM button in QMK Toolbox.
For keyboards with RP2040 microcontrollers, the process is slightly different. Unplug the keyboard, hold the top-left key, and then reconnect the cable. Wait until the RPI-RP2 drive appears, then unplug and reconnect the cable again. If your keyboard uses an STM32F072 chip, you’ll need to flash a special "Flash Clearing" .bin file with QMK Toolbox because these chips emulate EEPROM using flash memory.
| Microcontroller | EEPROM Reset Method |
|---|---|
| ATmega32u4 | Use QMK Toolbox and click "Clear EEPROM" in DFU mode |
| RP2040 | Hold the top-left key during plug-in; wait for the RPI-RP2 drive |
| STM32F072 | Flash a "Flash Clearing" .bin file |
| General (VIA) | Assign and press the QK_CLEAR_EEPROM keycode |
| General (Bootmagic) | Hold Escape (or the top-left key) while plugging in |
After resetting the EEPROM, use the QMK Configurator to verify that your keymap is correctly assigned.
Checking Keymaps in QMK Configurator

The QMK Configurator makes it easy to create and adjust keymaps without needing to write code. Begin by selecting your keyboard and version from the dropdown menu. If your specific layout isn’t listed, use LAYOUT_all as a fallback.
To assign keycodes, either drag them from the panel or click on a key position and press the desired key. This ensures you don’t accidentally leave any positions set to KC_NO, which disables the key. Once you’ve configured all layers, save your work by clicking Download this QMK Keymap JSON File. To generate firmware, click the green Compile button and download the .hex or .bin file for flashing.
Once your keymap is visually confirmed, you can make advanced edits in the keymap.c file if necessary.
Editing keymap.c for Custom Layouts
For more control over your keyboard’s behavior, editing the keymap.c file is an option. Start by including #include QMK_KEYBOARD_H at the top of the file to ensure all required definitions are available. Use an enum to name your layers (e.g., _BL, _FL, _CL) instead of using numbers - this makes your code easier to read.
The keymap itself is defined as an array within the keymaps[][MATRIX_ROWS][MATRIX_COLS] structure. Each layer uses the LAYOUT macro to map keycodes to physical positions. To allow keypresses to pass through to lower layers, use KC_TRNS (or its alias _______). For custom keycodes, you can simplify the layout by defining them at the top, like this:
#define FN_CAPS LT(_FL, KC_CAPS)
.
"Note that higher layers have higher priority within the stack of layers. The firmware works its way down from the highest active layers to look up keycodes." - QMK Firmware
After completing your edits, compile the firmware using the QMK CLI with this command:
qmk compile -kb <keyboard> -km <keymap>
Reflashing Firmware
Once you’ve reset the EEPROM and verified your keymap, reflashing the firmware is the last step. To enter bootloader mode, you can use one of these methods: hold both Shift keys and press Pause or B, unplug and hold Space+B while reconnecting the cable, or press the physical RESET button on the PCB.
Using QMK Toolbox, load your .hex or .bin file and click Flash once the keyboard is detected. If you prefer the command line, you can run:
qmk flash -kb <keyboard_name> -km <keymap_name>
This command compiles and flashes the firmware automatically based on the detected bootloader. If you’re on Windows and encounter "Unknown Device" errors, use Zadig or the QMK driver installer to set up the necessary drivers.
After flashing, you may need to reset the EEPROM again, especially if you’re using VIA-compatible firmware or if the keyboard behaves unpredictably. On ARM-based chips like the Planck rev6, saved EEPROM settings can sometimes cause the keyboard to become unresponsive after flashing. Performing an EEPROM reset should resolve this issue.
Testing and Preventing Future Errors
Testing Your Keyboard
After applying the firmware fixes mentioned earlier, it's time to test your keyboard to ensure every key functions as expected. The QMK Configurator includes a built-in test mode that makes this process straightforward. Use it to verify that each key produces the correct output.
For deeper debugging, enable console logs by adding CONSOLE_ENABLE = yes to your rules.mk file. To make keycodes easier to read, include KEYCODE_STRING_ENABLE = yes and use get_keycode_string(kc) to display names like LT(2,KC_D) instead of raw hex values. Tools like QMK Toolbox or hid_listen can help you monitor these logs in real time.
How to Prevent Future Errors
Once you've confirmed everything is working, take proactive steps to avoid similar problems down the line. Start by saving backups of your custom layouts in QMK Configurator as JSON files. Additionally, create a readme.md file to document your custom configurations, including the purpose of each key and any special keycodes you’ve used.
Regular maintenance is also key. Run qmk doctor in your terminal to check for issues in your local build environment. Use qmk lint often during development to catch potential structural problems early. The QMK documentation emphasizes:
"When developing your keyboard, keep in mind that all warnings will be treated as errors - these small warnings can build-up and cause larger errors down the road".
If problems persist or you’re unsure about something, don’t hesitate to seek additional help.
Where to Get More Help
For further assistance, the QMK Documentation and QMK Configurator are excellent resources. You can also connect with the community on platforms like Gitter, where experienced users provide troubleshooting advice. If you encounter hardware issues or need replacement parts, check out KeebsForAll (https://keebsforall.com), which offers a variety of components and support for mechanical keyboard repairs.
Conclusion
Key Takeaways
Resolving key mapping errors requires a methodical approach: diagnose issues systematically, ensure transparency settings are correct, and reset the EEPROM when necessary. Remember, QMK's layer system gives priority to higher layers. Using KC_TRNS allows key signals to pass through correctly, avoiding problems with modifiers or layers that stick. Without proper transparency settings, these issues can persist and disrupt functionality.
For persistent issues where your keymap doesn’t update after flashing, clearing the EEPROM is often the solution. Similarly, if you notice swapped keys, such as Caps Lock and Control, Magic keycodes could be the culprit interfering with your layout.
To streamline troubleshooting, activate the debug console by enabling CONSOLE_ENABLE = yes. Use tools like QMK Toolbox or hid_listen to monitor outputs, which can significantly speed up the process. Before compiling, always validate your JSON files with a linting tool and ensure all layout gaps are filled in the QMK Configurator to avoid API errors.
Next Steps
Once these fixes are in place, focus on maintaining a reliable firmware setup. Back up your .json files regularly and document any custom configurations to save time in the future. For additional guidance, the QMK documentation at docs.qmk.fm remains an invaluable resource for keycode references and advanced troubleshooting tips.
Looking to upgrade or replace components? KeebsForAll (https://keebsforall.com) offers a wide range of premium switches, keycaps, and keyboard parts to keep your build in top shape. If you're interested in expanding your collection, their marketplace at kfamarketplace.com features pre-assembled boards and more customization options.
FAQs
How do I know if it’s a keymap issue or a hardware problem?
Start by reviewing your QMK keymap configuration for any errors. Look for potential problems such as incorrect layer setups or unintended key assignments. Debugging tools like QMK Toolbox can help you verify if the firmware is sending the right signals.
If the firmware seems fine but the key still isn't responding, it's time to check for hardware issues. Common culprits include faulty switches, missing diodes, or even damage to the PCB. A multimeter can be a handy tool here, allowing you to test and confirm if there's a hardware failure.
Will clearing EEPROM delete my VIA layout and settings?
Clearing your keyboard’s EEPROM wipes all stored settings, including VIA keymaps if they’re saved in the EEPROM. This also affects other configurations such as RGB settings, persistent layers, and backlight states. After performing an EEPROM reset, you’ll need to reconfigure or reflash your firmware to get your keymaps and settings back to how you want them.
Why don’t my changes apply after flashing new firmware?
If your changes aren’t taking effect, it might be because the keyboard isn’t entering bootloader mode properly, or the firmware wasn’t flashed correctly. To start, make sure the keyboard is in bootloader mode. You can do this by:
- Using a dedicated reset button (if available).
-
Shorting the
RESETandGNDpins. - Trying key combinations like Space + B.
Also, double-check that you’re using the correct firmware file and ensure the flashing process runs smoothly without interruptions. These steps are crucial for a successful update.


Leave a comment
This site is protected by hCaptcha and the hCaptcha Privacy Policy and Terms of Service apply.