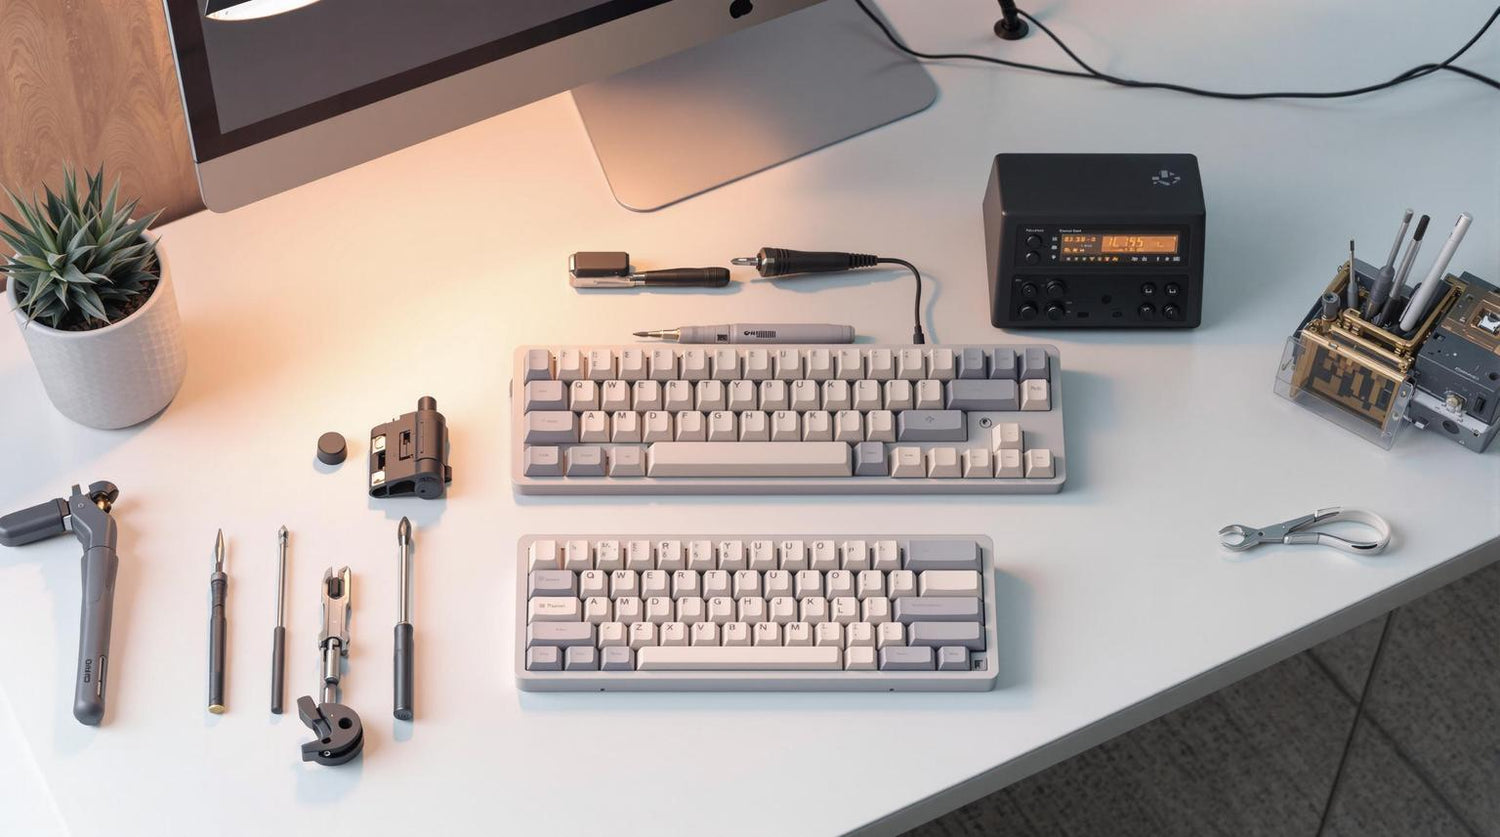
Building a custom mechanical keyboard doesn't have to feel overwhelming. With the right tools, you can simplify the process, protect your components, and ensure a safe, efficient build. Here's a quick rundown of the 8 essential tools you'll need:
- Precision Screwdrivers: For assembling cases, PCBs, and stabilizers. Magnetic tips help with small screws.
- Keycap Puller: A wire-style puller prevents scratches and ensures safe keycap removal.
- Switch Puller: Safely remove hot-swap switches without damaging pins or PCBs.
- Switch Opener: Disassemble switches for lubrication or modifications.
- Lube & Brushes: Improve switch performance with precise lubrication techniques.
- Soldering Equipment: For non-hot-swap keyboards, ensure clean and secure connections.
- Tweezers: Handle delicate components like springs and stabilizers with precision.
- PCB Testing Tools: Test your PCB to ensure all keys register before assembly.
Quick Comparison Table:
| Tool | Purpose | Key Features | Price Range |
|---|---|---|---|
| Precision Screwdrivers | Assemble cases and PCBs | Magnetic tips, multiple bit sizes | $15–$30 |
| Keycap Puller | Remove keycaps safely | Wire style, prevents scratches | $5–$10 |
| Switch Puller | Remove switches | Durable material, strong grip | $8–$15 |
| Switch Opener | Open switches for mods | Works with Cherry MX/Kailh switches | $15–$20 |
| Lube & Brushes | Lubricate switches | Krytox 205g0, precise application | $7–$15 |
| Soldering Equipment | Solder switches to PCB | Temp control, solder wire, cutters | $50–$100 |
| Tweezers | Handle small parts | ESD-safe, straight/curved options | $4–$10 |
| PCB Testing Tools | Test PCB functionality | Tweezers, USB cable, testing software | $0–$20 |
With these tools, you’ll be ready to build a custom keyboard that’s reliable, smooth, and tailored to your preferences. Let’s dive into the details of each tool and how to use them.
ESSENTIAL TOOLS for Building Custom Keyboards!
1. Precision Screwdrivers: Basic Assembly Tools
A precision screwdriver set is a must-have for assembling custom keyboards. These tools help you safely handle the tiny screws that secure your case, PCB, and other components.
Why Magnetic Tips Matter
Magnetic tips make working with small screws much easier by:
- Holding screws securely in place as you work
- Picking up dropped screws effortlessly
- Guiding screws neatly into mounting holes
Types of Screwdrivers You’ll Need
Here are the most common screwdriver types and their uses:
| Driver Type | Common Uses | Key Features |
|---|---|---|
| Phillips | Case assembly, PCB mounting | Cross-shaped head, widely used |
| Flathead | Plate adjustments | Simple slot design, adaptable for various tasks |
| Hex | Case screws, stabilizer mounting | Six-sided head, handles high torque |
| Torx | High-end case assembly | Star-shaped design, reduces slipping risk |
For the best experience, consider a complete set like the Kinetic Labs precision screwdriver kit, which includes 22 magnetic bits.
Pro Tip: Always use the correct bit size and apply light pressure to avoid stripping screw heads. Stripped screws can make assembly harder and may damage your components.
Next, we’ll look at tools like keycap pullers that help with safe component removal.
2. Keycap Puller: Safe Removal Methods
Using a wire-style keycap puller is the best way to safely remove keycaps. While many keyboards come with plastic ring pullers, wire pullers are better at preventing scratches on your keycaps.
Wire pullers use two metal prongs to apply even pressure, reducing the chance of damage while protecting your keycaps.
| Feature | Wire Keycap Puller | Plastic Ring Puller |
|---|---|---|
| Material Durability | Made of sturdy metal, lasts longer | More fragile, prone to breaking |
| Scratch Risk | Low – touches only bottom edges | Higher – may scratch sides |
| Efficiency | Removes multiple keycaps quickly | Usually handles one at a time |
| Cost | $5–$10 | Often included for free |
Steps for Safe Keycap Removal
- Position the puller: Place it above the keycap.
- Insert the wires: Lower the puller until the wires slide under both edges of the keycap.
- Apply gentle pressure: Press down slightly so the wires grip securely.
- Pull upward: Lift straight up with a steady motion.
Tips for Safe Use
- Make sure the wires are firmly in place before pulling.
- Pull straight up without twisting or angling the tool.
- Regularly clean the puller and check the wires for wear to avoid accidental damage.
3. Switch Puller: Hot-Swap Switch Removal
A switch puller is a must-have for anyone maintaining or customizing mechanical keyboards. This tool is specifically designed to remove switches safely, avoiding damage to pins or the PCB.
Metal vs Plastic Switch Pullers
| Feature | Metal Switch Pullers | Generic Plastic Pullers |
|---|---|---|
| Durability | Made with high-quality materials for longevity | Prone to breaking over time |
| Grip Strength | Offers a secure grip for precise removal | May slip during use |
| Pin Safety | Reduces the chance of bending switch pins | Higher risk of pin damage during removal |
Choosing a high-quality puller minimizes risks and ensures smoother handling.
Recommended Options
For frequent use, consider these trusted tools:
- Titanium Switch Puller: Built for durability and long-term performance.
- Gateron Switch Puller V2: Known for its strong grip and ease of use.
- Kinetic Labs Switch Puller: A reliable and affordable option for everyday tasks.
How to Remove Switches Safely
- Align the puller’s prongs with the switch tabs.
- Apply even pressure and pull the switch straight out.
- Inspect the switch pins afterward to check for any damage.
Care and Maintenance
- Regularly clean and inspect the tool to keep it in top condition.
- Store it in a dry place to prevent rust.
- Ensure the gripping mechanism works smoothly before use.
A dependable switch puller simplifies maintenance and reduces the risk of damaging your keyboard. Whether you're swapping out switches or just performing routine upkeep, a durable tool can save you time and effort.
4. Switch Opener: Preparing Switches for Mods
A switch opener is a must-have tool for safely taking apart mechanical keyboard switches. It allows you to disassemble them without damaging any components, making it perfect for tasks like lubrication, spring changes, and other custom tweaks.
Types of Switch Openers
The KFA Switch Opener ($19.00) works with both Cherry MX and Kailh-style switches, making it compatible with a variety of setups. Its sturdy build ensures consistent performance. Some openers are specifically designed for Cherry MX switches, while others are better suited for Kailh switches, which might require a bit more force.
How to Open Switches Safely
- Check Your Switch Type: Identify whether your keyboard uses Cherry MX-style or Kailh-style switches.
- Position the Switch: Place the switch with the stem side facing up into the opener.
- Align the Tool: Match the opener’s pegs with the clips on the switch housing.
- Press Down: Push firmly until you hear a click. If the switch doesn’t open easily, check the alignment - Kailh switches often need extra pressure.
Parts Inside a Switch
Once opened, a mechanical switch typically consists of these four pieces:
- Upper housing
- Stem assembly
- Spring
- Lower housing
Tips for a Safe Disassembly
Before starting:
- Clear your workspace to avoid losing small parts.
- Use a small container to store loose components.
- Make sure your area is well-lit for precision.
While working:
- Use a soft surface to catch any springs that might pop out.
- Handle each part gently to avoid bending or breaking anything.
- Pay attention to how parts are oriented to make reassembly easier.
Once your switches are open, you’re ready to dive into maintenance or modifications. A good opener not only protects your switches but also makes the entire process smoother and more efficient.
sbb-itb-3cb9615
5. Lube and Brushes: Switch Maintenance
Lubricating your switches can make typing smoother and more enjoyable. Just like using the right tools protects your build, proper lubrication can boost switch performance.
Lubrication Techniques
Applying lubricant correctly is key to getting the best results. Here's how to handle different parts of your switches:
- To lubricate springs in batches, put them in a plastic bag with 20–30 drops of Krytox GPL 105 oil. Seal the bag with as little air as possible, then shake it for about a minute to evenly coat the springs.
- Use a thin, even layer of lubricant on these areas:
- Bottom housing rails and the corners of the center post
- Contact points on the upper housing
- All four sides and inner walls of the stem
Be careful not to overdo it - too much lubricant can affect sound quality and make typing less satisfying. For tactile switches, skip the stem legs to keep the tactile feedback intact. On the other hand, for linear switches, Krytox 205g0 is a great choice for smoothness and sound dampening.
Starter Lubrication Kit
If you're new to switch lubrication, here’s a handy starter kit:
| Item | Price | Purpose |
|---|---|---|
| Krytox 205g0 (3 ml) | $7.95 | Main lubricant for switches |
| Lube Brushes (#0, #1) | $4.00 | For precise application |
| ESD Tweezers | Included | Handling small parts |
| Stem Holder | Included | Steady application of lubricant |
Krytox 205g0 works especially well for linear switches and stabilizers, helping create a deeper sound and smoother key travel. Start with a small amount of lubricant and add more gradually.
Make sure to work in a clean, well-lit space, keep the lubricant container closed when not in use, and carefully apply the lubricant to each switch.
Once your switches are properly lubricated, you're ready to move on to the next step: gathering the right soldering tools for PCB assembly.
6. Soldering Equipment: PCB Assembly
When building non-hot-swap keyboards, having the right soldering tools is crucial. A proper setup ensures clean connections and protects your PCB components from damage.
Here’s a quick rundown of the essential tools for PCB assembly:
| Equipment | Purpose |
|---|---|
| Temperature-Controlled Soldering Station | Ensures precise heat control for accuracy |
| Solder Wire (63/37 or 60/40 tin/lead) | Used to attach components securely |
| Solder Tip Cleaner | Keeps the soldering tip in good condition |
| Flush Cutters | Trims excess leads from components |
| Helping Hands/PCB Holder | Stabilizes the PCB while you work |
Basics of Temperature Control
For beginners, leaded solder (melting point 361°F/183°C) is often easier to work with.
When soldering switches:
- Set the iron slightly above the solder’s melting point.
- Clean the soldering tip after every five switches.
- Hold the iron like a pen for better control.
- Apply solder until it forms a small “volcano” shape around the lead.
Desoldering Steps
-
Preparation
- Work in a well-ventilated space to avoid inhaling fumes.
- Use a grounding mat to protect your PCB from static damage.
-
Removing Components
- Use a solder wick and a solder sucker to cleanly remove solder.
- Be methodical to avoid damaging nearby components.
For beginners, soldering stations like the KSGER T12 or Hakko FX888D are popular choices due to their reliable temperature control and ease of use.
Once your soldering setup is ready, you can move on to handling components with precision tools like tweezers in the next section.
7. Tweezers: Small Parts Handling
High-quality tweezers are a must-have for handling delicate keyboard components like springs and stabilizers.
Here’s a quick comparison of common tweezer types and their uses:
| Type | Best Use Case | Key Features |
|---|---|---|
| ESD-Safe Straight | General assembly, spring setup | Prevents static damage, precise control |
| ESD-Safe Curved | Stabilizer work, switch filming | Easier access to tight spaces |
| Cross-Locking | Long tasks, lubing switches | Reduces hand strain |
For added protection, look for tweezers with plastic tips. These provide a secure grip while avoiding scratches on sensitive parts. However, don’t use plastic-tipped tweezers near soldering tools or heat sources - the high temperatures can damage the tips.
Tips for Proper Grip
- Apply steady, gentle pressure with the tips aligned to avoid slipping or damaging parts.
- Use the flat inner surfaces for a more secure hold on components.
Cross-locking tweezers, priced around $4.50, are especially helpful for repetitive tasks like lubing switches. They maintain a firm grip without requiring constant pressure, making them a great tool for extended sessions.
Lastly, always choose tweezers with an ESD-safe coating to protect your keyboard’s electronics from static discharge. For beginners, straight ESD-safe tweezers are a great starting point, while curved models are perfect for working in tighter spaces. Both types are affordable and essential for any custom keyboard setup.
Up next: Learn how to ensure your build is flawless with precise PCB testing tools!
8. PCB Testing Tools: Quality Check
Before assembling your PCB, it's essential to test it to avoid troubleshooting headaches later. Here's what you'll need to perform a proper quality check:
| Testing Tool | Purpose |
|---|---|
| Metal Tweezers or Wire | To bridge switch pin pads for testing |
| USB Cable | To connect the PCB to your computer |
| Testing Software | To check key registrations via a visual layout |
Start by connecting your PCB to your computer using a USB cable. Open testing software like VIA or Switch Hitter to view key registrations. Use metal tweezers or a wire to bridge the switch pin pads - each key should register correctly. Once you've confirmed the key registrations, inspect the PCB for any physical issues.
"When you first get a PCB shipped to you, it is recommended that you test it before doing anything else. You don't want to be in a position where you've soldered everything on only to realize that a key doesn't work." - Switch and Click
Check for visible defects like:
- Burn marks or discoloration
- Hairline cracks in the board
- Broken traces or lifted pads
- Bulging or damaged components
To test function layers, hold the Fn key pads while testing other key positions. This ensures all special keys are functioning as expected.
VIA provides an easy-to-use visual matrix that highlights each key as it registers, making it simple to spot issues. If a key fails to register after multiple tries, note its location and contact your vendor immediately, as return windows are often limited. For split keyboards, test each half separately to pinpoint any problems before assembling the full setup.
Conclusion: Starting Your First Build
Set up your workspace, check your PCB, and dive into your build. Keep your soldering iron between 315°F and 350°F to avoid damaging the PCB.
Here’s a quick breakdown of the process:
| Build Stage | Tools You’ll Need | Pro Tips |
|---|---|---|
| Stabilizer Installation | Precision Screwdrivers, Lube Kit | Try a band-aid mod for quieter typing |
| Switch Installation | Switch Puller, Switch Opener | Test pins before soldering |
| Final Assembly | Keycap Puller, PCB Testing Tools | Double-check connections for accuracy |
These steps provide a straightforward path to building your custom keyboard.
When dealing with small components, tools like magnetic-tipped screwdrivers and tweezers can make the job smoother. If your PCB requires soldering, practice on spare parts first to build confidence in your technique.
Once everything is assembled, test each key and adjust the stabilizers as needed for a smooth typing experience. With the right tools and a little patience, you’ll have a reliable, custom keyboard ready to go.


![[Pre-Order] Autumn Leaves PBT Keycaps - KeebsForAll](http://keebsforall.com/cdn/shop/products/DSC09732.jpg?v=1676148273)


Leave a comment
This site is protected by hCaptcha and the hCaptcha Privacy Policy and Terms of Service apply.