Hot-swap keyboards make customizing mechanical keyboards simple. Instead of soldering, you can easily replace switches by hand using spring-loaded sockets. Here's what you need to know:
- Hot-Swap vs. Soldered Keyboards: Hot-swap keyboards let you change switches in minutes, while soldered keyboards require desoldering and resoldering, which is time-consuming and requires special tools.
- Switch Compatibility: Check if your keyboard supports 3-pin or 5-pin switches. Most modern hot-swap boards handle both, but some budget options only work with 3-pin switches.
- Tools You Need: A switch puller, keycap puller, and tweezers are essential for removing switches and fixing bent pins. Optional tools like compressed air and a switch opener can make the process smoother.
- Step-by-Step Process: Remove old switches carefully using a puller, check new switches for bent pins, align them with the PCB, and press them gently into place.
- Testing and Troubleshooting: After installation, test your keyboard to ensure all keys work. Fix issues like bent pins or debris in sockets as needed.
Hot-swap keyboards save time, allow for easy customization, and are beginner-friendly. Proper care - like cleaning sockets and handling switches carefully - ensures your keyboard stays in great condition for years.
Hot-Swap Keyboards and Switch Compatibility Basics
What Hot-Swap Keyboards Are
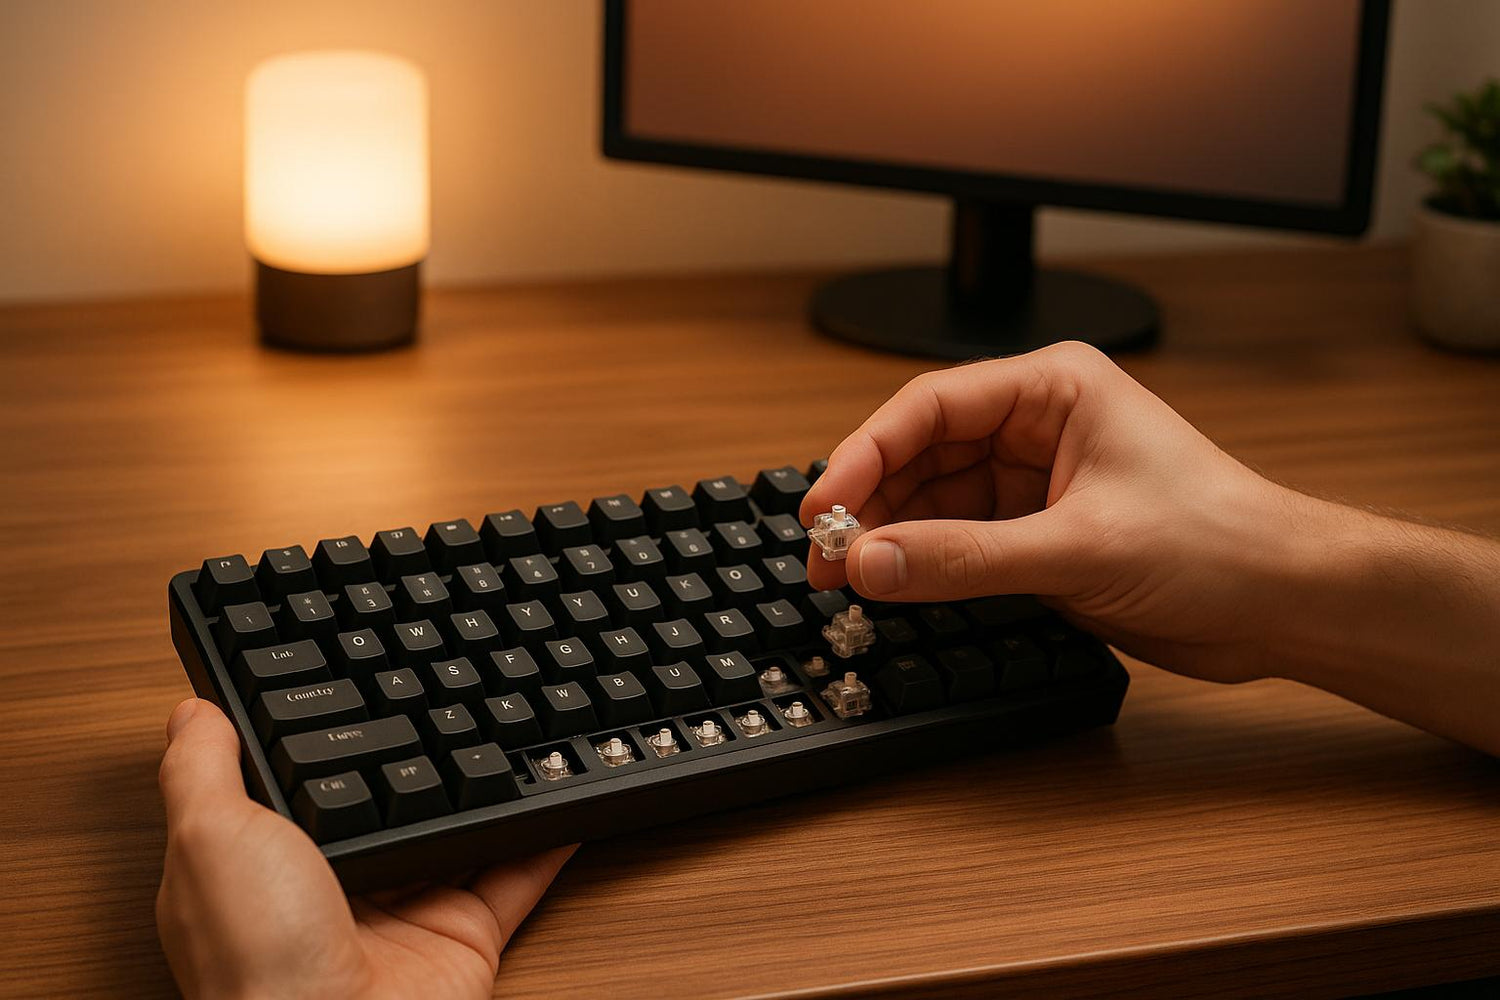
Hot-swap keyboards are designed with spring-loaded sockets on their PCB (printed circuit board), allowing you to easily insert and remove switches without the hassle of soldering. These sockets not only hold the switches in place but also create the electrical connection needed for the keyboard to function.
By removing the need for soldering, hot-swappable PCBs make it incredibly simple to try out different switch types. This innovation has opened up keyboard customization to everyone, even those without technical skills or specialized tools.
Now, let’s dive into how 3-pin and 5-pin switches differ and what that means for compatibility.
3-Pin vs 5-Pin Switch Types
Mechanical switches come in two main varieties: 3-pin and 5-pin. The difference lies in the number of pins extending from the bottom of the switch.
- 3-pin switches have two metal contact pins for the electrical connection and one plastic pin in the center for alignment.
- 5-pin switches include the same three pins, plus two additional plastic stabilizing pins for extra support.
Here’s a quick comparison:
| Switch Type | Pin Count | Stability | Compatibility |
|---|---|---|---|
| 3-Pin | 2 metal + 1 plastic | Basic alignment | Compatible with most hot-swap keyboards |
| 5-Pin | 2 metal + 3 plastic | Extra stability | Requires 5-pin compatible sockets |
While most modern hot-swap keyboards can handle both 3-pin and 5-pin switches, some budget or compact models are only built for 3-pin switches. To figure out what your keyboard supports, check the PCB - 5-pin compatible boards have five holes for each switch, while 3-pin boards only have three.
Understanding this difference is key to ensuring your keyboard works as expected.
Why Using Compatible Switches Matters
Using the right switches for your keyboard is essential for a smooth and reliable experience. If your keyboard only supports 3-pin switches, trying to install 5-pin switches without modifications can lead to problems.
The most common issue occurs when 5-pin switches are used in keyboards designed for 3-pin setups. While you can technically modify 5-pin switches by clipping off the extra plastic pins, doing so can void warranties and may affect performance.
To avoid any issues, always check your keyboard’s specifications before purchasing new switches. If you’re unsure, test with just one switch first. This simple step can save you time, effort, and potential frustration, ensuring your custom keyboard performs just the way you want it to.
How to Replace Hot Swap Mechanical Switches (with & without switch puller)!
Tools and Workspace Setup
Getting your tools and workspace ready ahead of time can make the switch installation process much easier and more efficient.
Required Tools for Switch Installation
To start, you'll need a switch puller for removing switches from hot-swap sockets. A keycap puller is also essential for safely taking off your keycaps so you can access the switches underneath.
Keep a pair of tweezers or small pliers nearby. These are especially helpful for straightening bent pins on new switches, which can sometimes happen during shipping and may prevent proper installation.
If you're looking for convenience, consider using a 2-in-1 keycap and switch puller. This tool combines both functions, making the disassembly process quicker and more seamless.
Once you've got your tools ready, it’s time to prepare your workspace to match your setup.
Helpful Extra Tools
Though not absolutely necessary, a few extra tools can enhance your experience. Compressed air is great for clearing out dust and debris from your keyboard before installing new switches, ensuring a clean surface to work on.
If you’re planning to do any switch maintenance, a switch opener is a handy addition. For instance, KeebsForAll offers a sturdy KFA Switch Opener for $19.00, which makes opening switches for maintenance far simpler than using makeshift tools.
You might also want to invest in an optional PCB holder or small vise. These can stabilize your keyboard during the installation process, reducing the risk of slips that could cause damage to the components.
With your tools assembled, the next step is organizing your workspace for a smooth and safe installation.
Setting Up Your Keyboard and Work Area
Begin by disconnecting your keyboard from your computer and ensuring it’s completely powered down. This step protects both your keyboard and your computer from any electrical mishaps during the process.
Set up a well-lit, organized workspace with plenty of room to lay out your components. Proper lighting is crucial for spotting small details, like bent switch pins or misaligned holes on the PCB. Position your desk lamp or work light to eliminate shadows over your workspace.
Carefully remove all keycaps using your keycap puller, and store them in a safe place, like a container or on a soft surface, to prevent scratches or loss.
Prepare a soft work surface and arrange your tools within easy reach. Having everything organized beforehand prevents unnecessary scrambling for tools, which could lead to dropped parts or accidental damage.
Finally, test your setup by performing a quick dry run with one switch. This allows you to confirm that your workspace is comfortable and that you have enough room to work. With a hot-swap keyboard, these steps are straightforward, making switch changes a hassle-free experience.
How to Install Switches Step by Step
Now that your tools and workspace are ready, it’s time to install your switches. Take your time with each step to avoid any accidental damage.
Taking Out Old Switches
Start by unplugging your keyboard from your computer. This simple step ensures there’s no risk of electrical issues during the process. Also, make sure to remove all keycaps before proceeding.
To protect your keyboard’s internal components, wear an anti-static wrist strap. Static electricity can cause serious damage, and this small precaution can save you from expensive repairs.
When choosing a switch puller, avoid tools that are small, round, or have a keycap puller attached. An IC chip puller is your best bet for hot-swap keyboards, as it offers better grip and control.
Position the puller carefully so its arms grip the north and south sides of the switch where it meets the plate. This placement gives you maximum leverage without putting stress on the socket.
Next, gently push in the tabs on the north and south sides of the switch. These tabs are the release mechanism, and you’ll feel them give slightly when pressed correctly. Once the tabs are engaged, the switch should come out easily. If it feels stuck, gently rock it - lifting the north side first, then the south - until it releases.
Be careful not to squeeze the switch too hard with the puller, as this can crack the housing. If you’re struggling with tight switches, take a break and return to the task with fresh patience.
Getting New Switches Ready
With the old switches removed, it’s time to prepare the new ones. Start by inspecting each switch for bent or damaged pins. Shipping can sometimes bend the metal pins, which can prevent proper installation and even damage your PCB’s hot-swap sockets.
If you find a bent pin, use tweezers or small pliers to straighten it carefully. Work slowly and apply only light pressure to avoid breaking the pin. The pins should be straight and parallel to ensure a proper connection.
Make sure to check the switch orientation. Most switches have a specific direction they need to face, and installing them incorrectly will prevent the keyboard from functioning.
Lastly, clean the switch housing with compressed air if you notice any dust or debris. This ensures a clean connection when the switches are installed.
Putting in New Switches
Align the switch pins with the holes in the PCB socket. If the pins are lined up correctly, the switch should slide in smoothly without any force. Never push too hard - forcing a switch can damage the socket connections.
Double-check that the switch is oriented correctly. Hot-swap keyboards typically have a specific layout, and the pins need to match the socket for proper electrical contact.
Once aligned, press the switch gently until it clicks into place. You’ll feel the tabs engage with the socket, and the switch should sit flush with the plate, with no gaps or unevenness.
How to Align and Secure Switches Properly
Proper alignment is key to a stable and functional keyboard. Begin by installing the corner switches first. These act as anchor points, helping you align the rest of the switches correctly.
From there, work row by row rather than jumping around. This method ensures consistent alignment and makes it easier to spot and fix any issues as you go.
Check that each switch is fully seated by looking for gaps or uneven positioning. A properly installed switch will sit flat against the plate and won’t wobble when pressed from different angles.
If a switch isn’t seating correctly, remove it and inspect for bent pins or debris in the socket. Even a small obstruction can cause issues.
Finally, test each switch by pressing it several times to ensure smooth actuation and proper return to its resting position. This quick check can save you from troubleshooting problems later, once the keyboard is fully assembled.
sbb-itb-3cb9615
Testing Your Keyboard and Fixing Problems
Testing Your Keyboard After Installation
Once you've installed your keyboard, reconnect it and open a text editor to type a few sentences. This helps confirm that all keys are functioning as they should. For a more detailed check, try using an online keyboard tester - it’s a quick way to spot any unresponsive keys. If your keyboard has visual feedback, like reactive LED lighting, enable that mode. This feature can help you identify problem keys by showing which ones fail to light up or register keystrokes.
If you notice any keys not working or behaving unexpectedly during this test, it's time to move on to troubleshooting.
Fixing Common Problems
When a key doesn’t respond, start by removing the switch. Inspect the pins - if they’re bent, carefully straighten them with tweezers. Use compressed air to clear out any debris from the hot-swap socket, then reinstall the switch, making sure it’s properly aligned. Still no luck? Try updating your keyboard’s firmware and tweaking the debounce or scanning settings in the software.
For issues like key chatter or double typing, adjusting the debounce or scanning settings can often resolve the problem. If a switch feels sticky even after cleaning, a small amount of silicone-based lubricant can help restore smooth operation. If none of these steps work, you might need to reset your keyboard to its factory settings as a last resort.
Hot-Swap Keyboard Benefits and Care Tips
Main Benefits of Hot-Swap Keyboards
Hot-swap keyboards have revolutionized customization for mechanical keyboard enthusiasts. They let you swap out switches without soldering, making it possible to try out different switch types in just minutes. Want tactile switches for typing during the day and linear switches for gaming at night? No problem - hot-swap boards make it that easy.
Investing in a high-quality hot-swap keyboard can save you money in the long run. Instead of buying multiple keyboards for different setups, you can experiment with various switches on a single board. This flexibility also helps maintain the keyboard’s resale value and protects your investment in switches. Plus, maintenance is a breeze - if a switch starts malfunctioning or gathers debris, you can simply pop it out for cleaning or replacement. Compare that to traditional soldered keyboards, where repairing or replacing a faulty switch often requires professional help or even replacing the entire board.
For newcomers to the mechanical keyboard scene, hot-swap boards offer a beginner-friendly way to explore. You can try out different setups without committing to permanent changes, giving you the freedom to discover what works best for you.
Caring for Hot-Swap Sockets and Switches
While hot-swap keyboards are versatile, taking care of them ensures they stay in great shape. The longevity of hot-swap sockets depends on proper handling. These sockets are designed for repeated use, but rough or careless insertion can shorten their lifespan. Always insert switches straight down, applying even pressure on both sides to avoid damaging the sockets.
Keep your workspace clean when swapping switches. Dust and debris can easily collect in empty sockets, leading to potential connection problems. Use compressed air to clear out any particles before installing new switches, and store removed switches in a clean, dust-free container.
Pay attention to the condition of switch pins. Before inserting a switch, check the pins for bends or damage. Misaligned pins can strain the sockets and compromise the internal metal contacts. If you feel resistance while inserting a switch, stop and realign the pins before continuing.
Temperature is another factor to consider. Avoid exposing your keyboard to extreme heat, as it can make the plastic sockets brittle and lead to poor connections over time.
Sticking to reliable switch brands like Cherry, Gateron, and Kailh is a smart move. These manufacturers produce switches that fit hot-swap sockets securely. Retailers like KeebsForAll also offer tested, compatible switches and tools like switch pullers, making maintenance even easier.
Regular cleaning is key to keeping your keyboard in top shape. If you use your keyboard heavily, consider removing the switches periodically for a thorough cleaning. Wipe down the switch housings and use a dry brush to clean the socket contacts. This routine can help prevent sticky keys and connection issues.
Finally, store spare switches properly. Use anti-static bags or containers to protect them from moisture and static electricity, which can damage the delicate internals. Proper storage ensures your switches stay in excellent condition for years to come.
Conclusion: Enjoy Your Custom Keyboard
You've successfully installed switches on your hot-swap keyboard! From grasping the difference between 3-pin and 5-pin compatibility to aligning switches correctly and testing your setup, you're now equipped to personalize your typing experience with ease.
One of the best parts of hot-swap keyboards is their incredible versatility. You can effortlessly switch between tactile switches for focused work sessions and smooth linear switches for intense gaming. This adaptability turns your keyboard into a dynamic tool that caters to your unique preferences and needs.
Want to keep customizing? You can explore swapping out keycaps or fine-tuning your switches to further enhance your setup.
For ongoing customization, KeebsForAll offers great options like the compact Freebird60 ($160.00) and the feature-rich Freebird TKL ($249.99), both designed to support various switch configurations.
As you continue refining your technique, remember to stay organized, handle switches with care, and work methodically. These habits will make the process smoother and more enjoyable.
Now, your hot-swap keyboard is ready to evolve with you. Whether you're experimenting with different switches or simply enjoying the freedom to change things up, you've unlocked one of the most satisfying aspects of mechanical keyboards.
FAQs
What can I do if my switches don't fit into my hot-swap keyboard sockets properly?
If your switches aren’t sitting correctly in the hot-swap sockets, the first thing to check is the pins on the switches. Sometimes, the pins may be bent. To fix this, gently straighten them using your fingers or a small tool. You can also try carefully twisting the pins to realign them for a better fit.
If that doesn’t solve the problem, take a closer look at the hot-swap sockets on the PCB. Make sure they’re intact and positioned correctly. In some cases, removing the PCB from the case can give you a clearer view and make it easier to address alignment issues. Remember to handle all components with care to avoid causing any damage while making adjustments.
How can I tell if my keyboard uses 3-pin or 5-pin switches before buying new ones?
To figure out whether your keyboard supports 3-pin or 5-pin switches, the easiest place to start is the product manual or the keyboard's specifications. This information is usually included there. If you’ve misplaced the manual, don’t worry - you can often find the same details on the manufacturer’s website or in online forums specific to your keyboard model.
If you’d rather check the keyboard yourself, you can remove one of the switches and take a closer look at the PCB (printed circuit board). A PCB designed for 5-pin switches will have five holes - three for the metal pins and two smaller ones for the plastic pins. On the other hand, a PCB compatible with 3-pin switches will only have three holes. Here’s a tip: 5-pin switches can still work with a 3-pin PCB if you trim off the plastic pins. Meanwhile, 3-pin switches are compatible with both types of PCBs without any adjustments.
Why should I use a switch opener and compressed air when installing switches on a hot-swap keyboard?
Using a switch opener simplifies the process of opening switches while minimizing the chance of damaging the housing or internal parts. Pair that with compressed air, which works wonders for clearing out dust and debris from switch sockets and nearby areas, and you’ve got a clean slate for better installation and performance. These tools work hand-in-hand to keep your keyboard running smoothly and lasting longer.


![[Pre-Order] Autumn Leaves PBT Keycaps - KeebsForAll](http://keebsforall.com/cdn/shop/products/DSC09732.jpg?v=1676148273)



Leave a comment
This site is protected by hCaptcha and the hCaptcha Privacy Policy and Terms of Service apply.