Clean keycaps mean better performance, hygiene, and a longer lifespan for your keyboard. Here's how to do it safely and effectively:
- Start by unplugging your keyboard and taking a photo of its layout for reference.
- Use a keycap puller to remove keycaps without damaging them. Be gentle, especially with stabilized keys like the spacebar.
-
Soak keycaps in lukewarm water (100–110°F) with mild dish soap for 30–60 minutes.
- For ABS keycaps: Use a soft cloth for cleaning.
- For PBT keycaps: A soft-bristled toothbrush works best.
- Rinse thoroughly and air-dry keycaps upside down for 2–3 hours.
- While drying, clean the keyboard base using a brush, compressed air, or isopropyl alcohol for stubborn grime.
- Reinstall keycaps carefully using your photo for guidance.
Key tips:
- ABS keycaps are delicate - avoid alcohol and harsh scrubbing.
- PBT keycaps are tougher but still require care to protect legends.
- Clean your keyboard every 2–4 weeks for heavy use or monthly for lighter use.
Follow these steps to keep your keyboard looking and performing its best.
How to Clean a Keyboard Properly (Remove the Keycaps)
Preparing to Clean Your Keycaps
Getting your keyboard ready for cleaning is all about minimizing risks and keeping everything protected.
Tools You'll Need
Having the right tools can make all the difference. A keycap puller is a must - it’s designed to safely remove keycaps without putting too much strain on the switches underneath.
For cleaning, a mix of mild dish soap and warm water works well to remove oils without harming materials like ABS or PBT. A bit of isopropyl alcohol can help disinfect and tackle stubborn grime, but stick to lower concentrations to avoid damaging the finish.
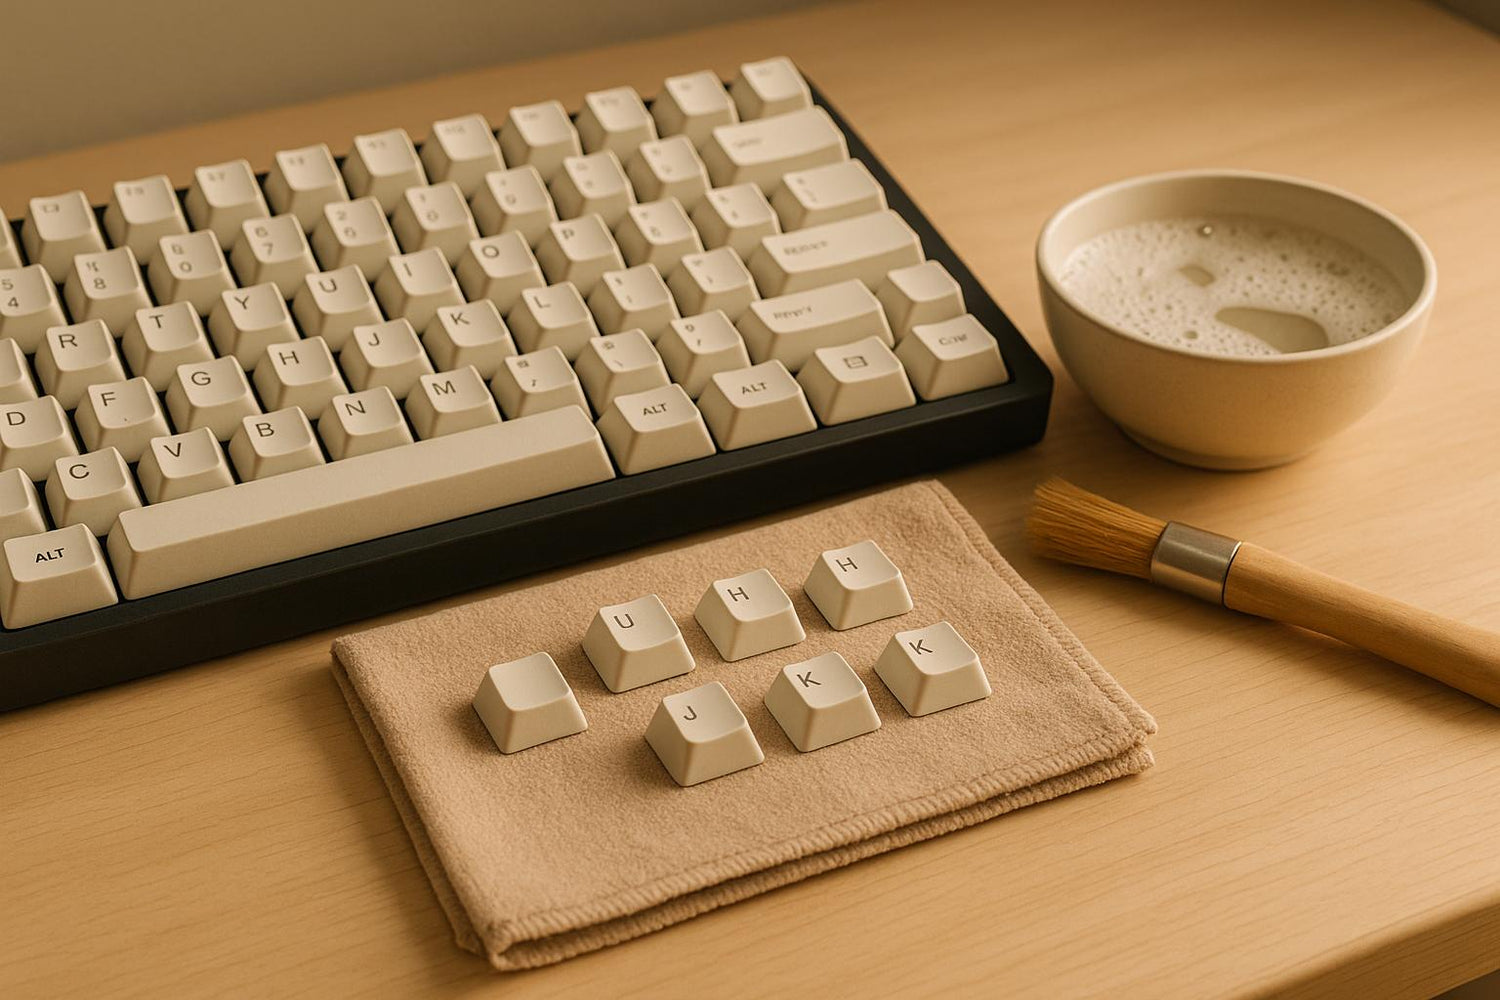
Other helpful tools include a soft-bristled brush to clean textured surfaces and crevices, microfiber cloths for drying without scratches or lint, and cotton swabs to reach tight spots around legends or sculpted areas. When soaking keycaps, use a smooth-sided bowl big enough to submerge them without risk of scratches.
Safety Steps Before You Start
Before diving in, unplug your keyboard and take a quick photo of its layout. This will save you a lot of time when it’s time to put everything back together.
Set up in a clean, well-lit workspace. Lay down a soft cloth or towel to protect your keyboard and catch any falling debris. A light-colored surface is especially helpful for spotting small keycaps that might roll away.
Make sure the keyboard’s surface is clean before removing keycaps. A quick pass with compressed air or a soft brush can clear away dust and crumbs, keeping them from falling into exposed switches.
When removing keycaps, work methodically and apply gentle, even pressure. This reduces the risk of damaging the switch stems or the keycap mounting points.
With your workspace prepped and tools in hand, you’re ready to safely remove and clean your keycaps based on their material.
How to Clean ABS and PBT Keycaps
ABS keycaps, made from softer plastic, tend to develop a shiny appearance and show wear over time. On the other hand, PBT keycaps are more resistant to fading and wear. To keep your keycaps in great shape, it's important to use cleaning methods that suit their material.
Removing Keycaps Without Damage
Start by placing a keycap puller over the keycap you want to remove. If you're using a wire puller, slide it under opposite sides of the keycap to provide even support. Gently pull upward while rocking the puller slightly to help the keycap pop off easily.
Work methodically across your keyboard, removing keycaps row by row. Place the removed keycaps in a clean bowl or container to keep them organized. Be extra cautious with keys that have stabilizers - like the spacebar, shift, and enter keys - since they require a bit more care to remove without damage.
If you feel resistance while removing a keycap, reposition the puller to avoid damaging the switch stem or the keycap mount.
Washing Your Keycaps
Soak your keycaps in lukewarm water (100–110°F) mixed with a few drops of mild dish soap for about 30–60 minutes. This helps loosen any dirt or grime.
- For ABS keycaps, use a soft cloth or sponge to gently clean each keycap, focusing on areas where finger oils may have built up.
- For PBT keycaps, a soft-bristled toothbrush works well for cleaning. Use light circular motions, especially around legends and sculpted areas.
After cleaning, rinse each keycap thoroughly under running water to remove any soap residue. Leftover soap can attract dirt, so don't skip this step. The table below provides a quick reference for cleaning guidelines based on the keycap material.
Material Care Guidelines
ABS keycaps need a gentler cleaning approach to avoid wear or discoloration. They are also prone to fading or yellowing when exposed to UV light, so keep them out of direct sunlight during cleaning or storage.
| Material | Cleaning Solution | Soaking Time | Special Considerations |
|---|---|---|---|
| ABS | Mild soap with lukewarm water | 30–60 minutes | Avoid alcohol, UV exposure, and harsh scrubbing |
| PBT | Mild soap with warm water (optional: 70% isopropyl alcohol for disinfection) | 30–60 minutes | Avoid harsh chemicals and excessive scrubbing |
PBT keycaps are sturdier and can handle more intensive cleaning. For disinfecting, you can use 70% isopropyl alcohol without causing damage. However, steer clear of harsh chemicals or overly aggressive scrubbing, as these can harm the legends, especially on double-shot or laser-etched keycaps.
sbb-itb-3cb9615
Drying and Putting Keycaps Back
How to Dry Keycaps Properly
After rinsing your keycaps, place them key side down on a clean microfiber cloth. Let them air-dry for 2–3 hours at room temperature. If you're in a hurry, you can use a blow dryer on a cool or low heat setting. Keep the dryer about 12 inches away and move it continuously to prevent any warping. For ABS keycaps, stick to air-drying only, while PBT keycaps can handle a little cool heat if necessary.
While your keycaps dry, take the opportunity to clean the keyboard base.
Cleaning the Keyboard Base
With the keycaps drying, turn your attention to the keyboard base. Start by flipping the keyboard upside down and gently tapping it to shake loose any crumbs, dust, or hair.
For larger debris, use a small brush or vacuum cleaner to clean between the switches and around the plate. Pay special attention to areas like the spacebar, Enter, and Shift keys, as these spots tend to collect more grime.
For tougher messes, dampen a cotton swab with 70% isopropyl alcohol and carefully scrub sticky or grimy areas. Avoid using too much liquid, as excess moisture can harm the PCB or other electronic components.
"Use Isopropyl alcohol (IPA) for cleaning. When cleaning your keyboard, gently rub exposed external surfaces. Be careful not to be too forceful when cleaning to avoid damaging your keyboard." - Corsair
If your keyboard features hot-swappable switches, you can temporarily remove them to access hard-to-reach areas. This makes it easier to clean the plate thoroughly and ensures no debris gets trapped beneath the switches.
Once you're done, do a final pass with a dry microfiber cloth to remove any remaining particles or alcohol residue. Make sure the base is completely dry before moving on to reinstall the keycaps.
Installing Keycaps Back on Your Keyboard
When your keycaps are fully dry, it's time to reinstall them. Use the layout photo you took earlier as a reference to ensure you place each key in the correct spot.
Start with the standard alphanumeric keys, as they're the simplest to install. Align each keycap directly over its corresponding switch stem and press down firmly until you hear a click, signaling it's securely in place.
Work row by row, and take extra care with keys that have stabilizers, like the spacebar or Shift keys. Make sure both the switch stem and stabilizer wire are properly engaged before pressing the keycap into place.
Once all the keycaps are installed, test each key by typing a few sentences or pressing every key to confirm they're functioning correctly. If any key feels off or unresponsive, remove it, realign the stem, and reinstall it.
After this process, your keyboard should feel and look as good as new, ready for many more hours of smooth typing.
Maintenance Tips and Common Problems
How Often to Clean Keycaps
Keeping your keycaps clean is essential for both hygiene and performance. If you're a heavy keyboard user, aim to clean them every 2–4 weeks. For lighter use, cleaning every 1–2 months should suffice. If you frequently snack or eat near your keyboard, consider wiping it down weekly and doing a more thorough cleaning once a month. Sticking to these schedules can help you avoid buildup and keep your keyboard in top shape.
About KeebsForAll

KeebsForAll is your go-to destination for top-notch keycaps, cleaning tools, and accessories tailored for mechanical keyboard enthusiasts. Whether you're sprucing up your current setup or crafting a custom keyboard from scratch, they’ve got everything you need to keep your keycaps in excellent shape.
For maintenance, KeebsForAll offers a range of affordable cleaning tools. Here’s a quick look at some of their essentials:
- CY Stainless Steel Keycap & Switch Puller: $4.00
- Lube Brushes: $4.00
- TX Keyboard Cover: $2.49
- Krytox GPL 105 Oil Switch Lubricant: $10.00
- Tribosys 3204 Switch Lubricant: Starting at $8.00
- KeebsForAll Switch Opener: $19.00
In addition to these basics, they also stock premium maintenance products to elevate your keyboard care routine.
KeebsForAll prides itself on quality, ensuring all products are made with durable, high-grade materials. They also design and curate unique items exclusively available in their store, prioritizing safe and effective cleaning solutions that align with the goal of protecting your keycaps.
Their product lineup includes their own KFA Cherry Profile Blank PBT Keysets ($36.00) and kfaPBT Cardinal Keycaps ($78.00). These keycaps are built to endure frequent cleaning sessions without compromising on style or functionality. For those seeking complete keyboard solutions, their Freebird keyboards come equipped with KFA stabilizers for smooth, reliable keystrokes and hot-swappable switches, making maintenance a breeze.
Whether you're just starting out or are a seasoned keyboard enthusiast, KeebsForAll offers the tools and products you need to keep your mechanical keyboard in top shape.
FAQs
How should I clean ABS and PBT keycaps safely?
When cleaning ABS keycaps, steer clear of harsh chemicals like acetone - it can ruin the material. Instead, stick to mild soap, warm water, and a soft cloth or brush to gently clean them. Since ABS keycaps often develop a shiny, oily surface over time, you might find yourself cleaning them more often.
For PBT keycaps, which are tougher and less prone to dirt and smudges, isopropyl alcohol is a safe option. You can also soak them in warm, soapy water. Their smoother texture makes upkeep easier and helps them resist wear. Just be sure the keycaps are completely dry before putting them back on your keyboard to avoid any potential damage.
How can I keep my keycaps from yellowing or fading over time?
To keep your keycaps in top shape, try to limit their exposure to UV light and heat, as both can lead to discoloration over time. When your keyboard isn't in use, store it in a cool, dry spot and consider using a cover to shield it from sunlight and dust.
For those worried about long-term wear, PBT keycaps are a solid choice. They’re less prone to fading and yellowing compared to ABS keycaps. Regular cleaning is also key to avoiding the buildup of oils and grime, which can speed up discoloration. Need some cleaning advice? Check out our guide on how to safely clean your keycaps.
Can I use a hairdryer to dry keycaps, and what should I keep in mind to avoid damage?
Yes, you can use a hairdryer to dry keycaps, but it’s crucial to do so carefully to avoid any damage. Make sure to set the hairdryer to a low or cool setting and keep it at least 12 inches away from the keycaps. This will help prevent issues like overheating, warping, or static buildup.
That said, the safest option is usually air drying, especially for keycaps made from materials like ABS or PBT. High heat can cause some plastics to warp or even release harmful substances, so it’s best to steer clear of high heat entirely. Taking a slower, more gentle approach will help keep your keycaps in excellent shape.


![[Pre-Order] Autumn Leaves PBT Keycaps - KeebsForAll](http://keebsforall.com/cdn/shop/products/DSC09732.jpg?v=1676148273)

Leave a comment
This site is protected by hCaptcha and the hCaptcha Privacy Policy and Terms of Service apply.