Stabilizers, or "stabs", are essential for keeping larger keyboard keys (like the spacebar or shift key) steady and smooth. They come in two main types: plate-mounted and PCB-mounted, each with unique installation methods and performance characteristics.
Key Differences:
- Plate-Mounted Stabilizers: Attach to the keyboard plate. Easier to install and swap but may shift if not aligned properly.
- PCB-Mounted Stabilizers: Connect directly to the circuit board using screws or clips. Offer a more solid typing experience but require precise installation.
Why Alignment Matters:
Misaligned stabilizers can cause wobbling, uneven keypresses, noise, or even sticky keys. Proper alignment ensures smooth operation, reduces rattle, and enhances the overall typing feel.
Quick Tips for Alignment:
- Plate-Mounted: Ensure stabilizer housings snap securely into the plate cutouts. Straighten wires and check for flush seating.
- PCB-Mounted: Insert housings carefully into PCB holes, tighten screws evenly, and inspect for debris or plastic residue.
For the best results, use the right tools, apply lubricant sparingly, and test key movement after installation. Whether you prefer the simplicity of plate-mounted stabilizers or the sturdiness of PCB-mounted ones, proper alignment is key to a smooth typing experience.
Plate-Mounted Stabilizers: Alignment Tips
How Plate-Mounted Stabilizers Work
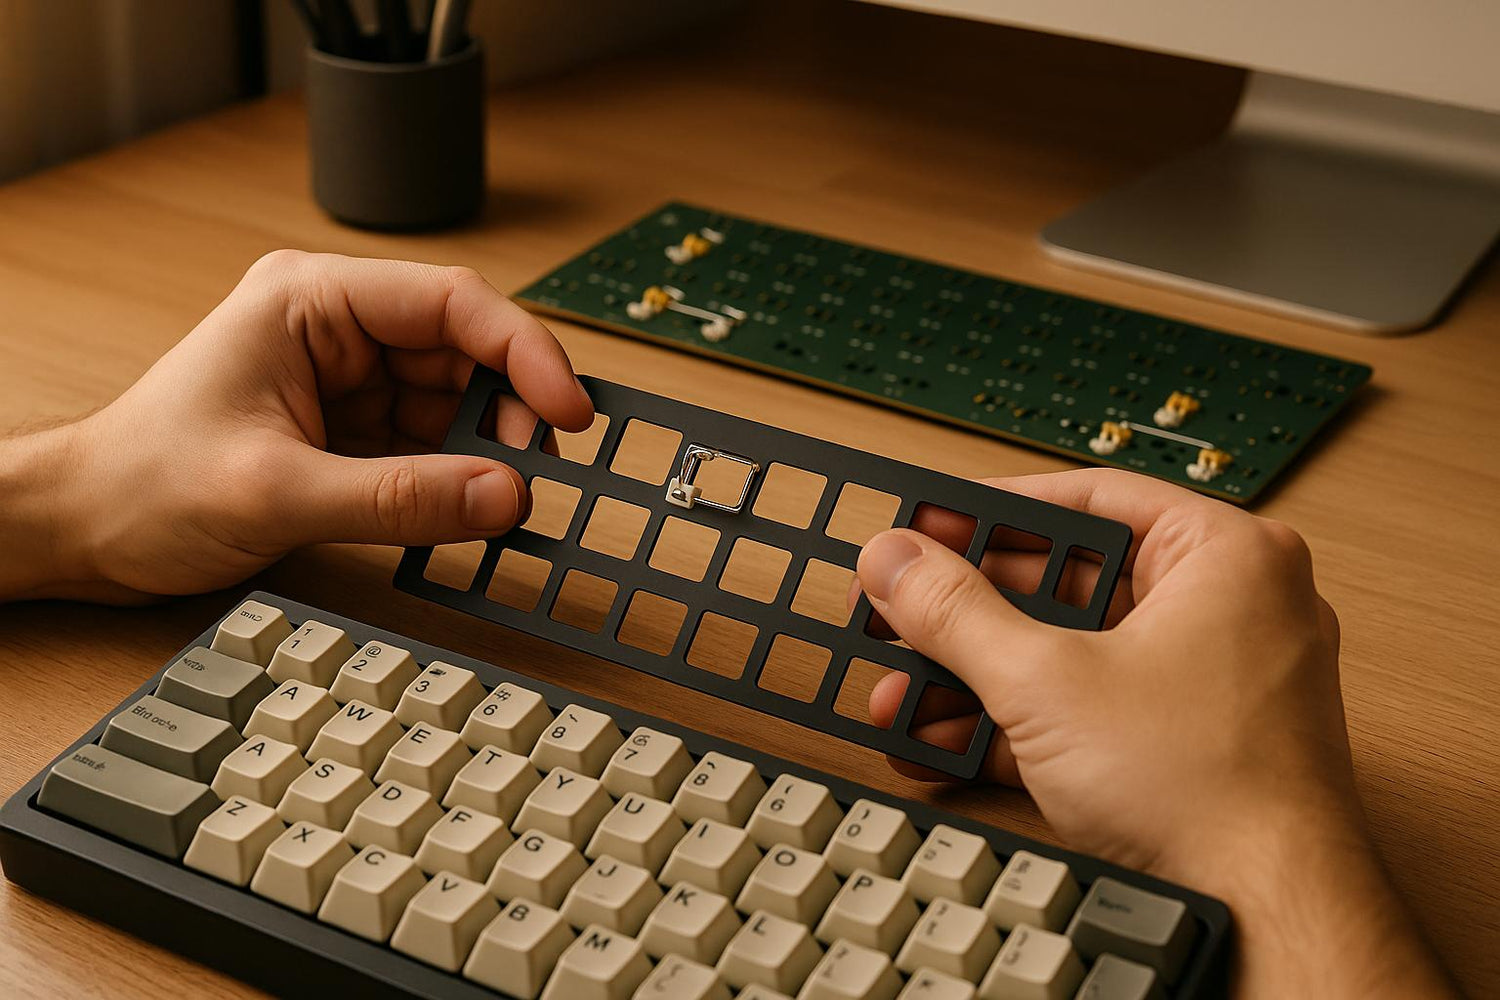
Plate-mounted stabilizers attach directly to the keyboard plate through specific cutouts, skipping the PCB entirely. The stabilizer housing includes small plastic clips or legs that snap securely into these cutouts, eliminating the need for screws.
This design is especially popular among keyboard enthusiasts who like to tinker. You can swap out stabilizers without having to desolder switches or take apart the entire keyboard, making adjustments much simpler.
That said, this setup comes with its own set of challenges. The stabilizers rely entirely on the precision of the plate’s cutouts. If the holes aren’t perfectly aligned, you might run into issues like uneven key motion or annoying noises. The interaction between the stabilizer wire and the plate is particularly important - any contact during key presses can lead to unwanted clicking or scraping sounds.
Here’s how you can ensure proper alignment and get the best performance out of your stabilizers.
Step-by-Step Alignment Guide
Aligning plate-mounted stabilizers takes a bit of patience and a close eye for detail. Start by inspecting the plate cutouts before installing the stabilizers. Misaligned or uneven cutouts are a common source of problems, leading to stabilizers that either wobble or fit too tightly.
- Insert the housing carefully: Place the stabilizer housing into the plate cutout and ensure the legs snap fully into place. If you feel resistance, double-check that the stabilizer is oriented correctly. Most stabilizers have a specific top and bottom, so installing them upside down will cause immediate issues.
- Check for a flush fit: Once the stabilizer is in place, make sure it sits flat against the plate. Any gaps or uneven seating need to be addressed before moving forward.
- Straighten the stabilizer wire: Even a slight bend in the wire can lead to uneven key movement or rattling. Hold the wire against a flat surface to check for any warping and straighten it if necessary.
- Install keycaps and test: After attaching the keycaps, press down firmly to ensure they’re seated evenly. This helps confirm that everything is aligned properly.
Common Problems and Solutions
Even with careful installation, issues can arise. Here’s how to troubleshoot the most frequent problems:
- Rattling or uneven movement: This is often caused by a misaligned wire. Remove the keycap, reposition the wire in the housing, and ensure it’s seated correctly in the slots.
- Loose or tight stabilizers: If the stabilizers feel wobbly, the plate cutouts may be slightly larger than they should be. On the flip side, if they’re hard to insert, the cutouts might be too small or have rough edges. Filing the edges or slightly adjusting the cutouts can help.
- Clicking or scraping sounds: When the stabilizer wire touches the plate during key presses, it can create noise. This happens if the wire is positioned too low or if the plate cutout interferes with its movement. Raising the wire slightly or filing the cutout can resolve this.
- Sticky or sluggish keys: Over-lubrication is a common culprit. While lubing stabilizers can improve their feel, too much lubricant, especially on the wire, can make keys feel sticky. Wipe off the excess and apply a thinner layer for smoother movement.
If you notice sticky keys after installation, try pressing the affected key repeatedly to break it in. Sometimes, stabilizers need a little time to settle into place. However, if the issue persists, it’s worth disassembling and inspecting for deeper alignment problems.
PCB-Mounted Stabilizers: Alignment Tips
How PCB-Mounted Stabilizers Work
PCB-mounted stabilizers attach directly to the circuit board using dedicated holes, offering a solid connection. They come in three main types: clip-in, snap-in, and screw-in, each with varying levels of stability and ease of use.
Clip-in and snap-in stabilizers secure themselves by fitting plastic tabs into the PCB holes. Screw-in stabilizers, often considered the top choice, use screws to anchor tightly to the board, providing the most secure fit. This direct mounting approach eliminates reliance on plate precision, giving you better control over alignment and minimizing wobble.
Since the stabilizers sit beneath the switches, proper alignment is key to ensuring smooth key operation. Misaligned stabilizers can cause friction, leading to sticky or unresponsive keys - especially noticeable on larger keys like the spacebar or Enter key.
Step-by-Step Alignment Guide
Achieving perfect alignment for PCB-mounted stabilizers takes careful attention and a methodical approach based on the stabilizer type. Begin by inspecting the PCB holes to ensure they’re clean and free of debris that might interfere with installation.
- For clip-in or snap-in stabilizers, start by inserting the rear hook into the larger PCB hole. Then, press the front of the stabilizer into the smaller hole until it clicks. A clear snap sound indicates it’s properly seated.
- For screw-in stabilizers, place the housing into its designated spot and hand-tighten the screws. Avoid over-tightening; the screws should go in smoothly. If you feel resistance, back them out and realign the housing. Always use washers to prevent electrical shorts on the PCB.
Once installed, test each stabilizer housing by pinching it gently to check for wobble. Ensure the housings are both parallel and perpendicular to the PCB. For screw-in types, make sure the screws are fully tightened to eliminate any housing movement. If you’re using cloth washers, confirm they haven’t shifted during installation.
If alignment problems persist, consider the following troubleshooting steps to resolve common issues.
Avoiding Installation Problems
Before installing switches, double-check that the stabilizers won’t interfere with switch placement. Switches should sit flush against the PCB, as any gaps can disrupt stabilizer performance and cause friction.
Inspect stabilizer housings and stems for leftover plastic from manufacturing. This residue can lead to binding and should be carefully trimmed away with a craft knife. Additionally, check the stabilizer wire for bends - any irregularities can result in uneven key movement.
Be cautious when assembling the case. Over-tightening the case halves can misalign the stabilizers, so apply moderate pressure. If you’re using case dampening material, ensure it isn’t pressing too hard against the PCB, as this can also push stabilizers out of alignment.
"Every once in a while I'll have a stabilizer (mostly 2u) that encounters enough friction on key presses, to become annoying slow moving." - macclack
For example, in July 2023, a user encountered an issue with the Enter key on their Aero75 keyboard equipped with TX AP stabilizers. While other stabilizers worked perfectly, this one experienced extra resistance. After testing new stabilizers and adjusting lubrication techniques, they discovered that the PCB measurements in that area placed the stabilizer housing too close to the switch. The solution? Wedging a small piece of Band-Aid between the stabilizer housing and the plate to create space, which immediately resolved the issue.
If over-lubrication is the problem, disassemble the stabilizer, clean off the excess lube, and reapply a thinner layer. In some cases, repeatedly pressing the problematic key can help the stabilizer settle into place and fix minor alignment issues.
Plate-Mounted vs PCB-Mounted Stabilizers Comparison
Comparison Factors
When comparing plate-mounted and PCB-mounted stabilizers, several key factors come into play, including installation, alignment, stability, maintenance, compatibility, and typing experience.
Installation and Alignment
Plate-mounted stabilizers are designed to clip into the plate's holes, making them quicker and easier to install. However, they demand precise positioning to ensure proper alignment. On the other hand, PCB-mounted stabilizers attach directly to the PCB, often using press-fit or soldered connections. While installation is more complex, their self-aligning housings simplify alignment.
Stability and Maintenance
Stability varies based on the mounting method. PCB-mounted stabilizers, when soldered, create a very secure connection. Plate-mounted stabilizers, while reducing PCB flex, may loosen over time unless properly secured. Maintenance is another area of difference. Plate-mounted stabilizers are easy to swap out on hot-swap boards, while PCB-mounted stabilizers typically require desoldering to remove.
Compatibility and Design
Plate-mounted stabilizers require a pre-designed mounting plate, which can complicate some keyboard layouts. PCB-mounted stabilizers, however, attach directly to the PCB, eliminating the need for additional plate modifications. This makes PCB-mounted stabilizers simpler to integrate into mass-produced designs.
Typing Feel and Sound
Typing feel is another distinguishing factor. Plate-mounted stabilizers deliver a sharp, snappy typing experience accompanied by a louder, clackier sound. PCB-mounted stabilizers, in contrast, provide a softer feel due to the inherent flex of the PCB, resulting in a quieter sound profile.
Comparison Table
Here's a quick breakdown of the differences:
| Feature | Plate-Mounted Stabilizers | PCB-Mounted Stabilizers |
|---|---|---|
| Installation | Faster and simpler | More complex |
| Mounting Point | Clips into plate holes | Attaches directly to the PCB (press-fit or soldered) |
| Swappability | Easily swappable on hot-swap boards | Requires desoldering for removal |
| Customization | More tuning and adjustment options | Limited customization |
| Security | May loosen over time if unsecured | Very secure when soldered |
| PCB Flex | Reduces PCB flex | Allows more PCB flex |
| Typing Feel | Crisp and snappy with louder sound | Softer feel with quieter sound |
| Design Complexity | Requires custom plate modifications | Easier to implement in designs |
| Alignment | Needs precise positioning | Self-aligning housings |
| Hotswap Compatibility | Highly compatible | Limited to factory-installed setups |
| Best Use Case | Custom and enthusiast keyboards | Mass production keyboards |
The choice between plate-mounted and PCB-mounted stabilizers ultimately depends on your needs. Plate-mounted stabilizers are ideal for custom builds where ease of maintenance, tuning, and a crisp typing feel are priorities. PCB-mounted stabilizers, with their secure installation and simpler design requirements, are better suited for production keyboards or setups with minimal modifications. Whichever option you choose, ensuring proper alignment is key to achieving the best performance.
sbb-itb-3cb9615
Tools and Products for Stabilizer Alignment
Required Alignment Tools
When it comes to achieving smooth, responsive keyboard performance, having the right tools for stabilizer alignment is key. Proper alignment ensures every keystroke feels consistent and satisfying. KeebsForAll provides a range of essential tools for both plate- and PCB-mounted stabilizers. For instance, a stabilizer twister helps position housings with precision, while a switch opener safely removes switches for adjustments. Lube brushes ensure even application of lubricant, and shims address height inconsistencies for a uniform typing experience. These tools not only make installation easier but also enhance the overall performance of your custom keyboard.
KeebsForAll Product Recommendations

KeebsForAll specializes in precision tools crafted to simplify stabilizer alignment and installation. Here are some top picks:
- KFA Switch Opener ($19.00): Safely opens switches for adjustments or maintenance.
- Geon Stabilizer Twister ($15.00): Ensures stabilizer housings are perfectly aligned, especially for PCB-mounted setups.
- Geon Skeleton Stabilizer Shims ($0.80): An affordable fix for height discrepancies, ensuring consistent key response.
- Lube Brushes ($4.00): Features fine bristles for smooth and even lubricant application, reducing friction and improving stabilizer movement.
- TX Stabilizer Tester (starting at $4.99): Lets you test and fine-tune stabilizer alignment before final installation.
- Krytox 205 g0 Switch Lubricant (starting at $7.95, regularly $9.95): A trusted choice for maintaining smooth and consistent performance.
For the stabilizers themselves, KeebsForAll offers high-quality options like:
- TX AP Long Pole Plate Mount Stabilizers (starting at $7.00)
- Durock Plate Mounted Stabilizers ($8.50)
- AEBoards Staebies V2.1 (starting at $18.00)
These stabilizers are designed with tighter tolerances and improved features, making alignment during installation more straightforward. If you're new to keyboard building, KeebsForAll also provides helpful resources to guide you through the process.
Beginner Resources
For those just starting out, KeebsForAll offers plenty of support to ensure a smooth stabilizer alignment experience. Their detailed product descriptions and compatibility guides help avoid common pitfalls. For example, the TX AP Clip-In Stabilizers Rev. 4 (starting at $8.99) come with clear specifications, making it easier for beginners to understand mounting requirements and alignment tips before making a purchase.
KeebsForAll is committed to keeping essential tools and products readily available, so even first-time builders can complete their projects without unnecessary delays. This allows beginners to focus on learning the techniques that bring their custom keyboard dreams to life.
Conclusion
Key Points
To wrap up the alignment challenges and solutions discussed earlier, understanding your stabilizer type is essential for achieving the typing feel you want. Plate-mounted stabilizers attach directly to the plate, making them easy to install and budget-friendly - an ideal choice for beginners or pre-built keyboards.
On the other hand, PCB-mounted stabilizers, particularly screw-in versions, attach securely to the circuit board. While they demand more precision during installation, they deliver excellent stability, reduced rattle, and a more refined typing experience. Deciding between these options comes down to whether you prioritize convenience and cost or performance and customization.
Regardless of the stabilizer type, proper alignment is non-negotiable. Misalignment can lead to key wobble, sticking, and unnecessary noise. Ensuring stabilizers are correctly seated, wires positioned properly, and all parts moving smoothly is key. Using the right tools and applying lubrication can further minimize issues like rattle and misalignment.
In summary, plate-mounted stabilizers are great for simplicity and accessibility, while PCB-mounted stabilizers shine in stability and long-term performance. Both types can deliver excellent results when paired with quality components. The key takeaway? Precise installation makes all the difference, and investing in the right tools and techniques is well worth it.
KeebsForAll as Your Resource
KeebsForAll is here to support you in mastering stabilizer solutions, whether you’re building your first custom keyboard or upgrading an existing one. Their carefully curated selection includes reliable plate-mounted stabilizers and premium PCB-mounted options like the AEBoards Staebies V2.1, starting at $18.00.
What makes KeebsForAll stand out is their dedication to keeping essential products available and providing detailed compatibility information to help you sidestep common installation errors. From the KFA Switch Opener ($19.00) to Krytox 205 g0 lubricant (starting at $7.95), they offer the tools you need for precise stabilizer alignment and maintenance.
For beginners, KeebsForAll simplifies the process with easy-to-follow product descriptions and educational resources. These guides walk you through mounting requirements and alignment techniques, so you’re well-prepared before making a purchase. Plus, the KfaMarketplace.com features pre-built custom keyboards, giving you a chance to test different stabilizer setups before committing to your own build.
Whether you go with plate-mounted or PCB-mounted stabilizers, KeebsForAll provides the high-quality components, precision tools, and community support you need to create a keyboard with smooth, stable, and satisfying keystrokes.
How To Tune Stabilizers: A Comprehensive Guide!
FAQs
What are the advantages of PCB-mounted stabilizers compared to plate-mounted stabilizers for typing feel and stability?
PCB-mounted stabilizers have some clear advantages over their plate-mounted counterparts, especially in terms of typing feel and overall performance. Because they attach directly to the PCB, they tend to offer a steadier and more reliable typing experience. This design helps cut down on wobble and reduces unwanted rattling, which translates to a quieter and smoother keystroke - a feature highly appreciated by keyboard enthusiasts.
Another reason for their popularity is the flexibility they bring during assembly. PCB-mounted stabilizers make it easier to customize and modify keyboards, making them a go-to option for anyone working on custom mechanical keyboard builds.
How do I know if my keyboard uses plate-mounted or PCB-mounted stabilizers?
To determine whether your keyboard uses plate-mounted stabilizers, examine if the stabilizers are designed to slot into cut-outs on the metal or plastic plate. For PCB-mounted stabilizers, look for small holes or mounting points on the PCB where the stabilizers attach directly.
You can double-check by inspecting your keyboard's plate and PCB or by consulting the manufacturer's specifications. If you're assembling a custom mechanical keyboard, knowing the stabilizer type is key to ensuring everything fits and works correctly.
What are the most common mistakes to avoid when aligning stabilizers for smooth and quiet keypresses?
To keep your keypresses smooth and quiet, watch out for these common stabilizer alignment errors:
- Improper installation: If the stabilizers aren't securely clipped or seated, you'll likely experience wobbling, uneven keypresses, and extra noise.
- Skipping lubrication: Without proper lubrication, stabilizers can produce rattling or scratchy sounds that disrupt the typing experience.
- Uneven placement: Misaligned stabilizers on the PCB or plate can lead to inconsistent key performance.
By taking the time to install stabilizers correctly, aligning them evenly, and applying lubrication thoroughly, you can significantly improve both the sound and feel of your keyboard.


![[Pre-Order] Autumn Leaves PBT Keycaps - KeebsForAll](http://keebsforall.com/cdn/shop/products/DSC09732.jpg?v=1676148273)


Leave a comment
This site is protected by hCaptcha and the hCaptcha Privacy Policy and Terms of Service apply.